Knife Sharpening Angle
Unlock your best edgeu2014this beginner-friendly guide reveals why just a few degrees in sharpening angle makes all the difference. Packed with a quick-glance chart, expert tips, and FAQs to sharpen like a pro.


Knife Sharpening Angle
E N D
Presentation Transcript
About us Reviews Shipping Сontacts $/€ sales.noblie@gmail.com KNIVES BEADS KEYCHAINS DAGGERS BLADES SWORDS EXCLUSIVES SALE INFORMATION CHECK OUT OUR STORE Previous Article Read Next BACK TO BLOG KNIFE SHARPENING ANGLE GUIDE: QUICK CHART FOR BEGINNERS Written by: Aleks Nemtcev Updated: June 5, 2025 Noblie Custom Knives / Knife News / Knife Sharpening Angle Guide: Quick Chart for Beginners Contents 1 Why Sharpening Angle Matters 2 Knife Edge Geometry & Steel Fundamentals 3 Degrees, Bevels and Micro-Bevels Explained 4 Inclusive vs. Exclusive Angles (Half-Angle vs. Full-Angle) 5 How Steel Type Influences Optimal Angle 6 Standard Knife Sharpening Angles by Knife Type 7 Western Kitchen Knives (20 – 22° per side) 8 Japanese Kitchen Knives & Single-Bevel Blades (12 – 17° per side) 9 Pocket & Outdoor Knives (18 – 22° per side) 10 Hunting, Fillet, Cleavers & Other Specialty Blades 11 Angle Overview 12 Choosing the Best Angle to Sharpen a Knife 13 Edge Retention vs. Raw Sharpness — Finding the Sweet Spot 14 Task-Based Angle Selection 15 Factory Angles, Customization & When to Re-profile 16 Printable Knife Sharpening Angle Chart 17 Setting Up for Success: Stones, Grits & Equipment 18 Sharpening Stones and Grit Progression (coarse → polish) 19 Angle Guides, Jigs & Wedges 20 Guided Systems (Spyderco Sharpmaker, Lansky, Wicked Edge) 21 Electric & Powered Sharpeners — Built-In Angle Settings 22 Step-by-Step Knife Sharpening Guide 23 Establishing the Primary Bevel & Raising a Burr 24 Refining, Polishing & Deburring 25 Stropping, Micro-Serrations & Mirror-Polished Edges 26 Maintaining Your Angle: Consistency & Pressure Control
27 Freehand Drills & Muscle-Memory Cues 28 Common Mistakes: Rocking, Lifting the Spine, “Banana” Edges 29 Fixing an Edge Sharpened at the Wrong Angle 30 Troubleshooting & FAQs 31 What angle should I sharpen kitchen knives? 32 What degree is the average chef’s knife? 33 Are multi-angle micro-bevels worth it? 34 How often do I need to re-establish the angle? 35 How can I tell if I’m really holding 20 degrees at home? 36 Conclusion & Quick-Glance Angle Guide 37 Quick-Glance Cheat Sheet Why Sharpening Angle Matters Ever sliced a ripe tomato only to watch the blade skid across the skin instead of gliding through? Whether you’re working with finely crafted custom knives or an everyday chef’s blade, the culprit nine times out of ten isn’t the steel, the stone, or your technique—it’s the angle. Nine times out of ten the culprit isn’t the steel, the stone, or your technique—it’s the angle. In this knife sharpening angle guide, you’ll discover how a few degrees can spell the difference between a laser-keen edge that lasts weeks and a ragged bevel that dulls after a single dinner prep. Over the next several sections we’ll unpack the geometry behind a cutting edge, show you how different jobs (from paper-thin sashimi to hard-use camp chores) demand different bevels, and walk you step-by- step through holding those angles with confidence—whether you sharpen freehand on waterstones or drop your folder into a guided jig. By the time you reach the troubleshooting tips at the end, you’ll know not only what angle to choose, but why it performs, how to lock it in, and when to tweak it for maximum sharpness and edge life. In short: master the angle, and the rest of sharpening becomes easy. Knife Edge Geometry & Steel Fundamentals Before you can choose the right sharpening angle, you need to understand what’s happening at the microscopic edge. Knife geometry and steel chemistry work together like blueprint and building material— get either wrong and even the sharpest bevel won’t last. DEGREES, BEVELS AND MICRO-BEVELS EXPLAINED Think of a knife edge as a microscopic roof. Each degree you shave off the “pitch” changes how easily that roof can cut through rain (your food) before the shingles wear out. Typical angle (per side) Bevel style Best for Trade-off Fragile tip; chips on hard use Full flat bevel 12 – 17° Slicing, fillet, sushi Standard double bevel Everyday kitchen, EDC folders Balanced durability vs. bite 18 – 22° Robust working bevel Cleavers, camp knives, machetes Loses razor feel but shrugs off abuse 24 – 30° Micro-bevels (aka secondary bevels) add a tiny 1-3° “safety belt” at the very edge. They’re quick to refresh, extend edge life, and let you enjoy a low-angle primary bevel without constant chipping. Pro tip: After polishing a 15° per-side bevel on your chef’s knife, lift the spine just a hair (about a credit- card thickness) and take two light strokes. Voilà—instant micro-bevel.
Image credit: prosharpeningsupply.com INCLUSIVE VS. EXCLUSIVE ANGLES (HALF-ANGLE VS. FULL-ANGLE) Sharpening forums love to argue numbers, but half the confusion comes from measurement language: Exclusive / half-angle – One side only. 15° per side = a 30° inclusive edge. Inclusive / full-angle – Both sides combined. The “30° edge” on your guided system is already inclusive. Why it matters: match the language on your jig, manufacturer spec, or sharpening chart. If your jig says “20°”, ask yourself, per side or total? Misreading that doubles—or halves—your bevel and wrecks consistency. HOW STEEL TYPE INFLUENCES OPTIMAL ANGLE Steel isn’t just “metal”—it’s a cocktail of carbon, chromium, vanadium, and more. Each ingredient tweaks hardness (how well it resists denting) and toughness (how well it resists chipping). Angle choice rides on that balance. Angle sweet spot (per side) Steel family HRC range Why Tough but not super hard— needs “meat” behind the edge High-carbon (1095, W2) 56 – 60 18 – 22° Chromium boosts stain resistance; moderate hardness handles mid angles Stainless kitchen (X50CrMoV15, VG-10) 56 – 60 15 – 20° Powder metallurgy “super” (S35VN, Elmax, MagnaCut) Fine carbides + high hardness keep ultra-keen bevels longer 60 – 64 12 – 17° Incredible slicing; one twist on a board can chip— reinforce with a micro- bevel Ultra-hard but brittle (ZDP-189, niche 65 + HRC) 10 – 15° *with micro-bevel* 65 – 67 Rule of thumb: Harder = you can go thinner, not that you must. Tougher = you should go thicker, unless raw keenness is mission-critical. Remember, your knife sharpening angle guide is only as good as the steel under the bevel—choose wisely, sharpen precisely, and let geometry do the heavy lifting. Image credit: echefknife.com Standard Knife Sharpening Angles by Knife Type For a quick orientation across the most common types of knives, use the chart below to match each blade to its ideal sharpening angle before diving into the detailed explanations.
WESTERN KITCHEN KNIVES (20 – 22° PER SIDE) German and French chef’s knives, parers and utility blades are built around moderate hardness (≈ 56–59 HRC) and a versatile double bevel. Grinding them to 20–22° per side (≈ 40–44° inclusive) does three things: 1. Durability on the board – They shrug off contact with bones and stainless-steel prep tables. 2. Forgiving maintenance – A few inattentive strokes on a pull-through sharpener won’t roll the edge as easily as a thinner bevel would. 3. All-round performance – At this “middle-weight” angle you can dice onions, spatchcock poultry, and even split a lobster without chipping. Pro tip: If you crave a bit more bite for tomato skins, take the primary bevel to 18° but finish with a quick 22° micro-bevel. You gain keenness without sacrificing longevity. JAPANESE KITCHEN KNIVES & SINGLE-BEVEL BLADES (12 – 17° PER SIDE) Harder steels (VG-10, SG2, White #2) and, in many cases, a single-bevel grind let Japanese knives wear ultra-acute angles: Double-bevel gyuto, santoku, nakiri: 15–17° per side Traditional single-bevel yanagiba, usuba, deba: 12–15° on the bevel, 0° on the flat side Why so sharp? The fine carbides in powder and high-carbon steels hold a thin edge longer than Western alloys. Food release and precision matter more than brute strength in sushi or kaiseki prep. Handle with care: Hard fish bones, glass boards and dishwasher cycles will chip a 14° edge in seconds. Keep a felt-lined saya or blade guard handy, and touch up on a finishing stone (6000+ grit) rather than a pull-through device. POCKET & OUTDOOR KNIVES (18 – 22° PER SIDE) Every-day-carry folders, multitools, and bushcraft fixed blades live in the 18–22° bandwidth. Here’s why: Recommended angle (per side) Scenario Rationale Slices cleanly through cardboard without snagging Urban EDC (boxes, zip-ties) 18 – 20° Camp/bushcraft (feather sticks, notches) Extra steel behind the edge resists rolling when you baton or pry 20 – 22° Hard-use tactical (seat-belt cuts, light prying) Prioritises edge stability under twisting loads 22° + micro-bevel Most pocket-knife steels (S35VN, 154CM, D2) are hard enough to support sub-20° edges, but the grit and dirt in outdoor tasks act like sandpaper; a hair thicker bevel adds insurance. HUNTING, FILLET, CLEAVERS & OTHER SPECIALTY BLADES Go-to angle (per side) Blade type Why it works Paper-thin cuts under the hide; low force, high control Game skinning / caping 15 – 18° Flex cuts through flesh without tearing delicate meat Fish fillet 12 – 15° Meat cleaver / bone chopper Massive bevel absorbs bone impact; edge won’t fold 25 – 30° Splits fibrous vegetation; resists glancing blows and dirt Machete / kukri 24 – 28° Dial it in: If your fillet knife chips on thick rib bones, add a quick 18° micro-bevel. If your cleaver stalls in cartilage, thin the primary bevel to 22° but retain a 28° micro-bevel near the heel. ANGLE OVERVIEW Sharpening Angle (per side) Primary Use- Case Knife Category Notes / Tweaks General food prep Add 18° edge & 22° micro-bevel for extra bite Western kitchen 20 – 22° Japanese double- bevel Use fine stones; avoid bone contact 15 – 17° Precision slicing
Japanese single- bevel Sushi, katsuramuki 12 – 15° Flat side stays at 0° Pocket / outdoor 18 – 22° EDC, bushcraft Add 22° micro-bevel for hard use Specialty: cleaver 25 – 30° Bone, cartilage Edge geometry > raw keenness Reinforce with 18° micro-bevel near hilt Specialty: fillet 12 – 15° Fish filleting Key takeaway: Match your angle to both steel capability and task demand. A Western chef’s knife ground to 15° may feel katana sharp—but chip on a chicken bone. Conversely, a machete honed at 30° will never glide through a tomato, yet it will survive in the jungle. Pick the right bevel, and your edge will serve you— not fight you—slice after slice. Image credit: Work Sharp Choosing the Best Angle to Sharpen a Knife Picking a sharpening angle isn’t guesswork; it’s the point where steel hardness, cutting task, and edge longevity intersect. Nail that sweet-spot degree and your knife will feel surgically sharp yet stay that way long after the last slice. EDGE RETENTION VS. RAW SHARPNESS — FINDING THE SWEET SPOT Think of bevel angle as a seesaw: Steeper & thicker (≈ 22–30° per side) Edge lasts longer because there’s more metal behind it, but initial bite feels blunter. Flatter & thinner (≈ 10–17° per side) Knife glides through food like silk, yet that laser-keen edge is easier to roll or chip. Aim for the crossover point where your steel’s hardness and your cutting habits meet. A mid-range 18–20° per side on most kitchen or EDC steels (VG-10, S35VN, X50CrMoV15) keeps dinner prep effortless and survives an occasional encounter with a chicken bone or shipping staple. Push thinner only if: Your knife is 60 + HRC and you baby the edge, or Ultimate precision (sushi, caping) outweighs longevity. Conversely, bump up 2–3° if you spot micro-chips, edge rolling, or find yourself sharpening more than once a week. TASK-BASED ANGLE SELECTION Ideal angle (per side) Primary task Why Paper-thin slicing (tomatoes, fish) 12 – 15° Minimal resistance; scalpel feel Balance of keenness and edge life General kitchen prep 18 – 20° Heavy chopping (squash, poultry joints) Extra backbone against lateral stress 20 – 22°
Strong enough to baton yet still carve Bushcraft / feather sticks 20 – 22° Bone impact (cleavers, machetes) Blunt but brawny—edge stays intact 24 – 30° Reality check: A single chef’s knife can wear two angles—e.g., 18° along most of the belly for slicing, 22° near the heel for joint work. Micro-bevels make this split personality easy: sharpen the whole edge at 18°, then add three gentle 22° strokes to the last inch. FACTORY ANGLES, CUSTOMIZATION & WHEN TO RE-PROFILE Know the baseline Victorinox, Wüsthof, Opinel—≈ 20° Shun, Global—≈ 16° Benchmade folders—≈ 17–20° Manufacturers pick a safe middle ground for mass users, not for you. Reasons to go custom New cutting focus (switching from camp chores to kitchen duty). Steel upgrade (your old 440A is now CPM-S35VN—harder steel can run leaner). Ergonomics (wide bevels remove food stick-and-lift on veggie prep). When to re-profile completely Edge is so thick it wedges in food or cardboard. Chips run deep and won’t disappear with normal touch-ups. You’re changing from inclusive 40° to 30° (or vice-versa) for a new purpose. Pro workflow: Re-profile once on a coarse stone (220–400 grit) to reset geometry. From then on, maintain with light stropping or a fine ceramic rod; that way you touch steel only where it counts and your “sweet- spot” angle stays locked in for months, not days. Printable Knife Sharpening Angle Chart Download the printable PDF file here. Recommended Angle (per side) Knife / Task Quick Notes Balanced durability and sharpness Western kitchen knives 20 – 22° Japanese double-bevel (gyuto, santoku) 15 – 17° Fine slicing; harder steels Japanese single-bevel (yanagiba, deba) Laser edge for sashimi; flat backside 12 – 15° (one side) Versatile for daily tasks & bushcraft Pocket / outdoor knives 18 – 22° Skinning / caping 15 – 18° Paper-thin cuts; high control Fish fillet 12 – 15° Glides through delicate flesh Thick bevel absorbs bone impact Meat cleaver / bone chopper 25 – 30°
Splits fibrous vegetation; resists abuse Machete / kukri 24 – 28° Image credit: knifegrinders.com.au Setting Up for Success: Stones, Grits & Equipment A dialed-in sharpening angle is useless if the surface beneath your blade is wrong or your jig wobbles. Start by matching abrasive, grit, and holding system to both your steel and your skill level, then lock in the chosen degrees. SHARPENING STONES AND GRIT PROGRESSION (COARSE → POLISH) Grit range Typical label Purpose When to use it “Extra-coarse / Coarse” Rapid steel removal; repairs chips; sets new bevels Re-profiling or fixing damage 120–400 Establishes the primary edge; raises a clean burr 600–1 000 “Medium” Routine edge refresh Refines scratch pattern; improves slicing push-cuts Finishing Western kitchen & EDC 3 000–6 000 “Fine” “Extra-fine / Polishing” Mirror polish; hair-shaving sharpness Sushi knives, straight razors 8 000–12 000 + Tip: If you’re short on time, keep a two-stone combo (1 000/6 000) next to the sink. That duo covers 90 % of maintenance. ANGLE GUIDES, JIGS & WEDGES Clip-on plastic wedges (10°, 15°, 20°): Snap onto the spine—great for beginners learning muscle memory. Magnetic roller guides: Ride along the stone; maintain angle through the full stroke. DIY hardwood wedge: Cut a 20° block; rest the blade spine on it as you sharpen. Zero tech, zero cost. Use these only until your wrist remembers the pitch—then wean off to develop freehand finesse. GUIDED SYSTEMS (SPYDERCO SHARPMAKER, LANSKY, WICKED EDGE) System Angle adjustments Pros Cons Spyderco Sharpmaker Fixed 15° & 20° per side Fast touch-ups; tiny footprint Limited angle range 17°, 20°, 25°, 30° slots Inexpensive; interchangeable stones Clamp can slip on tall spines Lansky clamp kit
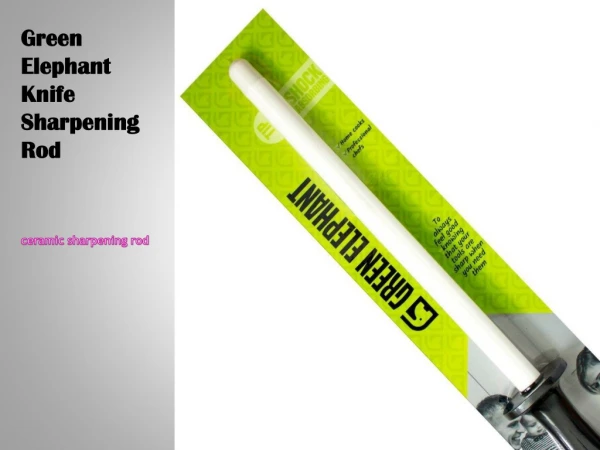
Wicked Edge / KME Micro-adjust ≈13– 35° Lab-grade precision; repeatable results Pricey; bench-top footprint Choose a system if repeatability matters more to you than sharpening speed. ELECTRIC & POWERED SHARPENERS — BUILT-IN ANGLE SETTINGS Modern pull-through machines (Work Sharp, Chef’sChoice) funnel the blade between abrasive belts or discs set to a fixed inclusive angle—often 15° or 20°. They’re: Blisteringly quick — a dull knife can be service-ready in under a minute. Consistent — internal guides eliminate wobble. But they also: Remove steel aggressively—use sparingly on thin Japanese blades. Offer limited angle options—great for utility knives, less so for custom profiling. Bottom line: Pick the abrasives and hardware that fit your steel, budget, and patience. A proper progression and stable guide turn angle theory into a screaming-sharp reality. [Best Knife Sharpeners] Step-by-Step Knife Sharpening Guide Ready to turn theory into a screaming-sharp edge? Follow the sequence below—each stage builds on the last, so resist the urge to skip ahead, and you’ll finish with a blade that glides through paper like it’s not even there. ESTABLISHING THE PRIMARY BEVEL & RAISING A BURR 1. Set the angle. Lock the blade into your jig or cant your wrist until the spine sits at the chosen degree. (A coin under the spine on a 25 mm-wide chef’s knife gives ~15°; two coins ≈20°.) 2. Start on a coarse or medium stone (220 – 1 000 grit). Lubricate waterstones for 2–3 minutes first; oil stones need a light mineral-oil film. 3. Push or pull with even pressure. Move the blade heel-to-tip, keeping the spine anchored at the same height. Count strokes (e.g., 10 per side) to stay symmetrical. 4. Feel for the burr. Run a fingertip across (never along) the edge; a wire-thin lip means the bevels now meet at a point. No burr? Keep grinding—sharp comes only after steel meets steel. 5. Flip and repeat. Grind the other side until the burr flips over cleanly; this ensures the apex is centered. Checkpoint: A dull grey scratch pattern, full-length burr, and straight bevel lines confirm the geometry is set. REFINING, POLISHING & DEBURRING 1. Progress through finer stones (1 000 → 3 000 → 6 000 +). Each jump should at least halve the previous grit to erase scratches efficiently. 2. Reduce pressure by half on each finer grit. Let the abrasive, not your arm, do the cutting—excess force ‘washes out’ the angle you just established. 3. Alternate single strokes left-right at the end of each grit to shrink the burr until it almost disappears. 4. Polish for glide. On a finishing stone (8 000–12 000) or fine ceramic rod, use trailing strokes only. This burnishes the apex without flipping a big burr back and forth.
5. Abrasive-swipe test. Gently drag the edge across a black Sharpie line on plastic. If it shaves it hair- fine without biting, polish is complete. STROPPING, MICRO-SERRATIONS & MIRROR-POLISHED EDGES 1. Charge a leather strop with green chromium-oxide or diamond paste (1 µm). 2. Lay the blade spine-first, raise until the bevel kisses the leather, then pull away from the edge— never into it—to avoid cutting the strop. 3. Light, fast repetitions (10-15 per side) align any microscopic teeth left from stone work and remove residual burr dust. 4. Optional micro-bevel. Lift the spine a single business-card thickness and give 2–3 delicate strop passes; the extra 1–2° adds chip resistance without dulling keenness. 5. Paper-slice proof. Cleanly sever newsprint on a push-cut. A mirror flash on the bevel plus that effortless slice equals mission accomplished. Remember: Maintenance takes minutes if you strop lightly after each use; you’ll revisit coarse stones only when chips or major dulling appear. Master this three-stage cycle, and your chosen sharpening angle will stay laser-true for months. Image credit: Lansky Maintaining Your Angle: Consistency & Pressure Control Even the perfect bevel geometry won’t stay perfect if each stroke wobbles a degree or two. Below are the habits and “tells” that let seasoned sharpeners hold rock-solid angles—even when they’re freehand on a bench stone. FREEHAND DRILLS & MUSCLE-MEMORY CUES Drill What to Do Why It Works Color the bevel with a marker; take three slow strokes. If ink disappears evenly, your angle is true. Instant visual feedback—no gauge needed. Sharpie Test Place one or two coins under the knife spine; match that height on every stroke, then remove the coins and repeat by feel. Trains wrist to recognize the exact “lift” without props. Coin-Stack Gauge Under a bright light, tilt the blade until the bevel just stops reflecting. Memorize that wrist position before each pass. Human eye detects the switch from glare to matte within ~½°. Flash-Glint Method Use a phone metronome set to 60 BPM; press lightly on the down-beat, release on the up-beat. Builds rhythm so pressure stays consistent along the entire edge. Metronome Pressure Drill Spend ten minutes on these drills before serious sharpening sessions and muscle memory will lock in the angle almost automatically.
COMMON MISTAKES: ROCKING, LIFTING THE SPINE, “BANANA” EDGES 1. Rocking the tip or heel – Rolling the knife like a seesaw widens the bevel at both ends and thins it mid-blade. 2. Lifting the spine mid-stroke – Creates a convex bulge that dulls faster and is harder to maintain (the dreaded “banana” edge). 3. Over-pressure on coarse stones – Digs a groove, heats the apex, and rounds off the precisely set angle. 4. Hurrying the flip – Switching sides before a full-length burr forms leads to an off-center apex and jagged feel. Spotting the problem: Hold the knife edge-up under a lamp; a shiny flat spot signals the bevel is now convexed and past its intended angle. FIXING AN EDGE SHARPENED AT THE WRONG ANGLE Minor wobble (off by ≤2°) Micro-bevel rescue: Tilt an extra 2° and give 3–4 light strokes on a medium stone. You’ll realign the apex without removing much steel. Moderate error (banana edge or asymmetric bevels) 1. Color both sides with Sharpie. 2. Start on a 400–600-grit stone at the desired angle. 3. Grind until the marker disappears evenly and the burr flips side-to-side without resistance. 4. Progress to finer grits and finish as normal. Severe mis-angle (edge too thick or thin) Full re-profile: Drop to a 120–220 grit and grind until a flat, even bevel spans the blade. Yes, it’s slow and sacrificial, but it restores geometry once and for all. If time or skill is short, clamp the blade in a guided system (Lansky, Wicked Edge) to guarantee symmetry during the heavy steel removal stage. Pro tip: After any correction, etch the new angle in your notes or on blue painter’s tape stuck to the handle. The next touch-up will start at the right pitch, preventing repeat mistakes. Master these consistency checks and corrective tricks, and your knife will stay at its chosen angle far longer—meaning sharper cuts and fewer trips back to the coarse stone. Video credit: Sharpening Supplies Troubleshooting & FAQs Even the best-laid sharpening plans can hit a snag, and the same few questions pop up every time a blade misbehaves. The quick answers below clear up common angle confusion so you can get back to carving clean, chatter-free slices in minutes. WHAT ANGLE SHOULD I SHARPEN KITCHEN KNIVES? For most Western chef’s, utility, and paring knives 20 – 22° per side (≈ 40 – 44° inclusive) strikes the best balance of keenness and chip-resistance. If your knife is made from a harder Japanese or PM stainless steel (≥ 60 HRC) and you rarely strike bone, you can safely lean down to 18°—just finish with a 20° micro-bevel for durability. WHAT DEGREE IS THE AVERAGE CHEF’S KNIFE? Factory edges on mainstream Western brands (Wüsthof, Victorinox, Sabatier) are ground right around 20° per side. Japanese makers such as Shun or Global typically ship closer to 15 – 17°. Measure yours with a
smartphone goniometer app or by matching the bevel to a guided system’s preset and noting the slot that sits flush. ARE MULTI-ANGLE MICRO-BEVELS WORTH IT? Yes—when done intentionally. Primary bevel (e.g., 17°) delivers effortless slicing. Micro-bevel (add 2–3°) fortifies only the last 0.5 mm of steel, reducing chips while preserving most of that laser feel. Two quick, light strokes at the higher angle on a fine stone or strop are all it takes, and you’ll quadruple edge life on brittle steels like VG-10 or ZDP-189. HOW OFTEN DO I NEED TO RE-ESTABLISH THE ANGLE? If you strop lightly after each session and touch up on a fine stone when push-cuts through paper start to snag, you may go 6–12 months (home use) before a full re-profile is needed. Re-grind sooner if: Micro-chips reappear after every touch-up. The bevel has thickened from repeated honing. You change tasks—e.g., repurpose a camp knife for kitchen duty. HOW CAN I TELL IF I’M REALLY HOLDING 20 DEGREES AT HOME? 1. Sharpie trick: Color the bevel, take a few strokes; even ink removal = correct angle. 2. Coin gauge: One U.S. nickel (or €1 coin) under a 25 mm-wide blade spine is ~15°; two stacked nickels ≈ 20°. Match that lift freehand. 3. Digital angle cube: Inexpensive magnetic cubes read spine-to-stone angle within 0.1°. 4. Guided system check: Clamp the knife in a Lansky/Wicked Edge, dial 20°, and see if the stones kiss the existing bevel without scratching above it. Dial in any of these tests once, and your muscle memory will keep you right on target for every future sharpening session. Conclusion & Quick-Glance Angle Guide If you remember only one principle, make it this: angle drives everything. Bevel geometry dictates how sharp your knife feels on day one, how long that bite survives, and how easily you can restore it months down the road. Choose an angle that matches both your steel and your chores, follow a sane grit progression, and lock in consistent strokes—the rest is just muscle memory and maintenance. QUICK-GLANCE CHEAT SHEET Go-to Angle (per side) Knife / Task Why Western chef’s / utility 20 – 22° All-round edge life vs. keenness Japanese gyuto / santoku 15 – 17° Harder steels hold leaner bevels Single-bevel sushi knives 12 – 15° (one side) Ultra-clean push cuts Pocket / outdoor 18 – 22° Versatile for cartons to feather sticks Game skinning / caping 15 – 18° Paper-thin control under the hide Fish fillet 12 – 15° Glides through delicate flesh Meat cleaver 25 – 30° Shrugs off bone impact Machete / kukri 24 – 28° Splits fibrous vegetation all day Printable chart reminder. Download the PDF file here. Tape this cheat sheet inside your tool chest, keep a printed version of the full chart by your stones, and you’ll never second-guess which angle to dial in. Master the angle, maintain it with light stropping, and every slice—whether it’s through sashimi or sapling—will feel effortless. Happy sharpening! Author: Aleks Nemtcev | Knifemaker with 10+ Years of Experience | Connect with me on LinkedIn | Follow me on Reddit References: How We Sharpen knifeaid.com Everything about sharpening angles Knives and Tools More Advice and Theory on Sharpening Angles for Knives sharpeningsupplies.com Inclusive or Exclusive Sharpening Angles prosharpeningsupply.com LEAVE A REPLY We don't allow links in the comments. Any comment containing links will be declined. Receive news updates via email from this site
Your name Commentary SUBMIT COMMENTS Michael Tar 08.09.2025 в 13:36 Hi, thank you for the article it was very eye opening, could you offer your opinion on the new German roller style knife sharpeners Thank you Robert 11.08.2025 в 17:18 Is there a CRK Sebenza service in Poland (Warsaw)? Miro 18.03.2025 в 16:53 Thank you. Everything written and explained in detail is OK. Odell Robinsons 20.02.2025 в 07:21 Thx u for your sharping info very helpful Abdullah Can 14.11.2024 в 15:25 Good day, What should the angle be for a döner knife? RELATED MATERIALS BEST SWISS ARMY KNIFE BEST HUNTING KNIFE: TOP 15 HOW TO MAKE A PARACORD KEYCHAIN: A STEP-BY-STEP GUIDE 18.04.2023 06.02.2024 Victorinox Swiss Army Huntsman Pocket Knife is our top pick for the best Swiss Army Knife. It is a multi-functional tool with unsurpassed quality and expert craftsmanship. It has 14 functions, including a large and small blade, a saw, a can opener, a bottle opener, a screwdriver, a wire stripper, a reamer, a key ring, tweezers, and a t th i k Hunting is an extremely popular sport today. This means that every hunter, both professional and amateur, should possess a great hunting knife. For many hunters, their knife is a matter of pride, therefore, choosing one’s knife requires special attention, taking into account the various situations that may arise on the hunt. So how does one choose the 04.11.2024 Making a paracord keychain is a fun, hands-on project that results in a personalized accessory. With these steps, you can create a simple yet functional keychain or lanyard that’s perfect for daily use. READ READ READ
Rating: 4,7 - 71 reviews Read all customers reviews of Noblie knife store FOLLOW US CATALOGUE INFO Knives in Stock About us Beads Reviews Dirk knives Knife News E-NEWSLETTER SIGNUP Daggers Knifemaking Swords Company Policy Luxury Gifts Get help Enter Your Email Collections Contacts CONTACTS IN THE USA CONTACTS IN EUROPE AREAL LAZUR LTD. Address: Address: ID No: 202342887 VAT No: BG202342887 3001 Woodbridge Ave, Edison, NJ 08837 Complex Lazur, block 153, Burgas, Bulgaria 8001 Email: Email: UNICREDIT BULBANK IBAN (EUR): BG06UNCR70001522688599 IBAN (USD): BG67UNCR70001523546242 SWIFT/BIC: UNCRBGSF sales.noblie@gmail.com sales.noblie@gmail.com Phone: Phone: +17183953854 +359-87-618-0346 Messenger: WhatsApp: @noblie.knives +359-87-618-0346 WE ACCEPT WORLD WIDE SHIPPING Our company produces a large amount of handmade knives, art knives, daggers, swords and other luxury gifts. © Noblie Custom Knives 2015 - 2025