V i t a l i s
390 likes | 605 Vues
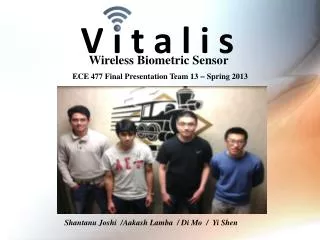
V i t a l i s. Design Review. Wireless Biometric Sensor. ECE 477 - Spring 2013 TEAM 13. Team Members: Aakash Lamba Di Mo Shantanu Joshi Yi Shen. ECE 477 Design Review Team 13 – Fall 2013. Paste a photo of team members here, annotated with names of team members .

V i t a l i s
E N D
Presentation Transcript
V i t a l i s Design Review Wireless Biometric Sensor • ECE 477 - Spring 2013 • TEAM 13 Team Members: AakashLamba Di Mo Shantanu Joshi Yi Shen
ECE 477 Design ReviewTeam 13 – Fall 2013 Paste a photo of team members here, annotated with names of team members. Shantanu Joshi /AakashLamba / Di Mo / Yi Shen
Outline • Project overview • Project specific success criteria • Block diagram • Component Selection Rationale • Packaging Design • Schematic and theory of operation • PCB layout • Software design/development status • Project completion timeline • Questions
Project Overview Prototype of a portable wireless biometric sensor Battery-powered device with fuel gauge Mounted on the wrist Monitor pulse rate, SpO2 and skin temperature Transmit the information via Wi-Fi for remote web access NFC chip allows immediate access to patient data Accelerometer on the shoulder for fall detection Manual and automatic alarm system.
Project-Specific Success Criteria • An ability to determine pulse and SpO2 readings from blood light absorption • An ability to display the users vital statistics (pulse, SpO2 , skin temperature) on the LCD screen mounted on the device which is located on the patients wrist • An ability to remotely monitor the users medical status from a web-site via secure login or authentication through an on-device NFC tag • An ability to activate an alarm both manually (through an emergency button) and automatically in response to anomalous readings of vitals • An ability to detect if the user has suffered a fall and automatically raise an alarm
Component Selection Rationale Microprocessor (1) Critical Design Constraints At least 2 UART outputs for WiFi and LCD One or more I2C and SPI (for debugging) connections Operable using internal oscillator (8 MHz or more) Low power consumption (< 20 mA active) Has a well established design tool chain Preferable Design Characteristics Low pin count Large amounts of internal flash/SRAM
Component Selection Rationale Sensors/Modules (1) General Requirements • Small size • Low cost • Easy to use • 3.3 or 5.0 V • Well documented • Communication via UART or I2C Components • Accelerometer • Temperature • OLED screen • Wi-Fi module • Light to frequency converter
Component Selection Rationale Sensors/Modules (2) • Accelerometer • Analog output • 3.3 V • Easily clipped on shoulder • 3 axis sensing • Low power (350 μA) • OLED Screen • UART communication • 5.0V • Extremely easy to program • Appropriate size for embedded application • Light to Frequency converter • Programmable sensitivity • Extremely small size • Operates in wide range of temperature(-25°C to 75°C) • WiFly Module • Low power - 4 μA sleep and 38 mA active • UART communication • Built in HTML commands to make POST request
Packaging Design (1) Packaging Constraints • Portable- The device must be portable such that a patient may move around while carrying it. It should operate wirelessly so as to enable patient mobility. • Light weight – The device must be light weight. Since the average weight of a smart phone is 120 g, we are targeting something on the order of 100-150g. • Small – The device needs to be small since it needs to be mounted on to the users wrist. We are aiming to make the breadth less than 5 cm. The average wrist is approximately 4.7cm in diameter.
Packaging Design (2) • Philips IntelliVue MX40 • Hung around the neckin a transparent carrying pouch • Touch screen UI • Sensor wires extend across patient’s chest • Entire package (including pouch) is relatively large and cumbersome. • ViSi Mobile health monitor • Worn around the wrist; supported by a band • Touch screen UI • Small and discrete. • Only respiration rate sensor is placed on user’s chest • Aesthetically pleasing
Packaging Design (6) Summary: Size and Weight (main device): Height: 96 mm Width: 50 mm Depth: 10.1 mm Weight (estimated): ~150 grams Components external to device: Pulse oximeter: Clipped on finger Accelerometer: Clipped on to clothing near shoulder Temperature sensor: Underneath the main device mounted on the band Power module: Attached to the bottom on the neoprene band Packaging requirements: Band material: Neoprene band with Velcro for securing onto wrist Device packaging: Plastic casing
Schematic: Section Breakdown Sensors External Interfaces Microcontroller Power and Battery Management
Power Supply Description • Supply Voltage • Lithium Polymer Outputs 3.7 Volts (Nominal) • 3.3 Volts • Microcontroller • Sensors (SpO2, temperature, accelerometer) • Wi-Fi Module • 5 Volts • OLED
Schematic: Power Supply Charger/Booster 5V Step Up Fuel Gauge Headers
Sensor Description Push Button – (Emergency) • Digital Inputs Accelerometer (Analog) • 3 Analog Inputs (3-axis) Temperature (digital) • I2C interface Pulse Oximeter • External Interrupt (Frequency output from photo-sensor) • 2 Digital Outputs • Regular Red LED • Infrared LED
Schematic: Sensors Emergency Push Button Pulse Oximeter Temperature Accelerometer
Wi-Fi and OLED Description • Communicates with microprocessor via UART • Wi-Fi also requires hardware flow control through CTS/RTS • OLED operates at 5V compared to 3.3V for everything else • Wi-Fi and OLED both contain a on-board processor • Wi-Fi module implements handshaking, parsing, and TCP stack creation • OLED handles high-level graphics and programmable updates
Schematic: Wi-Fi & OLED OLED Wi-Fi Wi-Fi Module • UART • TXD0: PD1 • RXD0: PD0 • CTS: PC6 • RTS: PC7 OLED • UART • TXD1: PD3 • RXD1: PD2
Microcontroller Description • Does all on-device data acquisition and processing • Peak detection for pulse • Look-up table for SPO2 • Acceleration processing for fall detection • Temperature conversion • Communicates to website through Wi-Fi via UART interface • Debugging and Programming using standard 10-pin JTAG interface
Schematic: Microcontroller Headers To Power Board I2C Bus SPI ATmega1284 Decoupling Capacitors JTAG
PCB Layout: Overall PCB (3.8 x 3.25) Power Board Main Board
PCB Layout: Power PCB (2.9 x 1.15)(GND Highlighted) Trace Size for 3.3 V, 5 V and GND is 0.032
PCB Layout: Power PCB (2.9 x 1.15) Decoupling Capacitors (C1,C2) for Power Traces Charger/Booster Power Connect Fuel Gauge 5 V Step Up
PCB Layout: Main PCB (3.25 x 2.8)(GND Highlighted) Trace Size: 3.3 V, 5 V and GND - 0.032 Others – 0.012 Hole Size (Diameter): Power - 0.04330709 Others – 0.02362205
PCB Layout: Main PCB (3.25 x 2.8) 5 6 8 10 7 9 3 4 Decoupling Capacitors for Micro: C3,C7,C9 (Size:0805) Decoupling Capacitors for VCC(3.3V)/GND: C10 Decoupling Capacitors for Accelerometer : C4 Decoupling Capacitors for OLED : C5,C8 Decoupling Capacitors for Wi-Fi : C6 (Size:1210) *All passive components are surface-mounted
PCB Layout: Main PCB (3.25 x 2.8)(Debugging Connectors Highlighted) JTAG SPI RESET Power
PCB Layout: Main PCB (3.25 x 2.8)(Sensor Connectors and Others Highlighted) LED SPO2 POWER Wi-Fi OLED BUTTON Temperature Sensor Accelerometer
Software Design • Web Application • Node.js, Express,Jade,Stylus,MongoDB • Login, patient details and DB communication Done • Improve UI, plotting library and Wi-Fi communication To Do • Embedded Software • UART up and running • Pulse oximeter processing finished. • ADC,I2C, OLED display, Wi-Fi configuration to be accomplished. • Android application • Programming in eclipse SDK • Login screen, detecting and reading NFC tags Done • Once web site is hosted, will enable auto-login from the app using NFC authentication
Project Completion Timeline • Week of 2/25: • Focus on embedded software • Get the Accelerometer interfaced with the micro. • Iron out flaws in PCB • Week of 3/4: • Proof of parts • Continue with software development • Week of 3/11: • Host the website • Spring Break!!! • Week of 3/18: • Begin populating the PCB • Finish building OLED display • Finish interfacing all sensors • Week of 3/25: • Continue populating PCB • Get the Wi-Fi updating useful information to the web-server • Enhance the UI for the web-app • Week of 4/1: • Start testing • Arrive at stable version of SW • Week of 4/8: • Debugging • Ethical and Environmental impact • Week of 4/15: • Final tweaks • Prepare demo