
SlideServe
Menu
Préférences
© SlideServe · v2026

Adding an Inline Style Sheet

adlai avatar
18 diapositives · 413 Views · Jul 14, 2014

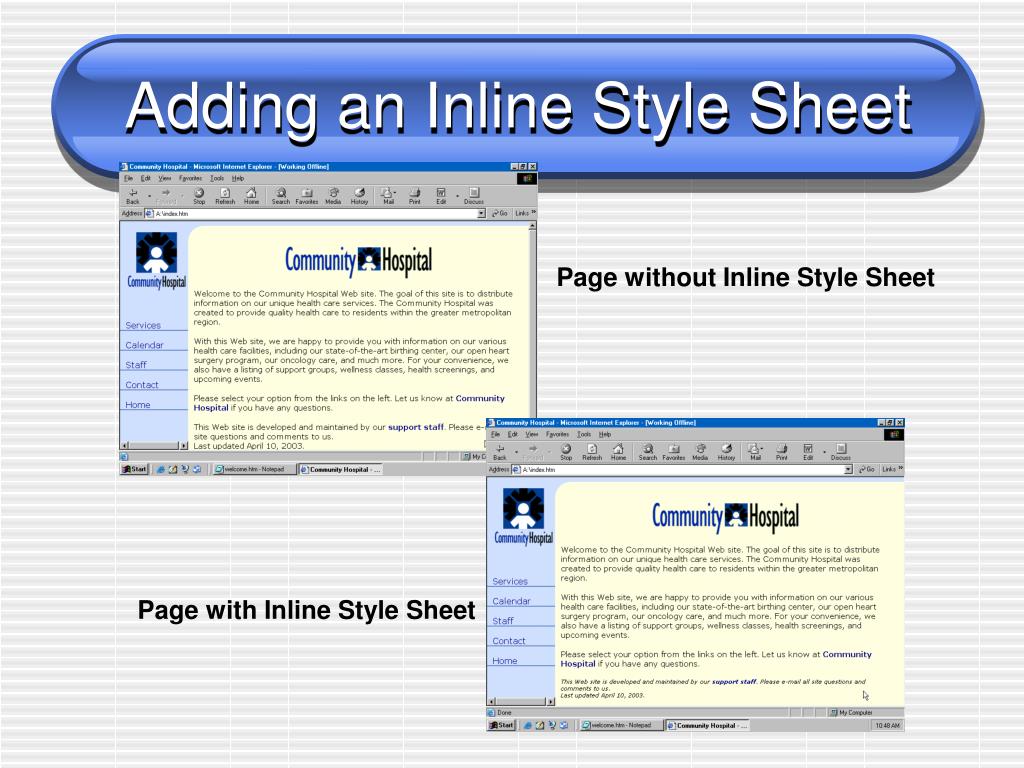
Adding an Inline Style Sheet. Page without Inline Style Sheet. Page with Inline Style Sheet. Adding an Inline Style Sheet. If necessary, click the Notepad button on the taskbar or BBEdit on the dock to display the file, welcome.htm
Adding an Inline Style Sheet - slide 1
01 / 18Adding an Inline Style Sheet
1 / 17

Télécharger la présentation

Adding an Inline Style Sheet
Une image / un lien ci-dessous est fourni (tel quel) pour télécharger la présentation

Politique de téléchargement : le contenu du site vous est fourni TEL QUEL pour votre information et votre usage personnel ; il ne peut être vendu, concédé sous licence ni partagé sur d’autres sites sans l’accord de son auteur.Le contenu vous est fourni TEL QUEL, pour votre information et votre usage personnel uniquement. Téléchargez la présentation en cliquant sur ce lien. Lors du téléchargement, si vous ne parvenez pas à télécharger une présentation, l’éditeur a peut-être supprimé le fichier de son serveur.Pendant le téléchargement, si vous ne parvenez pas à obtenir une présentation, le fichier a peut-être été supprimé par l’éditeur.

F I N

Plus de contenu associé

Transcription de la présentation
  1. Adding an Inline Style Sheet Page without Inline Style Sheet Page with Inline Style Sheet

  2. Adding an Inline Style Sheet • If necessary, click the Notepad button on the taskbar or BBEdit on the dock to display the file, welcome.htm • Click immediately to the right of the P in the <P> tag on line 24. Press the SPACEBAR and then type STYLE=“font-style: italic; font-size: 8pt” as the code

  3. Adding an Inline Style Sheet • Click File on the menu bar and then click Save As. Type welcome.htm in the File name text box. Click the Save button in the Save As dialog box

  4. Viewing and Printing Framed Web Pages • Click the browser button on the taskbar • Click the Community Hospital logo in the upper-left corner of the Web page • Click File on the menu bar and then click Print • When the Print dialog box displays, click As laid out on the screen and then click the OK button

  5. Viewing and Printing Framed Web Pages • One at a time, click the remaining links, Services, Calendar, Staff, and Contact, and repeat the last two steps

  6. Viewing and Printing HTML Files • If necessary, click the browser button on the taskbar. Click the Home link in the menu frame to display the Web page, welcome.htm, in the right frame • Right-click anywhere on the Welcome page except on a link • Click View Source on the shortcut menu

  7. Viewing and Printing HTML Files • Once the file, welcome.htm, is opened in Notepad, click File on the menu bar and then click Print • Click the remaining links (Services, Calendar, Staff, and Contact) and repeat the last three steps

  8. Closing Notepad and Closing Your Browser • Click the Close button on the Notepad title bar • Click the Close button on the browser title bar

  9. Working with Classes in Style Sheets • Using classes, you can selectively apply styles to HTML tags within a page • You can only define classes in embedded or external style sheets • Defining styles is a two-step process • Mark the elements in your HTML code that belong to the class by adding the tag, CLASS=classname • Define a specific style for that class

  10. Working with Classes in Style Sheets

  11. HTML Code with Classes Defined

  12. Resulting Web Page

  13. Summary • Describe the three different types of cascading style sheets • Add an embedded style sheet to a Web page that changes the link styles • Add an external style sheet that changes the background, link styles, paragraph text, and table styles

  14. Summary • Use the <LINK> tag to insert a link to an external style sheet • Add an inline style sheet to a Web page that changes the text style • Understand how to define style classes

  15. What You Should Know

  16. Project 7 Complete Please go to scsite.com/html2e/exs.htm to prepare for the exam on Projects 6 & 7