Adobe Photoshop Elements 6.0
Adobe Photoshop Elements 6.0. Please note that this presentation has not been updated to reflect Adobe Photoshop Elements 6.0. You are welcome to check out a book about version 6.0 from Dr. Flaherty for a short period of time. About Adobe Photoshop. Adobe Photoshop CS2.

Adobe Photoshop Elements 6.0
E N D
Presentation Transcript
Please note that this presentation has not been updated to reflect Adobe Photoshop Elements 6.0. • You are welcome to check out a book about version 6.0 from Dr. Flaherty for a short period of time.
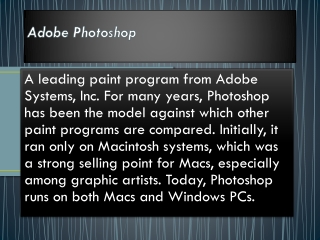
About Adobe Photoshop Adobe Photoshop CS2 Adobe Photoshop Elements Retails around $90 ~ $60 for an academic license A bit more if bundled with Adobe Premiere Elements (the video companion) • Retails around $700 • ~ $250 for an academic license
Digital Image Basics • Every digital image is just a grid of tiny blocks of color called pixels. • Pixels are the only unit of measurement that a computer can truly understand. This example shows an image with a portion greatly enlarged, in which the individual pixels are rendered as little squares and can easily be seen.
Resolution • Resolution is a concept that is critical getting good results with any digital photography, but is one of the most misunderstood. The term resolution refers to the spacing of pixels on the printed page. The resolution setting has no effect on the display of the image while it is on a computer, only when it is printed. • Resolution is referred to most of the time as ppi (pixels per inch) or dpi (dots per inch). For example, in the dialog box below, the resolution of the page is set at 72 dpi.
Print Versus Screen Image Standards • Print - Images for newsletters, brochures, newspapers, magazines, or any other type of print medium. • The baseline standard for a good photographic print is 300 ppi. • Screen - Images for web pages, HTML newsletters, PowerPoint presentations, or any other electronic medium. • 72 ppi is the standard for on-screen presentation (though some are moving to a 96 ppi standard as screen resolutions steadily increase).
UseImage > Image Size… to adjust values on an image • In order to use resolution effectively you need to do a little math. The chart below can be used for reference.
Getting Started • Open up Adobe Photoshop Elements below is CS (change to elements)
Getting Started • Create A New File • File => New or CTRL+N • Change the width, height, and resolution to the numbers below:
Getting Started • After creating a new file, you should see something similar to:
The Organizer and The Editor • The Organizer • Find, organize, and share image files • The Editor • Create, edit, and fix images
The Components of the Workspace • Menu Items • Shortcut Bar • Options Bar • Tool Bar • Palettes
1. Menu Items • File/Open – Many menu commands aren’t available until you use this command to open an image. • File/New – You can create an empty cnvas to compose a new image from scratch. Try something about 500 x 500 pixels if you want to experiment. • Window – If you can not find a palette, there is a list of all of them under this menu. A check mark means it’s already visible on the screen, so clicking it again will make it disappear. • Enhance – The enhance menu contains lots of great tools for making digital photos look better. This is a big advantage over the maze of menus necessary to complete thse same tasks in the full version of Photoshop. • Edit/Preferences – You can reset most of the defaults here, so if you find yourself changing a particular option over and over again, this can help. Unlike most areas of Photoshop (where experimentation is encouraged), if you don’t understand what a preference does, it may be best to leave it alone. However, a re-install will likely fix any mishaps. • Edit/Undo – This is my favorite function since everyone makes mistakes. Undo pretends that your mistakes never happened.
2. Shortcut Bar • This bar contains shortcuts to commonly used items that can be found in the menus. • If you don’t know what a shortcut button does, just hover your mouse over the button for a second and a little flag will appear telling you the name of the button.
3. Options Bar • This bar will look different depending on what tool you have selected from the Tool Bar (number four coming up). • The vast majority of options for any tool will be found here, and we will cover the most important ones. Feel free to experiment to learn the rest.
5. Palettes • Palettes are available in both the Editor and Organizer workspaces; however, they behave a little differently in each. • Palettes help you manage, monitor, and modify images. • Some palettes have menus that provide additional commands and options. • You can organize palettes in the workspace in many different ways. • You can store palettes in the Palette Bin to keep them out of your way, but easily accessible, or you can keep frequently used palettes open in the workspace. Another option is to group palettes together or dock one palette at the bottom of another palette.
Palettes in the Editor • The Palette Bin in the Editor lets you store multiple palettes in a single area that you can easily configure, close, or keep open for easy and fast access. • By default, the Palette Bin appears on the right side of the workspace. • When you adjust palettes, they remain as you leave them until you reset or change them.
The Palette Bin in the Editor A. Collapse or expand a palette B. Adjust palette height C. Palette menu D. Scroll to view rest of palette E. Change palette tools F. Adjust palette width G. Show or hide Palette Bin
Palettes in the Organizer • In the Organizer, the Task pane appears on the right side of the Photo Browser. It contains a tab for each of the basic steps of photo editing: Organize, Fix, Create, and Share. You can open the Task pane to access the tabs, or close it to expand the Photo Browser. • The Organize tab A. Show or hide Task pane B. Collapse or expand palette C. Adjust palette height
The Project Bin in the Editor • Located at the bottom of the Full Edit and Quick Fix workspaces, the Project Bin displays thumbnails of open photos. It’s useful for switching between multiple open photos in your workspace. The Project Bin has controls that let you open or close images, hide images, navigate through open images, make a specific image the frontmost, duplicate an image, rotate an image, or view file information. Because the Project Bin appears in both Full Edit and Quick Fix, you can easily bring open images into Quick Fix for editing. Multiple-page projects are highlighted by a gray frame around the page thumbnails. To show or hide the individual pages, click the right edge of the frame. • The Project Bin A. Selected photo B. Collapsed photo creation C. Click to expand photo creation D. Drag up or down to adjust Project Bin height E. Show or hide Project Bin F Project Bin drop-down menu
Saving Your Files • Formats • PSD • Default Photoshop extension • Preserves layers, etc. • TIF – Good for files that will be printed, high quality • GIF – 8 bit file format (a maximum of 256 colors) • Can be transparent • JPG – 24 bit file format ( maximum of 16 million colors) • PNG – Supports 24 bit, but format is lossless, meaning that although it preserves details, the file sizes are large • Not supported by older browsers
Saving Your Files • To optimize your graphics for the web, save them via File=> Save For Web • Photoshop will bring up a preview window to compare the image and file sizes across different compression ratios
Two Very Important Photoshop Concepts 1. Selection 2. Layers
1. Selection • In order to use Photoshop to the fullest extent, you must learn how to “select” the part of the image that you want to manipulate. • When you successfully select something using the Marquis tool, you will see dotted lines or “marching ants” around the selected area. • Sometimes, in order to select part of an image, you must “de-select” something else. • There are different ways to “select” • Normal • Add • Subtract • Intersect (not used very much; will select only where 2 sections intersect)
2. Layers • Layers gives you the ability to combine different elements in a safe way, so that edits to any one element does not affect the other elements. • Layers work similarly to clear sheets used on the old overhead projectors. • Use the layers palette to control how the different layers interact with each other.
Exploring the Toolbar • The arrow appearing in the bottom right corner means more tools are available by clicking and holding the mouse on the button.
Exploring the Toolbar The Marquee Tools allows for selections on the image using rectangles, ellipses, rows and columns. The Move Tool moves selections and layers on the image The Lasso Tool allows for freehand selections The Magic Wand automatically selects parts of an image based on similar areas in adjacent pixels The Crop Tool allows for selection of the image to be trimmed The Slice Tool slices the image into sections for creating an HTML document The Brush & Pencil Tools allow for drawing on the image. The brush makes strokes, the pencil makes straight lines The History Brush Tool allows for the correction mistakes by drawing over the image The Eraser Tools allow for the user to erase parts of the image The Gradient Tool allows for the user to fill an image with a transition from one color to another. The Paint Bucket Tool fills in the image with a single color The Blur Tool smoothes the edges in the image. The Sharpen Tool makes the edges in the image more defined
Exploring the Toolbar The Dodge Tools lightens and the Burn Tool darkens the selected area The Type Tools allows for a variety of text to be added to an image The Shape Tools allow you to add shapes to your image The Eyedropper Tool allows you to capture a specific color from a portion of your image The Hand Tool allows you move the image within the window The Zoom Tool allows you to zoom in and out from an image to view it from different perspectives The Foreground / Background Color Selector specifies the colors you are currently working with. For example, adding a text object will take the foreground color by default. Inserting a gradient will transition the colors from the foreground to the background
Exercise: Making A Banner • Create a blank canvas, change the Width to 500 pixels and the Height to 100 pixels • Photoshop will then create a workspacelike that shown below • Use the type tool to insert text • Note that in the lower right-hand corner that you have added a new layer with the type tool. You can now apply modifications to one layer without affecting the other
Exercise: Making A Banner • To change the color of the text • Make sure the type layer is selected • Select the type tool from the toolbar • Change the color by clicking on the color selector from the toolbar
Exercise: Making A Banner • To apply a gradient or fill to the background • Make sure the background layer is selected • Select the desired gradient colors by settingthe foreground and background colors from the toolbar • Select the gradient tool • Then just click and drag a line across the image • Note how the length and direction of the line drawn affect the gradient
Exercise: Making A Banner • The different layers of the banner can also be edited to add more styles • Common applications to the textlayer include the ‘Drop Shadow’ and the ‘Stroke’ • Note the before and after effectson the text or by clicking
Exercise: Working With Photos Resizing A Photo Open flowers.jpg from http://cob.jmu.edu/flahertb/images/flowers.jpg From the menu, selectImage => Image Size… A dialog box will appear allowing you to specify the new size for the image
Exercise: Working With Photos • Creating a Thumbnail • As a continuation of the previous exercise, resize the flowers.jpg to a width of 200 pixels. The height should automatically adjust • Now this file can be saved with a different file name to allow users to click on the smaller image to load the larger. • Example HTML code:<a href=“flowers.jpg”><img src=“smallflowers.jpg”></a>
Exercise: Working With Photos • Rotating an Image • To change an image’s orientation select:Image => Rotate Canvas
Exercise: Working With Photos • Adding a Border • To add a border to an image, apply the ‘Stroke’ effect to the background • First, add a layer to the background • Layer => New => Layer From Background…
Exercise: Working With Photos • Then add a ‘Stroke’ Layer Style • Change the Position to ‘Inside’ • You may modify the Color and Size to the desired attributes
EXERCISE: Simple Image Enhancement • From my website, open redbarn2.tif. File > Open > redbarn2.tif • Almost all images will be improved by a small amount of sharpening. Filter > Sharpen > Unsharp Mask will give you the most control over that sharpenss. • The color is off (too bright and under saturated). Image > Adjust > Levels will adjust the brightness and Image > Adjust > Hue/Saturation will help you bring out the color. • Note: Levels is generally considered a better tool that Brightness and Contrast. They are really just different ways of looking at the same tool, so feel free to use whichever gives you the best results.
EXERCISE: Improving Digital Images • There will always be a quest for perfect pictures with proper dimensions and balanced foregrounds and backgrounds. • In reality, though, stunning photography is not always captured through a lens. You must sometimes create the perfect picture in Photoshop. • The evaluation process determines what tools you select and the creative techniques used to correct an image. There is no correct, proper, right, or wrong way in Photoshop. • Understanding the visual content and knowing what you want to change in Photoshop is the most important thing.
EXERCISE: Improving Digital Images • Save the boats1.tif file from my Photoshop Images page. Insert it into your Adobe Photoshop Elements workspace by selecting File>Open. • Notice the image is a little skewed. To fix this, go to image > Rotate Canvas. Since the image doesn’t need to be rotated 90 or 180 degrees, choose Arbitrary. The right side needs to be shifted upward, so select the CCW (counter clockwise) button. The number of degrees to be rotated will be small so try a low number. If you feel the image still is not straight, add a few degrees. Reminder: The image adjusts from the point at which it is currently positioned, not the original position.
EXERCISE: Improving Digital Images 3. Now the image is ready to be cropped. There are two methods you can use. The first method uses the crop tool found on the tool bar. To use the crop tool, select the portion of the image you want to keep by clicking and dragging. A broken line will appear, with small boxes in the corners and the middle of each line. If you need to adjust the size of the selection, drag the boxes in the desired direction. To apply the crop, press the return key. 4. The colors in the image look muted and the image is not extremely clear. Use the Unsharp Mask and Adjust Levels. Filter > Sharpen > Unsharpand Image >Adjust > Auto Levels. 5. Next, use the clone stamp tool to remove the boat in the water. Select the water image by holding down the alt key and clicking. Start slowly covering the small boat by clicking the rubber stamp tool over the image.
For more practice working with photos, try the Photoshop Tutorial athttp://www.lunacore.com/photoshop/tutorials/tut018.htm To modify this picture… …into this picture
The Layer Menu • Layers allow for the editing of specific image components without editing the image as a whole • For example, to change only the background color • The ‘Layers’ menu is located in the lower right-hand corner of Adobe Photoshop • This menu allows layer manipulation including: Changing The Layer Opacity Visibility Deleting A Layer Changing Layer Styles Creating A New Layer
EXERCISE: Selection and Using Layers • In this exercise, you’ll take the tomato and make a new image incorporating layers, text, gradients, and a basic filter. Original File New File
EXERCISE: Using Layers • Save the file tomato.tif from my Adobe Photoshop Images page. Insert the file into Photoshop by selecting File > Open > tomato.tif. • Select the white background using the magic wand tool, Select > Similar. Hold down the shift key. • Choose Select > Inverse to select the tomato instead of the white background. • Copy your selection. Edit > Copy or Ctrl + C. • Create a new file. File > New. File specs: 8 inches (width) by 2 inches (height), 72 dpi, RGB mode, white background. • Paste the tomato into the new document. Edit > Paste or Ctrl + V. • Create a copy of the layer by pulling the layer onto the new layer button. The new layer is automatically placed above the layer that was previously active. • Create a text layer using the Horizontal Type Mask Tool. Type “T mat”. • Use the gradient tool to create a gradient from red to yellow. This will create the effect of gradient text in the selection. • Move the two tomato layers into the area where the letter “O” would go. • While on the text layer, click the New Layer Style button and choose Drop Shadow from the popup menu. Adjust the settings to your liking. • Again, click the New Layer Style and choose Bevel and Emboss from the popup menu. Again adjust these settings to your liking. • Right click on the layer and choose Copy Layer Style. Right click on each of the other layers and choose Paste Layer Style. You will see that the settings for each layer style has been applied to the layer.
Composting + =
EXERCISE: Composting • Open the file balloons.tif and redbarn1.tif. • Using the crop tool, crop the green and yellow balloon. • Use the Quick Mask mode to color in the sky (everything that is not the balloon). The will allow you to select the sky and then easily delete it. • Using the marquee tool of your choice, select the area around the balloon. Copy the balloon using Edit > Copy or Ctrl + C. • Bring redbarn1.tif to the front. • Switch to the field scene and paste the balloons. Edit > Paste or Ctrl + V. • The balloon was pasted into the image on a new layer so you can now position it wherever you want. • The balloon is larger then it would be in real life. To make the balloon smaller you should scale the layer. Edit > Transform > Scale (Ctrl + T for free transform). • The sun’s reflection on the balloon is also opposite of the picture. To fix this problem you need to flip the layer. Edit > Transform > Flip Horizontal.
EXERCISE: Making A Navigation Button • Basic navigation buttons can be made quickly with Photoshop • Applying a basic ‘Bevel and Emboss’ gives a 2-D image a 3-D appearance • Create a new image with a Width of 150px and Height of 50px • Fill the background with a ‘gray’ (hex #666666) color • From the menu, choose Layer=> Layer Style=> Bevel and Emboss • You can now add text to complete the button
EXERCISE: Using Photoshop To Design a Web Site • Design a site using Photoshop’s shape tools • Click on the ‘Edit in ImageReady’button from the toolbar • Once in ImageReady,click on the ‘Slice’ tool • Use the tool to define sections of the site