NIGHT CIRCUITS
Night Circuits. NIGHT CIRCUITS. Aim. To introduce the correct technique and procedures for conducting night circuits in the C172. Objectives. Correctly from memory: Recall the night VFR aircraft and aerodrome lighting requirements Recall the YBCG night operational requirements
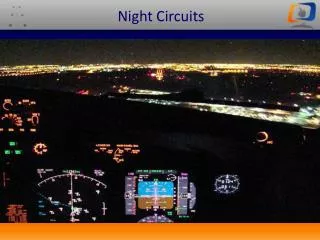

NIGHT CIRCUITS
E N D
Presentation Transcript
Night Circuits NIGHT CIRCUITS
Aim • To introduce the correct technique and procedures for conducting night circuits in the C172
Objectives Correctly from memory: • Recall the night VFR aircraft and aerodrome lighting requirements • Recall the YBCG night operational requirements • State the correct technique for conducting a night VFR circuit • Recall the factors that can affect our night vision
Revision • Recall the physiological factors that affect us as pilots during instrument flight • Recall the techniques that we can use to minimise these illusions during flight • Recall go around procedure.
What is a night circuit? • Normal circuit • Conducted at a suitable airfield • Between the end and beginning of day light
Maximising night vision • Avoid strong glare during the day, especially sand or snow • Avoid white light, especially fluoro lights • Reduce cockpit lighting to maximise night vision • Do not look straight ahead into an oncoming light source • Remember • Night vision can take up to 30 minutes to return to maximum efficiency
Factors Affecting Night Vision Anything that reduces the amount of oxygen available in the bloodstream will also reduce night vision • Smoking • Alcohol • Head cold • Altitude • Fatigue • Medication
Lighting Requirements • Aircraft internal lighting • Aircraft external lighting • Aerodrome lighting • Additional lighting
PILOT COMPARTMENT LIGHT \ MAP LIGHT INSTRUMENT ILLUMINATION LIGHT INTENSITY CONTROL EMERGENCY LIGHTING TORCH Lighting Requirements PASSENGER COMPARTMENT LIGHTING
140° 110° Red Rotating light Strobes White light Starboard 110° Taxi / Landing light Port Lighting Requirements
Green to green may be safe Red to red may be safe Solid white may be safe Red to green is unsafe Green to red is unsafe
AERODROME LIGHTING Obstacle lighting Runway end lighting (departure) Windsock lighting Runway edge lighting Runway end lighting (approach) T-VASIS T-VASIS Runway threshold identification lights
Aerodrome Lighting Apron lighting Taxi-way edge lighting Holding point lights Taxi-way centreline lighting
Lighting Information • ERSA FAC • Specific aerodrome lighting AERODROME AND APPROACH LIGHTING RWY 14/32 MIRL PAL+AFRU 118.7 SDBY PWR AVBL RWY 14/32 RTIL RWY 14/32 T-VASIS PAL+AFRU 118.7 3.0 DEG 39FT SDBY PWR AVBL PAL lighting timing is critical. Recommended three one-second pulses to activate. OTHER LIGHTING ABN ALTN 8 WG
Aircraft Performance • Colder air temperature • Denser atmosphere • Engine Performance increased • Aerodynamic Performance increased
Ground Operations • Pre-flight • During the day • Serviceability of all lights internal and external • Taxiing • The speed can be difficult to judge • Use area illuminated by nav lights on wingtips to assess taxi speed…..Be very careful • Taxi at slow walking speed • Turn off taxi light for oncoming taxi traffic
Beginning the Night Circuit • Taxi light remains on until the take-off clearance has been given then the landing light is switched on • Enter the runway as normal and align the nose wheel with the runway centreline • Focus on the end of the runway
Rotate • At 55kts increase the back pressure. • Be very smooth with the amount of back pressure used • Once the nose wheel has rotated, pitch the nose to 8° - 10° on the AI and hold • Confirm a positive rate of climb on two instruments • After takeoff go completely onto your instruments
Upwind • Maintain wings level on the instruments until 500ft AGL • Visually check for traffic on crosswind before the turn • Once the turn has been cleared • Conduct a rate 1 turn on instruments. • Trust your instruments • All turns roll out on specific headings so think ahead • Crosswind 90° to runway heading by looking at DI
Crosswind • Once the turn has been completed, roll wings level on the AI and continue the climb • Visually confirm the circuit spacing and adjust accordingly (slowly) • Return your focus to the instruments and continue to climb on crosswind
VISUAL / INSTRUMENT COMBINATION STRICTLY INSTRUMENTS CROSSWIND 14 UPWIND
Downwind • Normal circuit dimensions and procedures • Heading Height Spacing Speed • Before landing checks: • Instruments now include • DI aligned to compass • Suction (gyroscopic instruments), amps/volts (electrically driven flight instruments)
VISUAL / INSTRUMENT COMBINATION STRICTLY INSTRUMENTS DOWNWIND CROSSWIND 14 UPWIND
Base Turn • Visually clear the path prior to turning • Normal circuit dimensions and procedures • I.E. Flap and speed as required • Conduct a rate 1 turn onto base
VISUAL / INSTRUMENT COMBINATION STRICTLY INSTRUMENTS DOWNWIND BASE CROSSWIND 14 UPWIND
Turning Final • Normal circuit dimensions and procedures • I.E. Flap and speed as required • Conduct a rate 1 turn and use a mixture of instruments and visual • Maintain a visual with runway lights from this point onwards • Adjust descent profile as required and maintain runway centreline
VISUAL / INSTRUMENT COMBINATION STRICTLY INSTRUMENTS DOWNWIND BASE CROSSWIND 14 FINAL UPWIND
Final • Aiming point (T-VASIS) • Adjust descent profile as required and maintain runway centreline • Same technique as visual approach at day • Use runway perspective to assess profile
Australian Wings Academy Version 2 amd 0 Normal Approach
Australian Wings Academy Version 2 amd 0 High Approach
Australian Wings Academy Version 2 amd 0 Low Approach
Landing Technique • Continue the approach until the runway edge lights spread around the engine cowling and begin to appear as one solid line • Smoothly reduce power to idle • Do not fixate on the area illuminated by the landing light • Transition to straight and level and select an aiming point on the upwind end of the runway • Smoothly continue to raise the nose until the engine cowling is placed on the end runway lights
The Landing Roll • Once the aircraft is on the ground: • Apply brakes as required to slow the aircraft to a walking pace • Maintaining the runway centreline with rudder as required • If for a touch and go: • Identify the flap selector and move to the take-off position • Say to yourself ‘flaps identified and up’ • Re-trim for take-off • Smoothly apply full power and repeat
Emergency Situations at Night • Electrical problems • High demand on electrical system • Reduce electrical load • Ensure torch is ready • Failure of the electrical system will not effect the operation of the engine • Electrically driven flight instruments and flaps will fail to work
Emergency Situations at Night • Engine failure at night • Greater difficulty selecting a suitable forced landing area • Although a full moon may give adequate illumination • Use of local knowledge • Worst case scenario • Trim for best glide speed descend into wind and minimise the touchdown speed • Landing light on
Emergency Situations at Night • Radio Failure • Same procedure as day operations. • Use mobile phone if radio is un-serviceable