Mastering Poster Design in Microsoft PowerPoint: A Comprehensive Guide
330 likes | 506 Vues
This guide provides an in-depth look at utilizing Microsoft PowerPoint to create effective and visually appealing posters. Learn how to design your poster with clear principles, including the use of limited fonts and color schemes to ensure readability. The guide also covers optimal alignment and layout for simultaneous viewing, and demonstrates how to create posters in various sizes and orientations. By understanding the functionalities of PowerPoint, you can produce professional-grade presentations that effectively communicate your information.

Mastering Poster Design in Microsoft PowerPoint: A Comprehensive Guide
E N D
Presentation Transcript
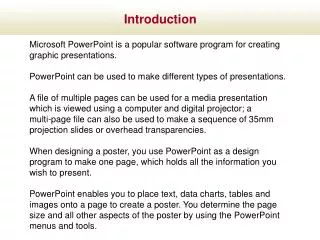
Introduction Microsoft PowerPoint is a popular software program for creating graphic presentations. PowerPoint can be used to make different types of presentations. A file of multiple pages can be used for a media presentation which is viewed using a computer and digital projector; a multi-page file can also be used to make a sequence of 35mm projection slides or overhead transparencies. When designing a poster, you use PowerPoint as a design program to make one page, which holds all the information you wish to present. PowerPoint enables you to place text, data charts, tables and images onto a page to create a poster. You determine the page size and all other aspects of the poster by using the PowerPoint menus and tools.
Introduction Many PowerPoint functions can be accessed several different ways, often by using a listed choice from the Main toolbar or by using a button icon. As you use the program, you will become familiar with the different ways to access these functions. It is beneficial to try out various options in order to get a sense of the range of choices available which will help you to quickly create an effective, interesting poster. The Help menu is quite useful for answering questions about functions and tools while using PowerPoint.
Introduction When designing a poster, there are some basic principles to use in order to present your information as clearly as possible. Use just one or two different fonts to keep the appearance uniform and easy to read. Font variety can be achieved by using the BOLD, ITALIC andUNDERLINE choices on the font toolbar. This font is Arial, which is easy to read from a distance. Sans serif fonts, such as Arial are preferred for reading from a distance. A color scheme of one or two colors helps to emphasize the information in the poster; the use of many colors may distract from the information you are presenting. Align the textboxes and illustrations in the poster by using guides in order to make the poster easy to navigate when seeing it for the first time. It is a good idea to recheck alignment after completing the poster, as well as running the spell check tool.
Introduction A poster should be self-contained and self-explanatory, allowing several viewers to read it simultaneously. The poster should be arranged in columns instead of rows, so that several people can read it at the same time without zig-zagging back and forth. The narrative text should be minimized into short, separated paragraphs using a large typeface. The minimum size we recommend is 24pt; larger typefaces (28pt+) are easier to read from a distance. Figures should be designed to be seen from a distance and should have clear visible graphics with large typeface.
Introduction example poster: Title of Poster Author's name, Author's name, Author's name Name of Division, Department, Institution, City, State Introduction Method Results continued Lorem ipsum dolor sit amet, consectetuer adipiscing elit. Praesent eu est ut orci sagittis fringilla. Lorem ipsum dolor sit amet, consectetuer adipiscing elit. Praesent eu est ut orci sagittis fringilla. In hac habitasse platea dictumst. Ut magna odio, vestibulum sit amet, ullamcorper nec, convallis eget, enim. Cras a libero. Duis eros risus, vehicula a, feugiat sit amet, venenatis aliquet, Abstract Figures Lorem ipsum dolor sit amet, consectetuer adipiscing elit. Praesent eu est ut orci sagittis a) b) Conclusion Lorem ipsum dolor sit amet, consectetuer adipiscing elit. Praesent eu est ut orci sagittis fringilla. Data Captions of Figures Results References Lorem ipsum dolor sit amet, consectetuer adipiscing elit. Praesent eu est ut orci sagittis fringilla. Author, article, journal, page, date Author, article, journal, page, date Author, article, journal, page, date
Introduction Most of the posters we print are 36" x 56" and are set up in a horizontal (landscape) orientation. Some exhibition venues have restrictions or requirements on the size, or orientation, of posters. For example, it is common for poster presentations in Europe to require vertically oriented posters. Be sure to find out any specific requirements before starting to create your poster. We print posters on paper rolls of 36" and 42". The most common size used is the 36", because it has the best combination of size and portability. The 36" paper is much easier to handle than the 42" when setting up for display. Also, 36" posters are easier to carry when traveling.
Introduction If you want to make a poster that is longer than the default PowerPoint limit of 56", simply create the poster page at half size in PowerPoint. We can enlarge it to the full size when printing the poster. For example, if you want a 36" by 86" poster, set up the custom page size to 18" by 43". We will print it at 200% to give you the 36" x 86" poster. Be sure to tell us you want the poster printed at double size (& tell us the final dimensions), when placing your order. When designing such a poster, be sure to adjust your font sizes. If your normal title font size is 100pt size, the half-size page title font will be 50pt.
Go to: File__Page Setup and select Custom from the drop down list under Slides sized for: Select orientationunder Slides Start
A typical poster page size is 36 x 56 inches. (Some events will have requirements for poster sizes and formats, be sure to set the poster up within these restrictions) Start
Start Start making your poster by diving right in! First, open a new presentation and set up your page size, then click on the text tool and start by entering the title, then click the text tool again to enter the authors, repeat for section headings, the text sections, any labels for pictures or charts, etc. Once you have the poster sections 'roughed-in' you can align the textboxes, section headings and pictures by moving the dotted guidelines to help line up the elements in vertical rows. Hint: create several vertical and horizontal guides by clicking on a guide and then hold the Ctrl key down while moving the mouse to position the new guideline. This helps to align elements such as text sections, columns and pictures in the poster.
Start You can size textboxes by right clicking on them and select the Size tab from the Format Autoshapecommand. Ideally, all textboxes in a poster will be the same width. Once you have created a textbox, you can duplicate it by pressing Ctrl+D at the same time. Then simply replace the old text in the new textbox. This way you will have the same size textboxes in the entire poster, which will enhance the poster’s overall design. When a picture or textbox is clicked, it can be moved by dragging with the mouse or more precisely by using the direction arrows on the keyboard. Hint: if you want to move a picture or textbox in smaller increments with the arrow keys, hold the Ctrl key down when using the arrow keys.
Recommended font size is 100 point for the title ( 100 pt = 1 inch)Font size for the text sections can be set up from 24 points to 36 points. 24pt is the smallest font that should be used; smaller fonts will be difficult to read from normal distances. Text
On the ruler slot window theindents and bullet spacing can be adjusted by moving the markers Text
Tabs can be added by clicking on the ruler at the place you wish to have a tab Text Note: if the text box outline is clicked when formatting the ruler, the entire text box will be affected. Conversely, selecting individual lines in the textbox will format each line individually. (see next page)
Text How to change all of a textbox’s characteristics at once:
Text This method of selecting also allows you to universally change several attributes of textboxes, such as colors, lines and sizes of the textboxes. You can ensure the uniformity of your design by making all the textboxes the same width, and by sizing vertical rows of boxes all at the same time, after the text is entered.
Text The best legibility is achieved by using black text on white backgrounds (example #1). Backgrounds made of dark images or texture patterns can cause the text to be harder to read (#2). If you use different colors for text, avoid using yellow or other light colors as these are hard to read (#3) example example example #1 #2 #3
Text It is best to enter text into a PowerPoint presentation by using the text tool and typing directly into PowerPoint. If you copy text from a Word document and paste it right into PowerPoint, the formatting can become corrupted . It is best to place the text into a native PowerPoint textbox, see below… To use a section of text from a Word file (.doc), it is best to highlight the section of text in Word, then press Ctrl + C which copies the text. Next, go to the PowerPoint file and click the text button , place the cursor where you want the text to go and press Ctrl +V which pastes the text into the text box you have created in PowerPoint. You may have to resize the dimensions of the textbox to fit the poster design.
Symbols Do NOT go to Insert_Symbol to create symbols in text. Making symbols this way may cause font substitution errors when the poster is printed. (see example on next slide for instructions on how to make a symbol)
Symbols Example: to make an alpha- simply type an “a” and change the font to "symbol" at the font selection box on the menu bar to make the alpha.
Pictures Background images can add interest and information to a poster. If you want to use a background image behind text, adjust it by using the picture toolbar's Brightness controls: and Contrastcontrols: Both controls will probably be needed to adjust levels for the image so the picture will be detailed enough to see clearly, while being light enough to not interfere with reading the text. In general, it is best to adjust the image so that the picture is very light, because when an image is printed, it tends to appear darker than how it appears on the computer monitor. (examples on next page)
Pictures Examples: Here is an image as inserted directly into PowerPoint. The text is not easily read because of the density and brightness of the image. This is the same image with "More Brightness" clicked 7 times and "Less Contrast" clicked 7 times. The text is _______________________easier to read over this image _______________________than the version above.
Pictures You can also select Clip Art from the Insert toolbar’s Picture selection to use illustrations for your poster. Clip.…art ?
Pictures You can Insert pictures from your computer files. JPEGor TIF files are recommended for photographs and GIF files work well for simple colored graphs and tables.
If you are pasting a picture (or graph or chart) from another application, we recommend using Edit_Paste Special and paste as an Enhanced Metafile. If that fails, try Bitmap. As a last resort, use Paste and hope for the best. Pictures
Hint: click in a picture to make the handles visible Pictures You can crop pictures (1) by using the crop tool found in the Picture Toolbar. Place the tool directly over a handle (2), then click and drag your mouse to crop the picture (3).
Pictures If you need to resize pictures after they have been inserted into the poster, push the Shift key while moving the corner handle and the picture will resize while maintaining its original proportions. Another way to resize pictures is by clicking on them once, then right click and select Format Picturefrom the drop-down list. Go to the Size tab to resize the picture numerically. You can also crop pictures from this dialog box by going to the Picture tab. SCANNING If you are scanning pictures to use in the poster, scan from 125 dpi to no more than 300 dpi at the size the image will be printed in the poster. Higher resolution scans will not look any better and they will cause the poster file to become larger than necessary, possibly causing a computer crash.
Final steps The PowerPoint page should fit together like pieces of a puzzle, adjacent textboxes and pictures should not overlap. Also, look for blank textboxes on the page and delete them if found.
Final steps Once you have finished entering all the text and images into your poster, use the guides to make sure the textboxes and pictures are aligned vertically and are the same size. Push Ctrl+A at the same time to get all the objects’ outlines to show at once:
Final steps Check the overall appearance of the poster by looking at it using the Fitcommand on the zoom list: We recommend reading over the text and doing a "spell check", by going to Toolsand clicking on Spelling. Hint:If your dictionary has mistakes in it, you can correct the errors by openingCustom.dicand then change the misspelled words.
Thank You This guide was developed by the Biomedical Media Group in the Center For Knowledge Management at The Ohio State University to help our customers create posters by using Microsoft PowerPoint. Thank you Ohio State! 11.10.2003