Working with Pictures
E N D
Presentation Transcript
Working with Pictures Lesson16 ( WORD 2007)
Pictures can be added to Word documents and then formatted in various ways. The picture tools in Word 2007 make it easy to incorporate images into your documents and modify those images in innovative ways. In this lesson, you will learn how to insert a picture from your computer, change the picture style and shape, add a border, crop and compress pictures, and more. Guevarra Institute of Technology
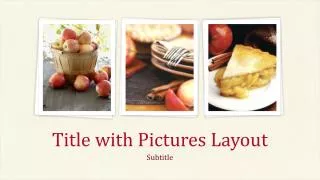
To Insert a Picture: • Place your insertion point where you want the image to appear. • Select the Insert tab. • Click the Picture command in the Illustrations group. The Insert Picture dialog box appears. • Select the image file on your computer. • Click Insert and it will appear in your document. • Left-click a corner sizing handle, and while holding down the mouse button, resize the image. The image retains its proportions. Guevarra Institute of Technology
To Wrap Text Around an Image: • Select the image. • Select the Picture Tools Format tab. • Click the Text Wrapping command in the Arrange group. • Left-click a menu option to select it. In this example, we selected Tight. • Move the image around to see how the text wraps for each setting. • The Position button has pre-defined text wrapping settings. The Position button is to the left of the Text Wrapping button. • Click the Position button and a drop down list of text wrapping options will appear. Hover over an option to see what it does. • If you can’t get your text to wrap the way you wish, click the Text Wrapping command and select More Layout Options from the menu. You can make more precise changes in the Advanced Layout dialog box that appears. Guevarra Institute of Technology
To Crop an Image: • Select the image. • Select the Format tab. • Click the Crop command. The black cropping handles appear. • Left-click and move a handle to crop an image. • Click the Crop command to deselect the crop tool. • Corner handles will crop the image proportionally. Guevarra Institute of Technology
To Compress a Picture: • Select the picture. • Select the Format tab. • Click the Compress Pictures command in the Adjust group. A dialog box appears. • Click the Options button to access the Compression Setting dialog box. • Choose the target output. • Change any of the default picture settings you wish. • Click OK in the Compression Settings dialog box. • Click OK in the Compress Pictures dialog box. • You need to monitor the file size of your images and documents that include images, especially if you send them via email. Cropping and resizing an image doesn’t decrease the image file size, but compression does. Guevarra Institute of Technology
Other Picture Tools There are many other things you can do to modify a picture. From the Format tab, some of the other useful commands include: • Change Picture command: Select a new picture from your computer. • Reset Picture command: Revert to original image. • Brightness command: Adjust the brightness of the image. • Color command: Adjust the contrast of the image from light to dark. • Recolor command: Modify the color in a variety of ways including Black and white, sepia, pink, purple, and more. Guevarra Institute of Technology
To Change the Shape of a Picture: • Select the picture. • Select the Format tab. • Click the Picture Shape icon. A menu appears. • Left-click a shape to select it. Guevarra Institute of Technology
To Apply a Picture Style: • Select the picture. • Select the Format tab. • Click the More drop-down arrow to display all the picture styles. • Hover over a picture style to display a Live Preview of the style in the document. • Left-click a style to select it. Guevarra Institute of Technology
To Add a Border to a Picture Manually: • Select the picture. • Select the Format tab. • Left-click the Picture Border command and select a color. OR • Select Weight from the menu and choose a line weight. Guevarra Institute of Technology
Challenge • Use the Newsletter or any Word document you choose to complete this challenge. • Insert a picture into a document. • Crop the image proportionally. • Apply a picture style to the image. • Compress the picture. Guevarra Institute of Technology