Community Atmosphere Model
Atmosphere Model Example Exercises Community Atmosphere Model Exercises prepared by Rich Neale Presented by Dani Coleman and Cecile Hannay AMP-CGD, NCAR. Community Atmosphere Model. Examples Turn off ‘freeze-drying’ approximation in CAM4 ( namelist change, Arctic )


Community Atmosphere Model
E N D
Presentation Transcript
Atmosphere Model Example ExercisesCommunity Atmosphere Model Exercises prepared by Rich NealePresented by Dani Coleman and Cecile HannayAMP-CGD, NCAR
Community Atmosphere Model Examples • Turn off ‘freeze-drying’ approximation in CAM4 (namelist change, Arctic) • Increase orographic height over the western US by 50% (dataset change, mid-latitude) • Increase the triggering threshold for deep convection just over land (code change, Tropical) Key Commands to be typed and code snippets appear in the Courier font A backslash ‘\’ indicates typed command continues on next line (it does not mean return)
Creating F-cases F-case refers to a specific model configuration with prescribed (observed data) ocean and prescribed sea-ice (thickness, area) • Create a new F-case • cd /home/$LOGNAME/cesm_collection/cesm1_0_3/scripts • cntl=cesm1_0_3.f2000.cntl • The casename is your choice; I like it to tell me as much as possible about the case. • I also like to set shell variables so I don’t have to type the long names all the time! • CASEDIR=~/cesm_case/$cntl • create_newcase-case $CASEDIR -res T31_T31 -compsetF_2000 -machalps • Note the difference with the B-case we’ve been running (no need to do this again!) • create_newcase-case $CASEDIR -res T31_gx3v7 -compsetB_1850 -machalps
Control Case Run length options (run for 2 months) cd $CASEDIR ./xmlchange -file env_run.xml -id STOP_N -val2 ./xmlchange -file env_run.xml -id STOP_OPTION -valnmonths Configure ./configure -case *** Most examples that follow are configured the same up to this point, so on those exercises just change the CASENAME and CASEDIR and you can use the same commands *** Build CASENAME=$cntl ./$CASENAME.alps.build
Control Case: continued Submit bsub < ./$CASENAME.alps.run Checking jobs bjobs Shows output similar to: JOBID USER STAT QUEUE FROM_HOST EXEC_HOST JOB_NAME SUBMIT_TIME 992612 s07hsu0 PEND 48cpu alps6 *2000.cntl Mar 21 14:14 Recall Day1 tutorial for how to know when and how well the model is running…. While this runs, continue with the tutorial to learn what we will do next.
Example 1: Namelist Change • ACTION: Switch off an approximation that reduces the cloud fraction in very dry atmospheric conditions (Vavrus and Walliser, 2008)
Optional:Use a script • This tutorial is written for the command line and you may skip this page • It is possible to put most of the commands necessary to run CESM • in a shell script instead of calling them from the command line • Advantagesof a script • An exact record of the commands used to make each case • Easy reproducibility or make small changes for another case • Disadvantagesof a script • More advanced: have to understand scripting language (example is c-shell) • When the construction of a case requires editing or adding a file, you must have the script stop before the edit and resume afterward • If you want to use the script: copy the instructors’ script for the control case to your directory, open it in an editor, read and understand it and make the necessary modifications to use it for example 1 (including changing the case and filenames!) • cp /home/s07hsu00/cesm_case/cesm1_0_3.f2000.cntl.csh ~/cesm_case/newcase.csh • Since this is a more advanced method, there are no more instructions for doing it this way but it should be possible to figure it out yourself. • Otherwise, continue as directed…
Example 1: Namelist Change Follow control case example until before the configure Set freeze drying to .False. Two methods-- choose one: 1. Via env_conf.xml using xmlchange (configureafter this) xmlchange-file env_conf.xml -id CAM_NAMELIST_OPTS -val "cldfrc_freeze_dry=.false." 2. Via buildnamelist file (configurebefore this) cd Buildconf emacscam.buildnml.cshadd the following two lines &cldfrc_nl cldfrac_freeze_dry = .false. Return to control caseinstructions at build point After build, check CAM namelist in the run directory to confirm above change cd /work/$LOGNAME/cesm_run/ diff $CASE1/run/atm_in $CNTL/run/atm_in
Example 1: Comparing to control You might need to load the ncview and netcdf modules module list shows what is loaded already If necessary, use these commands to add module load ncview module load netcdf A quick comparison: create an ncfilecontaining the diffs between two cases (both runs need to be finished for this to work!) cd /work/$LOGNAME/cesm_archive/ CNTL=cesm1_0_3.f2000.cntl CASE1=cesm1_0_3.f2000.nofrzdry FILECNTL=$CNTL/atm/hist/$CNTL.cam2.h0.0001-01.nc FILECASE1=$CASE1/atm/hist/$CASE1.cam2.h0.0001-01.nc ncdiff $FILECNTL $FILECASE1 diff_${CASE1}_${CNTL}.nc Use ncview to browse ncview${CASE1}_diff.nc What to look for? • Surface temperature (TS), surface energy budget (FSDS,FLNS), surface pressure (PS), cloud (CLDLOW)
Example 2: Dataset change • ACTION: Change input boundary datasets (orography) by increasing it’s value by 50% in the western USA
Example 2: Dataset change • ACTION: Change input boundary datasets (orography) by increasing it’s value by 50% in the western USA See alternative case 2a at the end to add a Sea Surface Temperature (SST) anomaly
Example 2: Dataset change Follow control case example until after the configure Now we want to modify Orography surface boundary dataset Orography file (specifies mean height PHIS) bnd_topo=/work/s07hsu00/cesm_inputdata/atm/cam/topo/USGS-gtopo30_48x96_c050520.nc The next slide shows how to use ncap2to modify this dataset. However, ncap2 is not available on alps so instead please link to the modified data set after changing to your $CASEDIR cd $CASEDIR ln –s /home/s07hsu00/USGS-gtopo30_48x96_us_oro_x50.nc . You can run the ncdiff/ncview at the bottom of the next page to view the differences between the two files.
Example 2: Dataset change Change orography surface boundary data 1) Make a local copy in your $CASEDIR cp/work/s07hsu00/cesm_inputdata/atm/cam/topo/USGS-gtopo30_48x96_c050520.nc \ USGS-gtopo30_48x96_c050520_orig.nc 2) Use nco utilities to edit values on the file (http://nco.sourgeforce.net) We will use a function calledncap2 – (netCDF Arithmetic Averager) single line command below ncap2 -O -s 'lat2d[lat,lon]=lat ; lon2d[lat,lon]=lon’ \ -s 'omask=(lat2d >= 30. && lat2d <= 50.) && (lon2d >= 235. && lon2d <= 260.)' \ -s 'PHIS=(PHIS*(1.+omask*0.5))' \ USGS-gtopo30_48x96_c050520_orig.nc USGS-gtopo30_48x96_us_oro_x50.nc 1. Define 2D latitude and longitude arrays 2. Create a mask – setting = 1 for the desired lat/lon range; elsewhere = 0 3. Apply mask to 2D field (PHIS = surface geopotential = gZ) – 1.5x PHIS in region of interest Check data ncdiff–v PHIS USGS-gtopo30_48x96_us_oro_x50.nc \ USGS-gtopo30_48x96_c050520_orig.nc PHIS_diff.nc ncviewPHIS_diff.nc 1 2 3
Example 2: Dataset change Editnamelist to point to modified dataset <edit> Buildconf/cam.buildnml.csh Change bnd_topo= ‘$DIN_LOC_ROOT/atm/cam/topo/USGS-gtopo30_48x96_c050520.nc’ Tobnd_topo= ‘./USGS-gtopo30_48x96_us_oro_x50.nc’ Build model ./${CASENAME}.alps.build Copy changed orography boundary data to run directory cpUSGS-gtopo30_48x96_us_oro_x50.nc /work/$LOGNAME/cesm_run/$CASENAME/run Return to Control Case AFTER build point Before running the model, how can you check what is different between this run and the control? Hint: copy of namelist saved in $CASEDIR/CaseDocs/atm_in What to look for when experiment is complete? • Surface temperature (TS), surface pressure (PS), cloud (CLDLOW), rainfall (PRECT), winds (OMEGA,U,W)
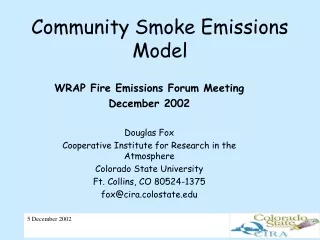
Example 3: Code Change • Examine the mean effects of delaying the initiation of convection by increasing the minimum required convective available potential energy (CAPE) to initiate convection over land; Models peak around noon Too early
Example 3: Code Change • Follow guide for control example until configure then Copy fortran code file that controls deep convection calculation (Zhang and McFarlane, 1995) to local code mod directory for the atmosphere cd $CASEDIR/SourceMods/src.cam cp /home/s07hsu00/cesm_collection/cesm1_0_3/models/atm/cam/src/physics/cam/zm_conv.F90. Editzm_conv.F90: Search for the following lines if (cape(i) > capelmt) then lengath = lengath + 1 index(lengath) = i end if The minimum CAPE (capelmt) for triggering convection is = 70 J/kg everywhere. Let’s increase the value over land (x10 to 700 K/kg) to analyze what the mean effect of delaying convection is.
Example 3: Code Change So change the following in sub-routine zm_convr (use ‘ctrl s’ to search in emacs) if (cape(i) > capelmt) then lengath = lengath + 1 index(lengath) = i end if To if (cape(i) > capelmt_mask) then lengath = lengath + 1 index(lengath) = i end if And before this add if (landfrac(i) > 0.5_r8) then capelmt_mask = 10._r8*capelmt else capelmt_mask = capelmt end if And in routine zm_convr after use phys_control, only: cam_physpkg_is Add real(r8) :: capelmt_mask Return to Control Case AFTER configure point Use a local variable for the convection trigger Scale the existing trigger value by 10x if land fraction is >50%
Example 3: Code Change What to look for? (may require longer than 2 months for good signal) • Surface temperature (TS), surface fluxes (LHFLX,SHFLX), cloud (CLDLOW), rainfall (PRECT) over land • How does it affect the diurnal cycle? (if feeling brave output hourly rainfall (PRECT) and surface temperature (TS) over a limited land region
Example 2a: Dataset change • ACTION: Change input boundary datasets (Sea Surface Temperature) by increasing it’s value by 2K in the tropical Central Pacific
Example 2a: Dataset change Follow control case example until before the configure You need to modify the SST file. This file is located in the central input data location: $DIN_LOC_ROOT/ocn/docn7/SSTDATA/sst_HadOIBl_bc_48x96_clim_c050526.nc with $DIN_LOC_ROOT = /work/s07hsu00/cesm_inputdata The next steps shows how to use ncap2to modify this dataset. However, ncap2 is not available on alps so instead please link to the modified data set after changing to your $CASEDIR cd $CASEDIR ln-s /home/s07hsu00/sst_HadOIBl_bc_48x96_clim_warmtcp.nc . You can run the ncdiff/ncview at the bottom of the next page to view the differences between the two files If ncap2 is available, copy file to your local directory and follow instructions on the next page cp $DIN_LOC_ROOT/ocn/docn7/SSTDATA/sst_HadOIBl_bc_48x96_clim_c050526.nc \ sst_HadOIBl_bc_48x96_clim_c050526_orig.nc
Example 2a: Dataset change Change SST surface boundary data Use nco utilities to edit values on the file (http://nco.sourgeforce.net) We will use a function called ncap2 – (netCDF Arithmetic Averager) single line command below ncap2 –O –s 'lat2d[lat,lon]=lat ; lon2d[lat,lon]=lon'\ –s 'omask=(lat2d >= -10. && lat2d <= 10.) && (lon2d >= 180. && lon2d <= 240.)'\ -s 'SST_cpl=(SST_cpl+omask*2.)'\ sst_HadOIBl_bc_48x96_clim_c050526_orig.nc sst_HadOIBl_bc_48x96_clim_warmtcp.nc 1. Define 2D latitude and longitude arrays 2. Create a mask – setting = 1 for the desired lat/lon range; elsewhere = 0 3. Apply mask to 2D field (SST_cpl): +2K in region of interest (equatorial Pacific) Check data ncdiff–v SST_cplsst_HadOIBl_bc_48x96_clim_warmtcp.nc \ sst_HadOIBl_bc_48x96_clim_c050526_orig.nc SST_cpl_diff.nc ncviewSST_cpl_diff.nc 1 2 3
Example 2a: Dataset change Apply changed SST ./xmlchange –file env_conf.xml –id DOCN_SSTDATA_FILENAME \ –val “./sst_HadOIBl_bc_48x96_clim_warmtcp.nc” ./xmlchange –file env_conf.xml –id DOCN_SSTDATA_YEAR_START –val “0” ./xmlchange –file env_conf.xml –id DOCN_SSTDATA_YEAR_END –val “0” Build model cd $CASEDIR ./{$CASENAME}.alps.build Copy changed SST data to run directory cp sst_HadOIBl_bc_48x96_clim_warmtcp.nc /work/$LOGNAME/cesm_run/$CASENAME/run> Return to Control Case AFTER build point Before running the model, how can you check what is different between this run and the control? Hint: copy of namelist saved in $CASEDIR/CaseDocs/atm_in What to look for? • Surface temperature (TS), surface pressure (PS), cloud (CLDLOW), rainfall (PRECT), winds (OMEGA,U,W) Did you notice that Example 2 and 2a used different methods to modify namelist?