A-Cargo-Fork
Construcciu00f3n de una horquilla de carga para bicicleta de carga

A-Cargo-Fork
E N D
Presentation Transcript
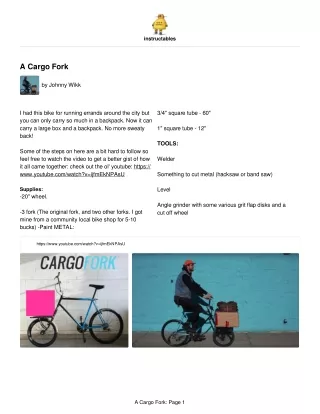
instructables A Cargo Fork by Johnny Wikk I had this bike for running errands around the city but 3/4" square tube - 60" you can only carry so much in a backpack. Now it can carry a large box and a backpack. No more sweaty 1" square tube - 12" back! TOOLS: Some of the steps on here are a bit hard to follow so feel free to watch the video to get a better gist of how Welder it all came together: check out the ol' youtube: https:// www.youtube.com/watch?v=ijfmEkNPAsU Something to cut metal (hacksaw or band saw) Supplies: Level -20" wheel. Angle grinder with some various grit flap disks and a -3 fork (The original fork, and two other forks. I got cut off wheel mine from a community local bike shop for 5-10 bucks) -Paint METAL: https://www.youtube.com/watch?v=ijfmEkNPAsU A Cargo Fork: Page 1
Step 1: Finding the Location of the New Axis. It depends on the fork but I tried to achieve a similar rake to the original fork so that I would handle as natural as possible Step 2: Cutting Up the Spare Forks I cut up the spare forks to achieve the length that I needed to reach to axel of the 20" rim, but making sure the top bar remained parallel to the ground. A Cargo Fork: Page 2
Step 3: Jig for Incorporating the Rack Into the Fork. I made a jig that used the brake pins to keep everything in place while supporting the main crossbar or the rack. A Cargo Fork: Page 3
Step 4: Attaching the Rest of the Rack. -With a digital level I got the angle that bed of the rack needed to be cut to, then I cut the pieces accordingly. -Once I had the bed of the rack welded up, I tack welded it in place and use the level to make sure it was parallel to the ground before continuing to weld it on. -When solid I removed the fork/rack from the bike to continue the welding the underside. A Cargo Fork: Page 4
Step 5: Cargo Bed Supports I hacked up another found fork, this one from an old road bike, which was nice because they are so thin and strong. As you can see they made for great supports, I did not use any measurements here I just put them far enough down the fork so they would not interfere with the V-brakes that would go in later. A Cargo Fork: Page 5
Step 6: Cleaning Up the Welds Just cleaned up those welds, nuff said. Not shown here: I welded in little caps to the open ends of the square bar. Step 7: Adding Brake Pins -I cut two brake pins off the original fork so that I Definitely use a drill press for this. could move them down the fork to accommodate the 20" wheel. -To get the location that the brake pins should be welded: install the wheel and use the actual brake -In order to get this right, I built a hardwood jig to hold and layout it out to make sure they are not too high or the pins at the right distance and angle. This was too low on the fork. simple to make. I just measured the distance of the pins on original fork (centre to centre) and drilled two -Then I just welded that biz hole in the hardwood using that measurement. A Cargo Fork: Page 6
Step 8: Painting! I had fun with this one! As you can see! Honestly I would advise from using neon paint from home depot its not very durable. Graffiti stores have much more durable bright colours if that is what you are looking for. A Cargo Fork: Page 7
Step 9: Install That Thang! -Install that thang and add those brakes, I chose V-brakes because they I have always enjoyed how simple and strong they are. -Then get those handle bars on there and start hauling! I built this rack so it perfectly holds a milk crate which I strap on with ski straps, (THE MOST HANDY STRAPS EVER, at least for biking). They are super easy to take on and off. very cool instructible. I have a question what type of camera are you using. Nice work! Great idea to scale it to the ubiquitous and handy milk crate. Thanks for sharing! A Cargo Fork: Page 8