Download
1 / 26
270 likes | 331 Vues
Furnito is a HTML5 Bootstrap frontend Odoo ecommerce theme made specifically for the furniture and furnishing industry. Its a completely responsive theme that comes with a range of custom snippets. For more informatin visit: https://www.appjetty.com/odoo-furnito-theme.htm

E N D
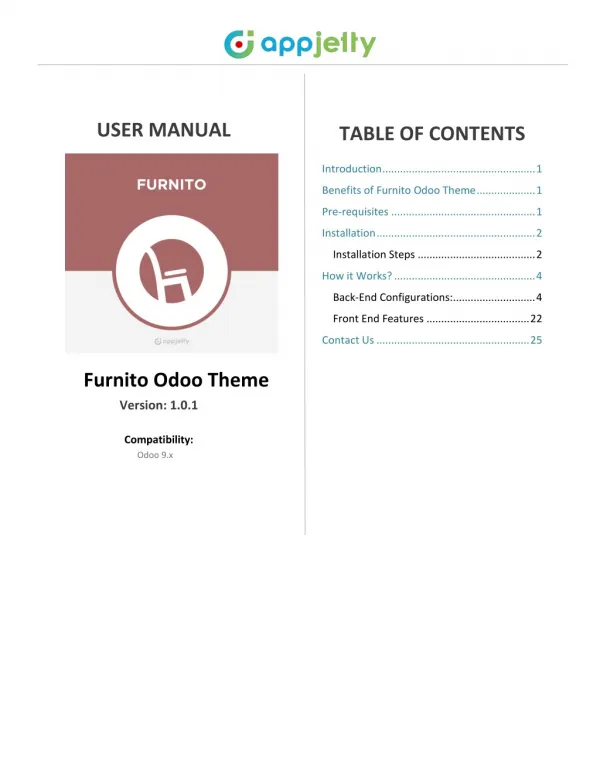
USER MANUAL TABLE OF CONTENTS Introduction .................................................... 1 Benefits of Furnito Odoo Theme .................... 1 Pre-requisites ................................................. 1 Installation ...................................................... 2 Installation Steps ........................................ 2 How it Works? ................................................ 4 Back-End Configurations: ............................ 4 Front End Features ................................... 22 Contact Us .................................................... 25 Furnito Odoo Theme Version: 1.0.1 Compatibility: Odoo 9.x
USER MANUAL – Furnito Odoo Theme Introduction The Furnito theme is an e-commerce theme specifically made to enhance online Furniture ecommerce store. Furnito theme provides numerous snippets to customize the store with an attractive look & feel. Benefits of Furnito Odoo Theme • This theme will beautify the online ecommerce store • It also provides various snippets to customize the store by giving an attractive look and feel. Pre-requisites • Following points must be followed before starting the plug in installation: o You should login as an Admin in Odoo. o Check that your Odoo Instance is compatible for Furnito Theme. o An e-commerce module should be present in your instance to use this theme. www.appjetty.com 1
USER MANUAL – Furnito Odoo Theme Installation Installation Steps Step 1: Download and extract the zip file. Step 2: Check your Odoo add-ons path. • It should be same as defined in Odoo Config file. • Config files are mostly saved in /etc folder. For e.g. /etc/odoo.conf • Open Config file: o Give the command: sudo/etc/odoo.conf o Config file content: addons_path = /opt/odoo/addons Step 3: Open Terminal and go to download location • For e.g. if the download location path is: /home/odoo/Downloads then the command to be written in the terminal would be: cd/home/odoo/Downloads Step 4: Copy download modules to addons path • Give the below mentioned commands to perform copy operation: o $cd /home/odoo/Downloads/theme_furnito o $cd v9 o $sudo cp theme_furnito /opt/odoo/addons Step 5: Restart Odoo server Step 6: Login with the admin credentials in your odoo instance. Step 7: Go to Settings/Update Module List. • Click on “Update” button. www.appjetty.com 2
USER MANUAL – Furnito Odoo Theme Step 8: Go to Settings/Local Modules • Remove search filter • Enter module name in the search box provided in the top right corner of the page. For e.g. here write “Furnito”. Click on install button. . • www.appjetty.com 3
USER MANUAL – Furnito Odoo Theme How it Works? Back-End Configurations: Step 1: Configuring Home Slider Snippet • Go to Website -> Edit -> Insert Blocks -> Home Slider. Drag and drop Upper Banner Snippet on the page where you want it. • Click on Customize to customize Style, Background and Color of the Snippet. You can Move, Copy and Delete the snippet from here. You can also resize the Snippet as per the need. • You can click on any image to change the image or remove the image. Along with image you can also add Text, Document, Pictogram and Video to the snippet. You can also Manage Slideshow speed along with number of slides in the snippet www.appjetty.com 4
USER MANUAL – Furnito Odoo Theme • You can also add text to the banner along with any button that can redirect your customer to any page. You can also manage links of the button by clicking button and then clicking on link button. Step 2: Configuring Multi Product Slider Snippet • Go to Website -> Edit -> Insert Blocks -> Multi Product Slider. Drag and drop Multi Product Slider Snippet on the page where you want it. • Select the Type of slider which you want to display on the page. • Click on Customize to customize Style, Background and Color of the Snippet. You can Move, Copy and Delete the snippet from here. You can also resize the Snippet as per the need. www.appjetty.com 5
USER MANUAL – Furnito Odoo Theme • Managing Slider Configurations: o Go to Sales -> Slider Configurations -> Multi Product Slider Configurations. Click on Create button to create a new slider category. o Set Following attributes to display Multi Product Slider on website. • Slider Name: Slider Name • Auto Rotate Slider: Enable this to set slider on Auto Rotation • Slider Sliding Speed: Manage Slider Speed if set on Auto Rotation • No. Of Collections to Show: Number of collections that are displayed on the page. o Collection Name: Name of the Collection • Product Collection: Set products which are displayed in the collection. • Special Offer Product for Collection: Set special product which will be displayed in the collection Step 3: Configuring Products Slider Snippet • Go to Website -> Edit -> Insert Blocks -> Products Slider. Drag and drop Products Slider Snippet on the page where you want it. • Select the Type of slider which you want to display on the page. • Click on Customize to customize Style, Background and Color of the Snippet. You can Move, Copy and Delete the snippet from here. You can also resize the Snippet as per the need. www.appjetty.com 6
USER MANUAL – Furnito Odoo Theme • Managing Slider Configurations: o Go to Sales -> Slider Configurations -> Products Slider Configurations. Click on Create button to create a new slider category. o Set Following attributes to display Category Slider on website. • Slider Name: Slider Name • Counts: Number of Categories to display on the page. • Auto Rotate Slider: Enable this to set slider on Auto Rotation • Slider Sliding Speed: Manage Slider Speed if set on Auto Rotation • Collection of Products: Add the products which are needed to be added in the collection. Step 4: Configuring Category Slider Snippet • Go to Website -> Edit -> Insert Blocks -> Category Slider. Drag and drop Category Slider Snippet on the page where you want it. • Select the Type of slider which you want to display on the page. • Click on Customize to customize Style, Background and Color of the Snippet. You can Move, Copy and Delete the snippet from here. You can also resize the Snippet as per the need. www.appjetty.com 7
USER MANUAL – Furnito Odoo Theme • Managing Slider Configurations o Go to Sales -> Slider Configurations -> Category Slider Configurations. Click on Create button to create a new slider category. o Set Following attributes to display Category Slider on website. • Slider Name: Slider Name • Counts: Number of Categories to display on the page. • Auto Rotate Slider: Enable this to set slider on Auto Rotation • Slider Sliding Speed: Manage Slider Speed if set on Auto Rotation • Collection of Category: Add the categories which are needed to be added in the collection. Step 5: Configuring Collection Snippet • Go to Website -> Edit -> Insert Blocks -> Collection. Drag and drop Collection Snippet on the page where you want it. • Click on Customize to customize Style, Background and Color of the Snippet. You can Move, Copy and Delete the snippet from here. You can also resize the Snippet as per the need. • You can customize every block of the snippet. You can customize single collection block as well as combined Collection block. You can click on any image to change the image or remove the image. Along with image you can also add Text, Document, Pictogram and Video to the snippet. • You can set button for your customer to navigate him / her directly to the collection Page. www.appjetty.com 8
USER MANUAL – Furnito Odoo Theme Step 6: Configuring Brand Snippet • Go to Website -> Edit -> Insert Blocks -> Features. Drag and drop Brand Snippet on the page where you want it. • Set Total Counts & Label for the Brand Slider before adding it to the Website. • Adding Brands to Brand Snippet o Go to Sales -> Slider Configurations -> Product Brands. Click on Create button to create a new Brand for the Shop. o Add Brand Name, Brand Logo, Brand Cover, Associated Brand Products and Brand Description saving the brand. www.appjetty.com 9
USER MANUAL – Furnito Odoo Theme o To associate Brand to the Products Select any Product and add Brand Name to associate it. Step 7: Configuring Single Banner Without slider • Go to Website -> Edit -> Insert Blocks -> Features. Drag and drop Single Banner without Slider Snippet on the page where you want it. Click on Image, Text and Button to change it as per your likings. • Step 8: Configuring Testimonial Snippet • Go to Website -> Edit -> Insert Blocks -> Testimonials. Drag and drop the Snippet on the page where you want it. • Click on Customize to customize Style, Background and Color of the Snippet. You can Move, Copy and Delete the snippet from here. You can also resize the Snippet as per the need. You can customize client area www.appjetty.com 10
USER MANUAL – Furnito Odoo Theme background as well as whole snippet background. You can also add multiple slides to the snippet to show numerous testimonials. You can customize every block of the snippet. You can customize single testimonial block as well as combined testimonial blocks. You can click on any image to change the image or remove the image. Along with image you can also add Text, Document, Pictogram and Video to the snippet. • Step 9: Configuring Blog Slider snippet • Go to Website -> Edit -> Insert Blocks -> Blog Slider. Drag and drop the Snippet on the page where you want it. • Select the type of Blog which you want to display from the menu. • Click on Customize to customize Style, Background and Color of the Snippet. You can Move, Copy and Delete the snippet from here. You can also resize the Snippet as per the need. • Adding Blogs to the Snippet o Go to Website Admin-> Blog -> Blog Slider Configuration. Click on Create button to create a new Blog category. o Set Following attributes to display Blog Slider on website. • Slider Name: Slider Name • Slider Label: Set the label for the slider • Products Collection: Set the products displayed in the slider. • Collection of Blog Posts: Add the Blogs which are needed to be added in the collection. www.appjetty.com 11
USER MANUAL – Furnito Odoo Theme Step 10: Configuring Featured Products Slider Snippet • Go to Website -> Edit -> Insert Blocks -> Featured Products Slider. Drag and drop Featured Products Slider Snippet on the page where you want it. • Select the Type of slider which you want to display on the page. • Click on Customize to customize Style, Background and Color of the Snippet. You can Move, Copy and Delete the snippet from here. You can also resize the Snippet as per the need. • Managing Slider Configurations: o Go to Sales -> Slider Configurations -> Featured Products Slider Configurations. Click on Create button to create a new slider category. o Set Following attributes to display Category Slider on website. • Slider Name: Slider Name • Slider Label: Set the label for the slider • Products Collection: Set the products displayed in the slider. www.appjetty.com 12
USER MANUAL – Furnito Odoo Theme Step 11: Configuring News Letter Snippet • Go to Website -> Edit -> Insert Blocks -> News Letter. Drag and drop the Snippet on the page where you want it. • Click on Customize to customize Style, Background and Color of the Snippet. You can Move, Copy and Delete the snippet from here. You can also resize the Snippet as per the need. • You can customize every block of the snippet. You can click on any image to change the image or remove the image. Along with image you can also add Text, Document, Pictogram and Video to the snippet. www.appjetty.com 13
USER MANUAL – Furnito Odoo Theme Step 12: Advance Mega Menu Settings Step 1: Creating Mega Menu • Go to Website Admin -> Configuration -> Menu -> Configure Website Menus. In this you will find Create Button. Click on it to create a menu. • There you will have options to add Web Site, Menu Name, URL for Menu, Option to open menu in new window, Parent Menu & If the new menu is mega menu or not. Step 2: Mega Menu Configuration • Select Is megamenu…? Option to create mega menu & give configurations as required. • You can directly add URL for the Mega Menu and can also add it in New Window. • Mega Menu Type: No. of columns needed in Mega Menu. www.appjetty.com 14
USER MANUAL – Furnito Odoo Theme • Mega Menu Background: If you want background in Mega Menu you can set it from here. It can be Image or Color. o For Image: You have to upload image and it will be set in mega menu. o For Color: Hash code of color is needed to define background color. Category Slider: To display category slider, select display category slider option & additional functionalities like Slider label & Position will be displayed. • www.appjetty.com 15
USER MANUAL – Furnito Odoo Theme • Menu Icon & Colors: o To give icon to menu select option Display Menu Icon and upload image for the menu. o To change font Color for Categories & Subcategories, enable Customize Menu Color Option & give hash code for Main & Sub Category Fonts. Menu Footer: o • To display menu footer enable Display Menu Footer option and give text for the footer. www.appjetty.com 16
USER MANUAL – Furnito Odoo Theme Step 3: Mega Menu Categories & Sub Categories • Go to Sales -> Products -> Web Site Product Categories. In this you will find Create Button. Click on it to create a Product Category. o To create Main Category: Give Name of category, Click on Include in Megamenu Option, Give Main Menu as the menu in which you want to create category in. You can also give sequence No. for deciding sequence in Mega menu list. o To create Sub Category: Give Name of category and give category name in which you want to create sub category in. You can also give sequence No. for deciding sequence in Category List. Step 13: Product Image Gallery Configurations Step 1: Creating New Product • Go to Sales -> Products. In this you will find Create Button. Click on it to create a New Product. • There you will have options to add Multiple Images. After clicking that you can set multiple images for the product. www.appjetty.com 17
USER MANUAL – Furnito Odoo Theme Step 2: Add Multiple Images to the product • Click on Product Multiple Images tab. • Click on Add an item option to start adding images for the product. Step 3: Creating a new Image • After adding an item you’ll be redirected to create image pop up. • Give proper Title, Alt text, Type (Image / Video), Image and Sorting order. • If you don’t want to include this image in Custom Product Image Gallery click on More • View Exclude. • Click on Save & Close to create new image. • To create another image / video click on Save & New. www.appjetty.com 18
USER MANUAL – Furnito Odoo Theme Step 4: Creating a new Video • After adding an item you’ll be redirected to create image pop up. • Give proper Title, Alt text, Type (Image / Video), Image and Sorting order. o To create Video click on Video option. • Give proper type to video which can be of o You Tube Video o Vimeo Video o HTML 5 Video • If you don’t want to include this video in Custom Product Image Gallery click on More View Exclude. • Click on Save & Close to create new Video. • To create another image / video click on Save & New. Step 5: Panel Options • Go to Website Admin -> Configuration -> Multiple Product Image. You’ll see settings for Multiple Product Image. • Which includes settings for: o Slider Effect: Select this option to enable slider effects. www.appjetty.com 19
USER MANUAL – Furnito Odoo Theme o Thumbnail Panel Position: This drop down allows admin to select Thumbnail panel position from Left, Right or Bottom. o Play Interval of Slideshow: This allows admin to manage interval between two images in slideshow. o Enable Text Panel: Select this option to show text along with images in panel. o Thumbnail Overlay Effect: This option allows admin to choose thumbnail overlay effects from Default, B/W, Sepia or Blur. o Change Thumbnail Size: To change thumbnail height and width, enable this option. www.appjetty.com 20
USER MANUAL – Furnito Odoo Theme Step 14: Adding Different Filters in Shop • Go to Website -> Customize. In this you will find multiple options to customize your webpage. Select any option and that will be shown on the Shop page as per defined criteria. www.appjetty.com 21
USER MANUAL – Furnito Odoo Theme Front End Features • Banner Slider Snippet o With the Brand Slider Snippet display all the highly engaging brands from your store. Customize content and images for exclusive look & feel of the banner. • Multi Product Slider snippet o Add a snippet to your E-Commerce store containing exclusive products from product list. o From this snippet your customer can directly add product to the cart and can also see ratings of the added product. o Multi Product Slider snippet supports two different widths: • Full Page Width Slider • Box Width Slider • Product Slider Snippet o You can add numerous products to the slider and show them to the customers. You needs to select product types defined in the back end, the products which are assigned to that category will get displayed in the snippet. • Featured Product Slider Snippet: o With Furnito’s Featured Product Slider Snippet you can display products in 4 different categories along with individual product slider for every category defined in the backend. Customer can directly go to the displayed product and buy it from thereon. Category Slider Snippet o Display Trending Categories of your Store with this slider snippet. You can add categories to the slider from back end and name the slider as requirement. Customer will be able to directly navigate to the category from the categories that are on display. News Letter Subscription Snippet o Let your customer follow daily updates from your store directly from their email accounts. With News Letter Snippet provided by our theme your customers can directly subscribe to latest happenings of your store. o You can customize the sections as per the need by adding images and various texts for the Subscription snippets. Collection Snippet o Collection Snippet will allow you to display your most fascinating collection of products to your customers. You can manipulate block images along with text of the block. You can also set navigation buttons on the snippet block as per the need and navigate customer to specific links. Brand Snippet o Display all the high profile brands’ products that your store endorses. Customer can directly shop for products of the presented brands from the brand slider. Single Banner Without slider o Display the most elite collection of your store with the single banner and highlight it for the store customers. • • • • • www.appjetty.com 22
USER MANUAL – Furnito Odoo Theme • Blog Slider snippet o Display the latest blogs posted by your site or related to your products with Blog Slider Snippet provided by the theme. • Testimonials slider snippet o Show the world what people have to say about your E-Commerce store with the Testimonial Slider Snippet. • Managing Product Reviews o Manage the reviews of the products provided by the users. Option to publish, unpublish and edit the reviews. • Advance Mega Menu o Make your simple menu mega menu with the help of Advance Mega Menu available in Furnito Theme. Display all the product categories and subcategories in mega menu for easy and better navigation. • Product Multiple Image Gallery o The Furnito Theme has a support for Product multiple image gallery with image zoom in/out, image full screen and video support. • Theme Customization o You can customize the theme the way you want. You can change the theme layout, Theme’s main color & Theme’s font combination. • Customizable Header & Footer o You can customize the header & footer as per your requirements for fascinating looks. You can add / delete in from the header and footer as per the needs as it is totally customizable block. You can also add links to header & footer content for speedy navigation. • Global Product Search o User can search for product from any page of the website. The Search option is given in the Header Sticky menu for more powerful search. • Categorized Product List o Manage product category list as per your choice. You can make the category list collapsible to save space and make the look of the site more compact from Customize menu of the website. • Product Sorting with Price Slider o Customer can sort the products on all the product attributes provided by the admin at the time of product configurations. Price Slider can be to the website from Customize option in website. • Product Sorting with Product Tags o Customer can sort the products on Product Tags provided by admin for Sorting. NOTE: Both the Filters, Price Slider & Popular Tags will work in combination. • Product Pagination o Admin can set Pagination for the shop page from back end and let customers decide products to display from given options. www.appjetty.com 23
USER MANUAL – Furnito Odoo Theme • Products Per Grid o Admin can set product numbers which can be seen on the shop page in one grid. • Selected Filters o Customers can see all the filters they have applied to the shop page in the Selected Filters Section. They can directly remove that filter from the section also • Multiple Store Support o Admin can add multiple languages for the store and can also add currencies for it accordingly. • Customizing Store Shop Page o Admin can configure store shop page as per requirement by adding or removing things that are needed. www.appjetty.com 24
USER MANUAL – Furnito Odoo Theme Contact Us We simplify your business, offer unique business solution in digital web and IT landscapes. Live Chat Tickets •Get instant support with our Live Chat. •Visit our product page at: https://www.appjetty.com/odoo-furnito-theme.htm click on the Live Chat button for instant support. •Raise tickets for your specific question! •Send an email to support@appjetty.com or you can login to my account www.appjetty.com and click on My Support Tickets on your account dashboard, to get answers to your specific questions. Our team will work to respond to your query prompt. Customization: • If you would like to customize or discuss about additional feature for Furnito Odoo Theme, please write to sales@appjetty.com www.appjetty.com 25