Download
1 / 9
90 likes | 210 Vues
This guide provides a step-by-step process for CSUCI students to create and host web pages using student web space. It covers how to download and use FileZilla FTP software, build and test web pages locally, and upload them to your designated web space. Learn essential tips for ensuring your pages are accessible at a simplified URL, utilizing a recommended naming convention for your home page. Whether you are new to web development or looking to enhance your skills, this resource is perfect for you!

E N D
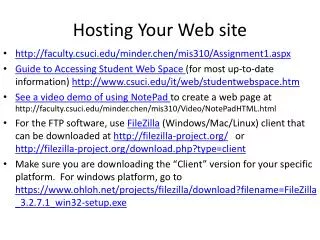
Hosting Your Web site • http://faculty.csuci.edu/minder.chen/mis310/Assignment1.aspx • Guide to Accessing Student Web Space (for most up-to-date information) http://www.csuci.edu/it/web/studentwebspace.htm • See a video demo of using NotePad to create a web page at http://faculty.csuci.edu/minder.chen/mis310/Video/NotePadHTML.html • For the FTP software, use FileZilla (Windows/Mac/Linux) client that can be downloaded at http://filezilla-project.org/ or http://filezilla-project.org/download.php?type=client • Make sure you are downloading the “Client” version for your specific platform. For windows platform, go to https://www.ohloh.net/projects/filezilla/download?filename=FileZilla_3.2.7.1_win32-setup.exe
Build and Test Your Web Site Locally • Create web pages and save them locally in a folder on your hard drive or flash drive. • Test your web pages locally. • Upload them to our Student Web Space using a ftp client. • Test the hosted web pages using a URL such as http://student.csuci.edu/~pat.smith123/ • Make any changes locally first, test it locally, and then update all changed or new files to the server again. Test the hosted pages again.
Enter the host setting • Host: student.csuci.edu • Username example: Your CSUCI user name such as pat.smith123 • Password: your CSUCI password • Port: 22 • Click on Quickconnect button
22 Host: student.csuci.edu Username example: pat.smith123 Password: your CSUCI password Port: 22 Click on Quick Connect Double-click files to upload
Quick Connet When you click Quick Connet, you will see the following dialogue box, click OK button to continue.
Select the correct folder for local site and remote site • Highlight the local folder where you store your local web site (pages) • Click on your + sign in front your remote site folder to expand it to see the public_html folder. Click on it to highlight it. Click on the plus sign
Upload • Click right mouse button on highlighted local files to be uploaded and then choose Upload • Or click on the local files one at a time to upload each file.
What is your web site URL? • The URL (i.e., web address) to the home page of your student web site is: http://student.csuci.edu/ + "~" (the tilde character) + your Dolphin User Name • Example: a student named Pat Smith with the Dolphin User Name “pat.smith123” would have the following web site home page: http://student.csuci.edu/~pat.smith123 • When publishing your home page to your web space, you are recommended to name your home page “index.html”. This will ensure that when someone goes to your web site address, the web page called index.html will be the first page which appears. It allows people to access your Web site using a simpler URL such as http://student.csuci.edu/~pat.smith123/ No file name is needed in the URL.