Download
1 / 115
1.15k likes | 1.17k Vues
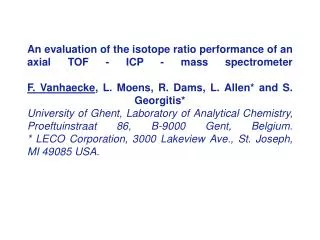
Explore the concepts and examples of instruments in biomedical and general fields. Learn about direct vs indirect measurement methods and familiar biomedical instruments like thermometers and stethoscopes. Delve into Intraocular Eye Fluid Pressure Measurement and its significance. Discover the principles behind Goldmann Applanation Tonometer.

E N D
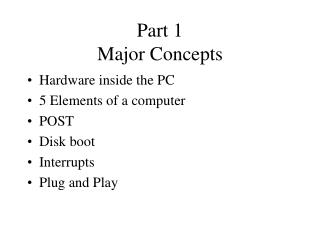
Part 1. General Instrumentation Concepts Reading Assignment: Chapter 1 in our textbook.
What is an Instrument? • Instruments: Devices that can be used to make a measurement and give quantitative (or sometimes qualitative) results • Biomedical Instruments:Devices that can be used to make measurements of biological or medical quantities and give quantitative (or sometimes qualitative) results
Examples of FamiliarBiomedical Instrumentation Clinical Thermometer Stethoscope
Classification of Instrument Operating Modes 1. Direct vs. Indirect Measurement MethodsExample #1. Direct vs. Indirect temperature measurement
Direct Temperature MeasurementClinical Mercury Thermometer Bulb is brought directly into contact with the body part or material whose temperature is to be measured, and as the mercury in the bulb exponentially changes to match this temperature, the mercury expands or contracts, pushing the very thin column of mercury up or down along a calibrated scale. Temperature measurement range: 35 – 42 degrees C
Indirect Temperature Measurement via “non-contact” Infrared (IR) Pyrometer) Laser beam indicates middle of temperature measurement “spot”. Radius of spot size is given by S = D/10.
IR Blackbody Radiation: Planck’s Law • Planck's law describes the radiation spectral density “I” at all wavelengths emitted from a black body at temperature T. As a function of frequency ν, Planck's law is written as: Note: h is Planck’s constant, k is Boltzmann’s constant, c is the speed of light
Planck’s Law (Radiation Spectral Density) Plotted for Several Values of Temperature Total Radiation R in Watts/m2 Between band of wavelengths
Typical IR Pyrometer Features: • Infrared IR Thermometer with Laser Pointer • Non Contact Temperature Measurements in degree F and degree C • Temperature Range: -25 to 716 °F (-32 to 380 °C) • Accuracy: 2%, Battery: 9V included • Dimensions: 6" x 5" x 1.5"
Direct vs. Indirect Measuring Instrument Example #2:Direct vs. Indirect Intraocular Eye Fluid Pressure Measurement
Intraocular Pressure (IOP) • Intraocular pressure (IOP) is a measure of the fluid pressure inside the eyeball (cornea). • High IOP indicates glaucoma, which is a silent, symptomless debilitating illness that results in tunnel vision and eventually in blindness if it goes untreated with pressure reducing eye drops. • We should all have our IOP checked regularly, since this is the first indication of glaucoma!
Applanation tonometry measures IOP by directly contacting a probe with the cornea of the eye. It measures the the force required to flatten (applanate) a constant area of the cornea. • Goldmann Applanation Tonometry is considered to be the gold standard in tonometry as it is the most widely accepted method of determining approximate IOP. • The Goldmann tonometer principle is based on the ”Imbert-Fick Law”: “the pressure in a sphere filled with liquid and surrounded by an infinitely thin membrane is measured by the counterpressure which just flattens the membrane.“
The Imbert-Fick Law appears in textbooks of optometry but you will NOT find it in Physics textbooks! WHY??? • This is because this pseudo-scientific “so-called” “law” was actually concocted by Hans Goldmann himself to justify the operation of his tonometer! • This law is really just Newton’s 3rd Law “you press on a stone with a certain force, it presses back on you with the same force.” • The “applanation” requirement is necessary to ensure that you are measuring only the force due to the fluid pressure inside the eye and not also the additional lateral forces exerted by the tension on the spherical corneal membrane.
Conversion from probe force in grams to mm Hg • Pressure is equal to force per unit area but one must factor in the density of mercury (Hg) which is 13.6 gm/cm3. • The probe diameter for a Goldmann tonometer is 3.06 mm. Why was this strange diameter value chosen by Hans Goldmann? THERE WAS METHOD IN HIS MADNESS, as we see below!The cross-sectional area of the probe is given by Aprobe = π(3.06E-3/2)2 = 0.7354 mm2 • Find the pressure in mmHg if the applanation force on the probe is 1 gmPressure = Force/AreaPressure = 1 gm / .073541714 cm2 x 13.6 gm/cm3 of HgPressure = 1 gm x cm3 of Hg / .07354cm2 x 13.6 gmPressure = 1 cm of Hg / 1Pressure = 1 cm of Hg = 10 mmHg • Therefore, one gram of force is needed to flatten an area equal to .073541714 cm2 when the eye contains a pressure of 10 mmHg.=> Each large number on the micrometer is in grams, where 1 gram of probe force equals 10 mmHg of IOP
Goldmann Tonometer Operation • A special disinfected prism is mounted on the tonometer head and then placed against the cornea. • The examiner then uses a cobalt blue filter in front of a slit lamp (emits a thin sheet of light) to view two green semi circles. • The force applied to the tonometer head is then adjusted using the dial until the inner edges of these green semicircles meet. • Because the probe makes contact with the cornea, a topical anesthetic is introduced onto the surface of the eye in the form of an eye drops. Patient must not rub eye until anesthetic wears off to avoid hurting eye, since there is no feeling in eye!
Eyeball is applanated when semicircles (viewed through a slit lamp) are brought into alignment so that their edges touch. That is when IOP = Fplunger/(plunger area)
Patients do not like having their corneas anesthetized! • Might there be a better way that does not require contact with the cornea? • Enter the indirect non-contact “Air-Puff Applanation Tonometer” • Not as accurate as the Goldman contact tonometer, but useful for screening patients to find which ones need to be checked more carefully with the Goldmann tonometer.
Indirect Measurement of IOP: Non-Contact “Air Puff” TonometryAir stream velocity steadily increased until cornea applanates at which time all light rays are collected by the lens and are focused onto the detector, causing detector output voltage to rise above a predetermined threshold, turning off the airstream. IOP is related to airstream velocity at time of applanation. All of this must happen quite literally within “The blink of an eye”; the air puff measurement must be complete before the opthalmic reflex kicks in and causes the patient’s eye to involuntarily close.
Problems with the Air Puff • Abandon the Air PuffLet’s face it, most patients dread the air-puff tonometer. (The cartoon at left from our colleague, Scott Lee, O.D., in his entertaining book, Sight Gags: Cartoons for Eye Doctors and Their Patients, tells the tale.) • Although the air-puff has served as a reasonable IOP “screening device” for many years, it is not at all patient-friendly, and patients anticipate the air puff and often close their eyes even before the air puff arrives! • We have waited nearly 30 years to see a technology evolve that makes the air-puff tonometer obsolete.
Back to Direct Measurement of IOP: Rebound Technology • The Rebound Tonometer was developed in Finland circa 2006 http://www.icaretonometer.com • Required a decade of development by Finnish MD Antti Kontiola. “Icare” Company. • Determines IOP by bouncing a small plastic tipped metal probe against the cornea. Probe is DISPOSABLE, so this eliminates the need for disinfecting the probe. • The device uses an induction coil to magnetize the probe and fire it against the cornea. • As the probe bounces against the cornea and back in to the device it creates an induced voltage waveform from which the intraocular pressure is calculated.
Rebound Technology, Cont’d • Software analyzes the probe deceleration, contact time and other parameters of the probe while it touches the cornea. The deceleration and other rebound parameters of the probe change as a function of IOP. In simple terms, the higher the IOP, the faster the probe decelerates and the shorter the contact time. • The device is simple, cheap, portable, and easy to use. • Anesthesia is not needed since the touch of the probe is so gentle; the measurement is barely noticed by the patient! • It is particularly suitable for children and non-compliant (old and confused) patients.
6. Null-mode vs. Deflection ModeNull-mode Instrument • The purpose of any null mode instrument is to act like a laboratory balance scale, indicating when the two quantities are equal. The laboratory scale balance beam doesn't actually weight anything; rather, it simply indicates equality between the unknown mass and a pile of standard (calibrated) known masses. Balance beam acts as a “null detector”, its scale need not be accurately calibrated, but it must accurately indicate the “null” or balance condition.
Null-Mode Voltmeter The voltage across R2 is to be measured in the “high resistance” circuit consisting of the battery, R1 and R2. Adjust voltage source until no click is heard in headphones when switch is operated. At this point the adjustable source voltage is equal to the voltage to be measured (the instrument is “nulled”. The audio transformer increases the input impedance of the headphones, but note that this audio transformer DOES NOT load down (alter the voltage in) the circuit being measured when no click is heard, since at that point there is 0V across the transformer, and so NO CURRENT flows through it, no matter how low its impedance!
Null detector can be any kind of voltage/current sensing device. It need NOT read voltage accurately or linearly, but it must indicate when the voltage across it goes to 0.If possible, the sensitivity of the null detector should be increased as a null is approached to get the most accurate null possible. • Notes: • Impedance of null detector element need NOT be high, since it does not load down the circuit whose voltage is being measured when it reads “0” (nulled condition). The null detector need not read accurately. • Likewise, the voltmeter used to measure the adjustable voltage source value need NOT be of high impedance, since it is across a voltage source, not across the high resistance in the circuit. However, it must be very accurate.
Deflection Mode Instrument • While a null-mode instrument is as accurate as its known standard value that the unknown quantity is balanced against, it is an iterative process that can take time to complete. • The deflection-mode instrument is faster but less accurate. The best example of a deflection mode instrument is a spring-loaded scale that measures weight.
Deflection Mode Instrument Example #1: Hanging Spring Scale Spring scale operation is based upon Hooke’s Law for a spring: Fspring = kx Where k is the “spring constant” (N/m), and x is the deflection of free end of the spring from its 0-force (equilibrium) position. Approximate deflection is read along analog scale
Deflection Mode Instrument Example #2: D’Arsonval Ammeter Movement Developed in 1882 Jacques-Arsène d'Arsonval with a stationary permanent magnet and a moving coil of wire, suspended by coiled hair springs. The concentrated magnetic field and delicate suspension made these instruments sensitive and they could be mounted in any position. By 1888 Edward Weston had brought out a commercial form of this instrument, which became a standard component in electrical equipment. This design is almost universally used in moving-vane meters today. PERHAPS NO OTHER INSTRUMENT THAT WAS DESIGNED A CENTURY AGO IS STILL USED IN ITS SAME ORIGINAL FORM!
Because the D’Arsonval meter movement consists of a spring and a mass, its governing equations for needle movement are described by a 2nd order differential equation. The meter movement is inherently underdamped without adding some sort of damping mechanism. Thus the step response of the meter can be oscillatory about the final needle resting place; when the meter is suddenly connected across a dc voltage level, the needle will overshoot the final value, then undershoot, and gradually die down to read the desired value, which is very annoying for the user of the meter. To sufficiently damp the system so that the needle does not take long to settle, friction must be introduced. However this slows down the meter response. A better solution is apply more friction when the needle moves fast and less friction when the needle moves slow. This can be done using “Dynamic Aluminum Vane Damping” shown on next slide.
Dynamic Needle Damping: Aluminum damping vaneAs aluminum closed loop moves in the dc magnetic field, an induced current flows in the loop, creating an opposing torque that is proportional to velocity of the needle. This serves to damp the speed of the needle when it is moving fast, but not damp it so much when it is moving slow. This reduces the chance of needle oscillation about its equilibrium point.
+ Vo/2 - + Vo/2 - /+ Vo/2 -2 -
Practical Signal Notch (Band Reject) Filtering Example • 60 Hz ac power-line interference is always present in indoor biopotential measurements. • In special situations, this kind of interference can be neglected, but this is not a general rule. • In laboratory experiments and clinical analysis, it is hard (and expensive) to isolate the subject of measurement from electrical fields produced by a power line. • In human biopotential recordings, it is common practice to apply a 50/60 Hz notch filter to reduce this kind of interference. • In such cases, there is no considerable distortion observed on the recorded signal
Bootstrapped High Q Twin-”T” 60 Hz Notch Filter See Bootstrapped Twin “T” Frequency Response. (Disconnecting wire from output of op amp to junction of C3and R3 and grounding junction of C3 and R3 yields much broader (Low Q) Twin “T” Response.
Noise-Cancelling Stereo Headphones S1 selects between noise cancelling mode where external environment cannot be heard, and noise amplifying mode, where external environment CAN be heard. J1 is microphone jack that is directed out Into the noisy environment – it picks up Noise only, not the desired audio signal. R23 is audio volume control, R14 is noise cancelling adjustment, J2 is audio input jack and J3 is the audio output jack.