Download
1 / 21
210 likes | 303 Vues
Learn how to control your phone through the web using the CallManager End User Page. Manage Speed Dials, Fast Dials, and Address Book. Easily log in and customize settings for efficient phone use.

E N D
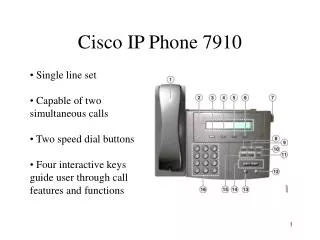
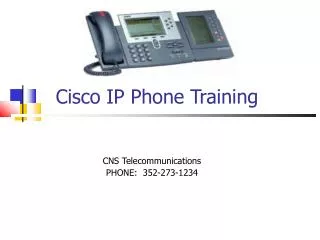
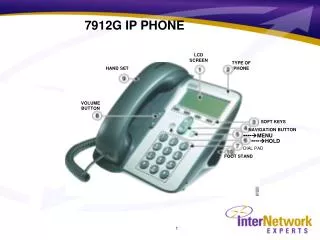
7912G IP PHONE LCD SCREEN TYPE OF PHONE HAND SET VOLUME BUTTON SOFT KEYS NAVIGATION BUTTON MENU HOLD DIAL PAD FOOT STAND
CCM End User Page • The CCM user page allows you to control your phone through the web. There are several things you can do through this page. • Examples: Speed Dials, Fast Dials, and Personal Address Book. • To log in to the CallManager End User Page: • Open a browser • Type in the URL, http://phones.katyisd.org/ccmuser • Your User Identification should be your 7 digit phone number. • Type in the default password “12345”
Cisco IP Phone End User Options-Step 1 Enter your User ID ( 7 digit extension) Your Password is “12345” Click the Log On Button
Cisco IP Phone End User Options-Step 3 & 4 Select the Pull Down Menu Arrow, scroll down to My Address Book Click the Continue Button
Cisco IP Phone End User Options Step 5-Enter a “9” Step 6-Enter your User ID or 7 digit phone number Step 7-Enter “12345” Step 8-Click Subscribe to add the Address Book
Cisco IP Phone End User Options Step 9-Select “Return to the Menu” Link
Cisco IP Phone End User Options Select the Pull Down Menu Arrow, scroll down to Fast Dials Select Continue
Cisco IP Phone End User Options Enter a “9” Enter your User ID 7 digit phone number Enter “12345” Click Subscribe to add Fast Dials
Cisco IP Phone End User Options Select Return to the Menu Link
Adding a Fast Dial Entry Select the (Unassigned) Link next to the Index Number of your choice
Adding a Fast Dial Entry Select Address Book Entry
Adding a Fast Dial Entry Select Phone Number
Adding a Fast Dial Entry Select Insert
Adding a Fast Dial Entry Notice Confirmation of Entry into Fast Dials, close Pop Up window.
Adding a Fast Dial Entry • Entry now appears in Fast Dial list. • You can access Fast Dials by pressing the Services Hard button on IP Phone.