Download
1 / 28

E N D
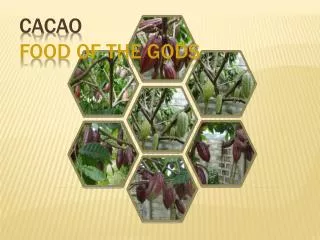
Cacao seeds are borne in pods that hang from the branches of the cacao tree. When the red pods become deep red or hen yellow-orange and green pods become yellow, they are ready for harvest. When processed, the seeds or beans are used as flavoring materials and as chocolate beverage. These are also used in the manufacture of cosmetics and pharmaceutical products. Local supply of cacao is inadequate for our industrial needs so most local processors of cacao and chocolate products have to import cacao beans and cacao grindings. The common varieties of cacao in the Philippines are the following:
A. Criollo — this comes in three (3) types: Venezuela, Nicaragua and Trinidad. • It is considered best for its flavor and aroma, but is susceptible to pests and diseases, so it is avoided. • The pod is elongated, thin-husked and pointed, usually with constriction near the base. • The ridges of the pods are pronounced and sharper than those of Forastero. • The pods come in two (2) colors: white when ripe is generally yellow, while those of the red criollo change from purple to yellowish orange. • The Seeds are pale yellowish white or pinkish yellow.
B. Forastero — Amazonian and Amelonado are among the Forastero.This is more resistant to insect pests and diseases, and other adverse conditions than Criollo. Oftentimes, this is moreproductive. • The pod has smooth appearance, less rounded in tip and square base. • It is larger in size than the Criollo. • The color is purple or dark, becoming yellowish between the ridges as it matures. • The seeds are large, somewhat rounded, and the color is purple or with purplish tinges.
C. Trinitario — is a cross between Criollo and Forastero with features similar to Criollo (this exhibits the characteristics of a hybrid and is perhaps the richest source of materials for the improvement of cacao for breeding). • Famous for its well-balanced conditions of hardiness and quality products. • The seeds are variable in character. • D. Upper Amazonian Hybrid (Malaysian or Sabah Hybrid). Early bearing, high yielding and more vigorous.
Soil Requirements • The better the soil structure, the deeper the root penetration and therefore the greater the volume of soil is exploited by the roots for moisture and nutrient uptake. Clay loam soil of good structure is best for cacao since the aggregate of sand, silt and clay provides large pore spaces for aeration and drainage, and at the same time retain moisture. • Organic matter in the surface layer is important for cacao growth. To preserve the organic layer, the soil must be well shaded to slow down the rate of natural breakdown of waste leaves. Cacao is not good for water-logged areas or places with prolonged drought. Soil is favorable if ph is 6.0-7.1 A ph value 4 or less is not suitable for cacao. Where bananas and corn grow luxuriously, it is a sign that cacao will grown successfully in that place.
Climatic Requirements– Cacao is strictly a tropical plant; it grows mostly within 10° of the Equator (lat 20°N and 20°S), within temperature of 20°C (between 22°C-32°C) Cold limit is 21°C, not lower than 15°C at coldest month and an absolute minimum of 10°C. For hot limits, temperature ranges from 38°C-40°C: growth is abnormal at a constant temperature above 31°C, although good growth can be had up to 35°C, with a fluctuating temperature between day and night. Elevation – Cacao thrives up to 1,000 meters above sea level as long as temperature is not lower than 21°C. Ideal elevation is 600 m above sea level. Rainfall – if the monthly rainfall drops below 10 cm per month, cacao will suffer water stress, leaves begins to fall. Areas under Type IV climate are suited for cacao production provided these are not within the typhoon belt areas.
Relative Humidity – cacao needs humid temperature; a relative humidity of about 80% as in a tropical forest or that provided by an artificial shade. Thus, cacao needs shade for growing. Propagation and Care – The most common way of propagating cacao is by seeds. Other ways are by cutting, budding or marcotting. Hybrid seeds are recommended.
Seed Selection – If hybrid seeds are not available, seeds for planting must be well selected, that is, they must come from big pods obtained from trees that are highly productive, bearing regularly and free from pests and diseases. Size of pod is determined by using a pod index, i.e. number of pods to make a kilo of dried beans. If 25 pods yield one kilo dried beans, this is considered good-sized pods. Fresh seeds must be large and weigh at least 2.5 grams including mucilage. Criolle seeds or hybrids with high criolle character must be avoided because of its susceptibility to pests and diseases.This can be checked through the seed color after the seed coat is removed. Non-Criolle variety is violet.Violet cacao seeds are generally that of Trinitario or Forastero. Seed Planting – Cacao seeds do not last long, so they must be planted soon. They germinate as soon as the fruits ripen. Some germinate even while in pods. Seeds are viable normally until up to six (6) days after harvest; viability may be extended up to 8-10 weeks if the pods are stored at 21°C-24°C.
1.To have uniform germination, the mucilage embedded on the seed coat, which contains germination inhibitor, must be removed. This is done by putting the seeds in a bamboo basket for a day during which time the mucilage softens. • 2.Rub the seed with dry sand or sawdust, then wash. • After removing the mucilage, spread the seeds in wet gunny sacks under shade and keep moist. • 3.When the radicle breaks through the seedcoat, the seeds are ready for planting in polyethylene bags (earlier arranged in beds of about 1 meter wide and any convenient length). A one-meter wide space between beds should be provided to facilitate watering, weeding, fertilization, pest and disease control, etc. • 4.Bags must be perforated at the bottom for drainage. The longer the time the seedlings will be kept in the nursery, the bigger the bags must be. • For 3-4 months = size 6″x8″ bags • 4-6 months = size 8″x12″ bags • .
Care of Seedlings Light – initial shade intensity is about 80%. Nurseries must be protected from direct sunlight and strong wind. Coconut leaves may be used for the purpose. After the first whorl of leaves has hardened, reduce the shade gradually. Reduce the light to 50% from 6 weeks-8 weeks from germination. .
Water– watering must be early mornings and afternoons. Take care not to saturate the rooting medium. Discard poorly developed seedlings. When leaves are pale, it means the plant has nutrient deficiency. Apply weekly: 15 grams urea or 30 grams ammonium sulfate dissolved in one gal of water for 200 seedlings. To protect the seedlings from pests and disease, spray with fungicide or insecticide if necessary. After 4-6 pairs of leaves have come out (6-8 months old) the seedlings are ready for transplanting. Remove shade gradually one month before transplanting to harden the seedlings and prepare them for field conditions. .
Land Preparation – If the soil is forest land with a good amount of organic matter on the surface layer, no tillage is necessary. However, if cash crops are to be planted along with cacao, a thorough preparation is necessary. Plow and harrow the land at least 2 times to pulverize the soil well and suppress the growth of weeds. Roads and Drainage – In rolling lands, base contour lines are first established to serve as guide in the establishment of roads, drains and rows of cacao and shade trees. Lay out main roads and in-plantation roads adequately to facilitate management and minimize operational costs. Main roads may be established horizontal to in-plantation roads and laid out a convenient distance of about 100 meters apart, and in-plantation roads may be set at about 50-75 m apart. .
Distance of Planting, Staking and Planting System – Some studies recommend that cacao can be laid in rows 2 meters apart if in open areas, while under coconut trees 2.5 m away from the base. Another study favors close planting followed by thinning, as advantageous as higher yield per unit area is obtained earlier, and farmers have a chance to eliminate or top-work less productive trees. Other studies even recommend 3×3 m or 3×4 m apart. Staking – Align cacao rows by using thin rope or string as planting guide, wherein distances desired are properly identified with a knot or other marks. As this guide is stretched across the field, pegs are driven though where the markers are set, until the whole area is laid out with pegs or stakes. In sloping land, hedge planting can also be employed. For land less than 15° slope, 3-row hedge with 4 m space between hedges; for land with 15°-30° slope, 2-row hedge with 4 m space between hedges; and one-row hedge for slopes up to 35°. {CONT}
Temporary shade trees are grown 6-12 months ahead of cacao to provide shade to the seedling at planting time. These may be banana, ipil-ipil, or madre de cacao (kakawate). In spots or points previously staked for shade trees, sticks of madre de cacao are about 1.5 m long, or 3 months old giant ipil-ipil are planted. Where overhead shade is insufficient, 3-5 seeds of rapidly growing temporarily.
Fertilization • Apply 20-30 gms ammonium sulfate in a shallow trench around each plant 2-3 months after transplanting. • In the first year, apply 200-300 gms per tree the following: • ammonium sulfate – 5 parts (or urea: 2.5 • parts) • single superphosphate – 5 parts • potassium sulfate – 2 parts • magnesium sulfate – 1 part • In the second, third and fourth year, increase the fertilizer to 450, 600 and 900 gms per tree, respectively. Divide the recommended quantity in 2 or more equal parts. • Apply the first part at the start of the rainy season and the rest at equal intervals later in the season. If the above fertilizers are not available, complete fertilizer 14-14-15-15 (N-P-K-Mg) will do just as well. • Apply one half of the quantity given above, that is, • 225 gm per tree for year 2 • 300 gm per tree for year 3 • 450 gm per tree for year 4
Pruning – One year after transplanting, branches come out. The first pruning is done to control the height at which the first branch (sometimes called jorquette) is formed. This first branch must be at least 5 ft, or else, harvesting and maintenance will be greatly hindered, that is, spraying and harvesting. When 5 or more branches have grown, prune the weak ones leaving only 3 or 4 well-developed branches. Pruning is done with a sharp saw, during dry months (or after harvest). This controls the shape and height of the tree to facilitate work. Surfaces that have cuts must be painted with coal tar or lead paint. Fan branches in a jorquette must also be controlled. Overcrowding results in ineffective utilization of the sunlight. Leaves of Overcrowded branches become liabilities rather than assets with respect to nutrition. New growths appear at the cut surface after some time. Cut them early unless they are used to replace a dead or unhealthy branch. All suckers (chupons) that may arise after pruning must be removed as early as possible. Avoid heavy pruning. Reduce shade continually at the beginning of the second year until only 1/4 (25%) of its original cover is left at the beginning of the fourth year.
Harvesting – Harvest only mature pods. Pods are ready 170 days from pod setting when red pods turn deep red or yellowish orange, and green pods turn yellow. A hollow sound is produced when pods are tapped as the seeds are separated from the inner walls of the pod. Use a sharp instrument (knife, bolo, scythe or shear) for harvesting. A knife attached to a pole could help in reaching the high branches. Cut pods as close to the stem as possible, but take care not to hurt the flower cushions, pods and the tree itself. Remove infested pods and separate beans collected from infested pods because these are inferior in quality. Fruits do not mature at the same time. Harvest pods when they are at uniform ripeness, and prevent an exercise number of over ripe pods before the next harvest. Ten days to 3 weeks (10-21 days) intervals are recommended. About four (4) harvest cycles may be made per season.
Pod Breaking – After harvest, the pods are brought to the field for breaking by a wooden mallet. Then the beans are scooped out of the husk and the placenta removed. Collect the beans in a container for fermenting. Fermentation – The characteristic cocoa flavor and aroma are developed during fermentation. During fermentation, the pulp breaks down with drainage of sweating. With the rise in temperature, pulp sugar is fermented into alcohol. The bean dies and the seed color changes, developing into the nice chocolate flavor. There are two ways of fermenting cocoa beans:A. Wooden Basket Fermentation. For small planters where harvest is not so big for bigger containers.
Line the baskets with banana leaves, put beans inside it and cover. • After 24 hours, transfer the beans to another (similarly lined) basket so as to mix it thoroughly. • Continue same process until the 6th or 7th day when fermentation will be complete. • B. Heap Fermentation • Spread banana leaves on the ground; heap the beans on the leaves and cover with banana leaves again. • Keep the leaves in place by putting wood weights on top. Repeat after 24 hours and so on until fermentation is complete when a brown ring appears at the edge of the cotyledon when cut crosswise. This takes 6-7 days. • C. Box Fermentation • For big plantations, wooden boxes have sides and bottom perforated for aeration and drainage of sweating. These are arranged side by side for convenience in transferring the beans from one box to another every 24 hours, mixing them thoroughly to have good fermentation.
Drying – After the beans are fermented, they are dried. Washing is not necessary. Drying should be slow and even, by occasional turning of the beans. Collect the beans in the evening to avoid dew moisture. Spread them again next morning. Bamboo mats or nylon net are recommended. Where sun drying is not possible due to weather, use artificial drier. • Storage – When the beans are dried, store them in loosely woven, jute bags; place them on wooden floor in clean, well ventilated room free from storage pests. Do not store them with copra, hide or tobacco, etc., as these will contaminate their odor. • Quality Requirements of Cacao for Manufacturers • Size — plump and even, with less than one gram fermented dry weight. • Shell — loose and intact. • Cotyledon — friable, open textured and chocolate brown with characteristic choco flavor.
Nutritional Deficiency • Cherelle Wilt — young pods or cherelle may wilt or ripen prematurely. • Cause: inadequate water supply and nutrient deficiency, especially when a large number of cherelle is found on the tree and the demand for nutrients and water is big. • To control: • periodic application of fertilizer, especially potassium and phosphorus during fruit setting and leaf flush • irrigation
PESTS AND DISEASES • A. Pests • 1. Cacao pod borer (most serious pest especially in Mindanao). Description: • Female is very small, about 7 mm long; • Adult has greenish-brown forewings with yellow dots and white lines. • Female lays eggs on the furrows of pods. Eggs hatch in 6-9 days. • Larvae bore inside pods, feed on seeds. Become full grown 15-18 days, are 10-12 mm long. • They get out of the pod and pupate in small membranous cocoons on the leaves, trunks and fruits. Pupal period is 5-8 days. • Damage: • Infected tissues harden and seeds do not develop properly. • Later, pods turn black and become susceptible to fungal attack. • Control: • Spray Sevin 85 WP 3-5 tbsp in 5 gal water; • Wrap pod in plastic bag; or • Endosulfan, chlorpyrifos or malathion are used at recommended dosages. • Field cleanliness
2. Cacao Shot-hole Borer (Davao). Description: Tiny white beetle • Damage: Larva attacks the base, usually 30 cm from the ground level of th plant. Barks are stained down. Tree dies within a year. • Control: Spray Thiodan 3-5 tbsp per 5 gal water • 3. Capsid (or mosquito bug). Description: • 8mm long • nymphs are yellow • adults are brownish-yellow • eggs are laid singly or in pairs into the soft tissue of the young growing plants. • Damage: • Causes toxicosis of cacao in the Philippines • Sucks the juice of pods, shoots and leaf stalks • Causes water soaked lesions that rapidly turn black • Lesions in pods are round while those on stems are usually oval and larger. • Heavy attack on young pods prevent their maturation. Affected parts dry prematurely.
Control: • Spray Thiodan, endosulfanchlorpyrifos or Malathion at recommended dosages • Field sanitation • Collect and burn infected pods or stems. • 4. Curculionid beetle. Description: Adult is about 10 mm long, blackish blue with a t-shaped gray band at the back. • Damage: • Feeds on very young leaves and lays eggs at the base of the trunk, especially on wounds. • Larvae are found at the lower part of the trunk where they bore through.
DISEASES • 1. Black Rot or Stem Canker. Description: Characterized by round brown spots which enlarge concentrically and evenly Demarcation between healthy & affected areas is abrupt. • Damage: • Damaged tissues are soft and infected pods become black, hard and dry. • A reddish brown liquid oozes on split bark of trunk or branches. • Spread may be thru direct contact, air current, rain or insects • Damage is more severe during humid weather. • An abundant downy growth of fungus is present at this time. • Control: • Remove infected stems and fruits, burn. • Spray Dithane Z-78 at 40 gms/20 1 water during flower time every 2 weeks. • Avoid heavy shading • Do regular pruning of shade trees and maintain good drainage to reduce excessive humidity. • 2. Vascular streak – dieback (suspected fungus). Description: Brown streaks in the woody or vascular tissue.
Damage: • one or two leaves are yellowing on the 2nd or 3rd flush below the growing tip. This develops into small sharply defined green spots scattered over a yellow background. Diseased leaves fall, short lateral shoots grow from the leaf axils. • Unhardened leaves in the young flush of a diseased shoot may show an oak leaf pattern due to the death of tissue between the lateral vein. • 3. Mold. • Damage: • Most affected are beans which develop unpleasant flavor and are therefore useless. • Affect germinated beans and improperly dried beans. • Control: • Keep beans in well ventilated place. Thoroughly dry beans and place in clean jute sack or polyethylene bags.
For further information including plant and planting materials, contact: CocoaPhil1977 Commonwealth Ave., Diliman, Q.C.Telefax: (02) 952-6397Email: info@cocoaphil.orgWeb: www.cocoaphil.org The National Seed Industry Council has released a new variety of cacao, UF 18. It has big beans (approx. 80 dry beans/100 grams) and has good yielding ability. There are other NSIC recommended varieties with good potential. For more information, contact: Alfredo “Fred” T. Corpuz:Phones: (082) 286-2135; (082) 293- 1294, (082) 275-7525Mobile: 0905- 2939551Email: dpropagator2003@yahoo.com or alfred011956@gmail.comBureau of Plant Industry – Davao National Crop Research and Development CenterBagoOshiro, Davao City.TeleFax: (082) 293-0108