Download
1 / 24
260 likes | 722 Vues
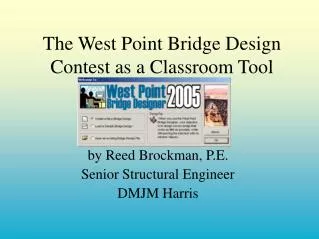
The West Point Bridge Design Contest as a Classroom Tool. by Reed Brockman, P.E. Senior Structural Engineer DMJM Harris. The Design Process. Steps 1 & 2: What's the problem?.

E N D
The West Point Bridge Design Contest as a Classroom Tool by Reed Brockman, P.E. Senior Structural Engineer DMJM Harris
The Design Process
Steps 1 & 2: What's the problem? Steps 1 and 2 do not get directly addressed by the West Point Designer – someone determined that there will be a truss bridge on this spot! A good engineer would question the assignment. Why this type of bridge? Why a bridge? Why do anything?
Step 3: Develop Possible Solutions • Every option in this program has a significance in terms of strength and price. • Site / Substructure Development • Roadway elevation • Types of Supports (2 types) • Pier • Superstructure • Materials (3 kinds) • Steel shapes (2 types) • Steel sizes (many)
Step 4: Select the Best Solution • There are literally millions of combinations of the different choices in the program. • How can you reduce the choices? • Any mathematical relationships between choices and cost? • Any physics principles that can help reduce the choices? • Is there necessarily a BEST solution? • Does anyone really expect to get that best solution on the first try?
Steps 6 & 7: The big test - - WHY?!!! Materials Report Cost Report
Step 8: REPEAT AD NAUSEUM
Hit a wall? Question that "best solution!"
And then you win. Simple.
And then you win. Simple.
and the national winner... (just what I was thinking!)
Using the West Point Bridge Designer for teaching Construction Technologies
Should be self-explanatory
I know... you still need to explain shear and torsion
Okay, the program doesn't require the use of any tools, but it is easy enough to discuss using the level, square, plumb bob, tape measure and strain gauge in terms of the bridge designs.
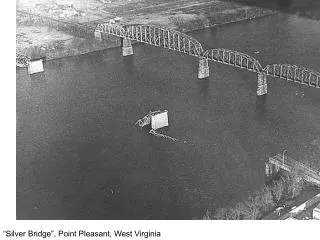
Just ask "What are those big round things we keep calling joints?" More discussion will be needed on this, and its best with pictures or samples.
What happens to the bridge when it deflects? In real life, will it snap back to its original shape? What effect could those power lines have on the bridge? How much does it weigh?
This program closely follows the current AASHTO LRFD requirements, intentionally neglecting deflection. Discussing this opens the door for discussing all other codes.
The "help" in this program spells out how to determine the forces in each member, but to do it by hand is just a mix of basic math and geometry.