Producing a Hand Cut Silkscreen
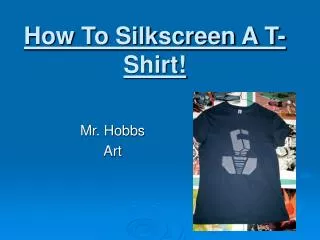
Producing a Hand Cut Silkscreen. Welcome to the exciting and creative world of screen printing. As you may know we are actually going to create and print our own t-shirt using professional techniques and equipment. So, put on your creative caps and let’s make a t-shirt!.


Producing a Hand Cut Silkscreen
E N D
Presentation Transcript
Producing a Hand Cut Silkscreen Welcome to the exciting and creative world of screen printing. As you may know we are actually going to create and print our own t-shirt using professional techniques and equipment. So, put on your creative caps and let’s make a t-shirt!
Make sure that you have completed your layouts for the project. Be certain that the teacher has graded your design and approved it for production. Remember your layouts should include overlay sheets to indicate color placement and registration marks for alignment purposes. Before we begin let’s look at some preliminaries:
You will need a few items to begin the process: 1. An x-acto knife 2. One sheet of Sta-Sharp Green screen printing film slightly larger than your design. 3. Several small pieces of masking tape. Using your completed layouts tape the Sta-Sharp film emulsion (dull side) up to your black outline layout. It is a good idea to tape the paper to the base(Plastic side) of the film. Using your x-acto knife carefully cut down each side of the black outline and peel away the emulsion. Remember to cut hard enough to penetrate the emulsion but not so hard that you pierce the base. Gently lift the film away from the layout and run your finger over the base. If you can feel your cut, you are pressing too hard with the knife. Piercing the base or cutting too hard will ruin the stencil. Now that you layouts are in order it’s time to begin the stencil preparation.
Continue cutting the black outline and peeling away the emulsion until the entire design has been completed. Don’t forget to cut out the registration marks for alignment. Now have the instructor check your work!!!!!!!! Are you ready to cut your additional colors? Great! Let's go! Remove your layout from the completed black stencil. Tape that completed stencil to a clean sheet of white paper with the emulsion (dull side) up. Obtain another piece of Sta-Sharp green film slightly larger than your design and tape it on top of the black stencil emulsion (dull side) up. Make sure that the tape does not rest on the black stencil itself. Tape the new stencil to the paper instead. If the tape covers a prepared stencil it could remove the outline you worked so hard to cut when you remove the tape. Stencil Preparation
Cut each color to the center of the black outline. We want to bleed the color into the black to avoid any voids of color Since the black outline will be printed last you don’t need to leave a space for the interior details as you cut your colors simply cut and peel the entire silhouette. Remember not to penetrate the base as you cut your stencils. As you complete each color have the instructor check your work. Continue this process for each color remembering to cut out the registration marks for alignment. After all of the stencils have been cut out have the instructor check your work at least one more time. Stencil Preparation
Now that you have completed your stencil preparation it is time to stretch your screen frames with the fabric. Here are the items you will need: 1. Wooden screen frames 2. Stapler loaded with staples. 3. 8XX polyester screen fabric about one inch larger than the exterior of the frame. If you are printing more than on shirt you will need one frame per color. If not, one large screen frame will be sufficient. Check to be sure the screen frame is clean and free of old ink or fabric (you may need to remove the old fabric and clean the frame). Once the frame has been cleaned obtain a piece of polyester 8XX fabric about one inch larger than the frames exterior. Stretching a Frame
It is vital that the fabric is stretched and attached with equal tension in order to avoid any damage to the fabric. Locate the one loose corner and stretch the fabric toward the corner and place one staple there. Beginning with the center of one of the remaining two sides pull the fabric Across the frame and attach one staple. Continue moving to the left and right stretching, pulling, and stapling until both sides have been uniformly stretched. Attaching the Fabric • Lay the fabric over the frame aligning two of the sides. • Now begin stapling the fabric to the frame along those two sides laying the staples very close together and parallel to the sides of the frame
Now that your screen frame is ready for use take a moment and have the instructor check your frames. Remember the material must be very tight across the frame. Let’s attach your stencils to the fabric. Here are the items you will need: 1. Frame(s) with fabric. 2. Sta-Sharp green stencils 3. Two cotton pads. 4. Adhering Liquid. 5. Your Layouts 6. Masking tape. The alignment of the stencils on the fabric is critical to a quality print. Tape the black outline layout to the table. (position here does not matter) Now place your frame over the layout squaring it with the picture and leaving at least one inch between the top inside of the frame and the design. With the frame in place take a piece of tape and run it along the top edge of the frame to set the frame position. Adhering your stencil
Lift the frame and place your black Sta-Sharp green stencil over your black layout (dull side up) Once again align your frame to the taped mark. Fold both of your cotton pads into fourths. Soak one of the pads with adhering liquid. Using the wet pad begin applying the adhering liquid to the stencil through the screen using a right to left motion. A little more on adhering • Immediately dry the stencil using the dry cotton pad. • Continue working from Top to bottom and left to right until the entire stencil has been adhered to the fabric.
Each color stencil will need to be adhered to the fabric in the same manner as was previously described. Remember to move the frame along the tape alignment mark as you adhere the stencils to maintain alignment. After all the stencils have been adhered please have the instructor check your progress. The stencils will require a 15 minute drying time before you can proceed. Moving Through the Process
Once the drying time has elapsed you will need to remove the plastic base from each stencil. The open areas of the frame will to need to be covered with masking tape. A Few Last Steps for the Stencils • Be sure to overlap the edges of your stencils (1/4 inch) with the the masking tape.
Before you print your t-shirt have the teacher check your frame(s) You are now ready to print. Here are the things you will need: 1. Your comprehensive layout. 2. Spray adhesive. 3. Your frames with stencils attached 4. Various ink colors. 5. One squeegee for each color. 6. Your T-Shirt 7. Masking Tape Attach your black layout to one end of the screen printing unit using the spray adhesive. This layout will be used for alignment purposes. Don’t forget to have your color comprehensive layout in hand as you will need to know the color of each stencil. Load your frame onto the screen printing unit stencil side down. Align the first and lightest color stencil to the the layout attached to the base. (Remember you will print the lightest colors first finishing with the black outline.) Lock down the frame using the lock down screws. Time to Print Lock Down Screws
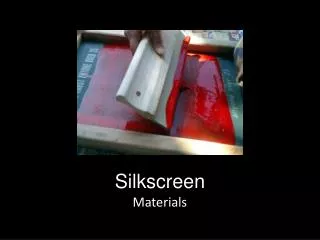
Spray the other end of the printing surface with spray adhesive (lightly). Load and center the desired side of your t-shirt onto the base. Place a small amount of ink onto your first stencil. Now spin your frame to the end holding your shirt. Lower the frame. Place your squeegee at the top of the stencil ahead of the ink and firmly pull across the stencil at about a 45 degree angle. Printing Your Shirt Squeegee
Once you have printed the first stencil gently lift the frame. Return the frame to the opposite end and align the next color. Repeat the printing procedures until all of the stencils have been printed onto the t-shirt. Remember to print the black outline last. Now that you have finished printing your t-shirt it is time to dry the print and heat set the ink Check the dryer settings. The speed should be set to 3.5 and the heat should be set to 7.5. Pull your shirt of the printing base by the top of the shirt. Place the shirt on the conveyer belt of the dryer printed side up to dry the shirt. Printing Your Shirt continued…