Download
1 / 42
640 likes | 1.47k Vues
Cakes and Icings. Contents. Content -------------------------------------------------------2 Cakes and Icing -------------------------------------------- 3 Basic Mixing Methods - -------------- --------------------- 4 T wo-Stage Method -------------------- ------------------- 5

E N D
Contents • Content -------------------------------------------------------2 • Cakes and Icing-------------------------------------------- 3 • Basic Mixing Methods ------------------------------------ 4 • Two-Stage Method -------------------- ------------------- 5 • Baking and Cooling---------------------------------------- 11 • Cake Formulas -------------------------------------------- 13 • Brown Sugar Spice Cake ------------------------- 14 • Chocolate Butter Cake -----------------------------15 • Old-Fashioned Pound Cake ----------------------16 • Old-Fashioned Raisin Pound Cake -------------17 • Chocolate Pound Cake ----------------------------18 • Two-Stage Method ----------------------------------------19 • Devils Food Cake -----------------------------------20 • Foaming Methods -----------------------------------------21 • Chocolate Genoise ----------------------------------------22 • Sponge Roll or Jelly Roll Sponge ---------------23 • Milk and Butter Sponge ----------------------------24 • Jelly Roll Sponge ------------------------------------25 • Yellow Chiffon Cake --------------------------------26 • Chocolate Chiffon Cake --------------------------- 27 • Angel Food Cake ------------------------------------28 • Chocolate Angel Food Cake----------------------------29 • Icings: Production and Application -------------------- 30 • BUTTERCREAMS -----------------------------------------31 • Decorator's Buttercream---------------------------32 • Meringue-Type Buttercream ----------------------33 • Chocolate Buttercream-----------------------------34 • FOAM-TYPE ICINGS-------------------------------------- 35 • Caramel Fudge Icing ------------------------------- 36 • Cocoa Fudge Icing ---------------------------------- 37 • ROYAL ICING ---------------------------------------------- 38 • Assembling and Icing Cakes---------------------------- 41 • Cake and Icing --------------------------------------------- 42 • Terms & Questions --------------------------------------- 42
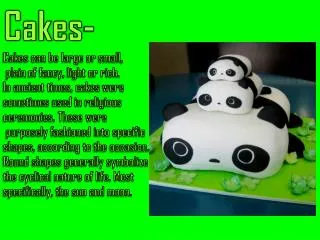
Cakes and Icings Cakes are the richest and sweetest of all the baked products we have studied so far. From the baker's point of view, producing cakes requires as much precision as producing breads, but for completely opposite reasons. Breads are lean products that require strong gluten development and careful control of yeast action during the long fermentation and proofing periods. Cakes, on the other hand, are high in both fat and sugar. The baker's job is to create a structure that will support these ingredients and yet keep it as light and delicate as possible. Fortunately, producing cakes in quantity is relatively easy if the baker has good, wellbalanced formulas, scales ingredients accurately, and understands basic mixing methods well. Cakes owe their popularity to their richness and sweetness, but also to their versatility. Cakes can be presented in many forms, from simple sheet cakes in cafeterias to elaborately decorated works of art for weddings and other important occasions. With only a few basic formulas and a variety of icings, the chef or baker can construct the perfect dessert for any occasion or purpose.
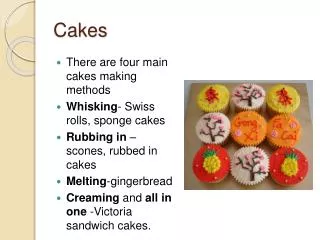
Basic Mixing Methods After reading this chapter, you should be able to 1. Perform basic cake mixing methods. 2. Understand the characteristics of basic cake types. 3. Produce both high-fat or shortened cakes and low-fat or foam-type cakes. 4. Prepare basic icings. 5. Assemble and ice cakes. • Understanding Cake Making • Basic Mixing Methods • The mixing methods presented in this chapter are the basic ones for most types of cakes prepared in the modern bakeshop. Each of these methods is used for particular types of formulas. • High-fat or shortened cakes. • Creaming method. • Two-stage or blending method. • Low-fat or foam-type cakes. • Foaming or sponge method. • Angel food method. • Chiffon method. • We will discuss these cake types in detail after you have had a chance to study the actual procedures. • CREAMING METHOD • This method, also called the conventional method, was for a long time the standard method for mixing butter cakes. Recently, the development of emulsified or high-ratio shortenings has led to the development of simpler mixing methods for shortened cakes. But the creaming method is still used for many types of butter cakes. • PROCEDURE • 1. Scale ingredients accurately. Have all ingredients at room temperature. • 2. Place the butter or shortening in the mixing bowl. With the paddle attachment, beat slowly until the fat is smooth • and creamy. • 3. Add the sugar. Cream the mixture at moderate speed until the mixture is light and fluffy. • Some bakers prefer to add the salt and flavorings with the sugar to ensure uniform distribution. • If melted chocolate is used, it is added during creaming. • 4. Add the eggs a little at a time. After each addition, beat until the eggs are absorbed before adding more. The mixture should be light and fluffy after the eggs are beaten in. • 5. Scrape down the sides of the bowl to ensure even mixing. • 6. Add the sifted dry ingredients (including the spices if they were not added in step 3) alternating with the liquids. • This is done as follows: • a. Add one-fourth of the dry ingredients. Mix just until blended in. • b. Add one-third of the liquid. Mix just until blended in. • c. Repeat until all ingredients are used. Scrape down the sides of the bowl occasionally for even mixing. • The reason for adding dry and liquids alternately is that the batter may not absorb all the liquid unless some of the flour is present to aid in absorption. Cocoa, if used, is included with the flour.
TWO-STAGE METHOD TWO-STAGE METHOD This method, also called the blending method, was developed for use with modern high-ratio shortenings (see Bake Shop- Basic Principles and Ingredients). It is simpler than the creaming method, but produces a very smooth batter that bakes up into a fine-grained, moist cake. It is called two-stage because the liquids are added in two stages. PROCEDURE 1. Scale ingredients accurately. Have all ingredients at room temperature. 2. Sift the flour, baking powder, soda, and salt into the mixing bowl and add the shortening. With the paddleattachment, mix at low speed for 2 minutes. Stop the machine, scrape down the bowl and beater, and mix again for 2 minutes. If melted chocolate is used, blend it in during this step. If cocoa is used, sift it with the flour in this step or with the sugar in step 3. 3. Sift the remaining dry ingredients into the bowl and add part of the water or milk. Blend at low speed for 3 to 5 minutes. Scrape down the sides of the bowl and the beater several times to ensure even mixing. 4. Combine the remaining liquids and lightly beaten eggs. With the mixer running, add this mixture to the batter in three parts. After each part, turn off the machine and scrape down the bowl. Continue mixing for a total of 5 minutes in this stage. The finished batter will normally be quite liquid. Variation This variation combines steps 2 and 3 above into one step. 1. Scale ingredients as in basic method. 2.Sift all dry ingredients into the mixing bowl. Add the shortening and part of the liquid. Mix on low speed for 7 to 8 minutes. Scrape down the sides of the bowl and the beater several times. 3. Continue with step 4 in the basic procedure. FOAMING OR SPONGE METHOD All egg-foam cakes are similar in that they contain little or no shortening and depend for most or all of their leavening on the air trapped in beaten eggs. One mixing method is usually presented as the basic method for all foam cakes. However, since whole-egg foams and egg-yolk foams are handled differently from egg-white foams, we will discuss two separate, although similar, methods. A third method, for chiffon cakes, is somewhat unusual. It combines an egg white foam with a high-fat batter made with oil. First, the method for sponge cakes: PROCEDURE 1.Scale ingredients accurately. Have all ingredients at room temperature. If butter is included, it must be melted. If liquid and butter are included, heat them together, just until the butter is melted. 2.Combine the eggs and sugar and warm to about 110°F (43°C). This may be done in one of two ways. a. Stir the egg-sugar mixture over a hot-water bath. b. Warm the sugar on a sheet pan in the oven (do not get it too hot) and gradually beat it into the eggs. The reason for this step is that the foam will attain greater volume if warm.
3.With the whip attachment, beat the eggs at high speed until very light and thick. This may take 10 to 15 minutes. This step is very important. One of the most frequent causes of failure in the sponge method is not whipping the eggs and sugar enough. The foam must be very thick. When the beater is lifted from the bowl, the foam falls slowly from it and makes a ribbon that slowly sinks into the batter in the bowl. 4.Fold in the sifted flour, being careful not to deflate the foam. Many bakers do this by hand. If other dry ingredients are used, such as cornstarch or baking powder, they are first sifted with the flour. 5.If melted butter or a butter-liquid mixture is being used, fold in at this point. Be careful not to overmix, or the cake will be tough (because of developed gluten). 6.Immediately pan and bake the batter. Delays will cause loss of volume. Variations Some formulas contain water or some other liquid, but no butter (so you cannot heat the liquid and butter together, as in the basic procedure). In this case, the liquid is usually added after step 3 and before folding in the flour. Either whip it in a steady stream or stir it in, as indicated in the recipe. In some formulas the egg yolks and whites are separated. Use the yolks and part of the sugar to make the foam in steps 2 and 3. Use the remaining sugar to whip with the whites. Fold the egg-white foam into the batter after step 5. ANGEL FOOD METHOD Angel food cakes are based on egg-white foams and contain no fat. PROCEDURE 1. Scale ingredients accurately. Have all ingredients at room temperature. The egg whites may be slightly warmed for achieving better volume. 2. Sift the flour with half the sugar. This step helps the flour mix more evenly with the foam. 3. Beat the egg whites, using the whip attachment, until they form soft peaks. Salt and cream of tartar are added near the beginning of the beating process. 4. Gradually beat in the sugar that was not mixed with the flour. Continue to beat until the egg whites form soft, glossy peaks. Do not overheat. 5. Fold in the flour-sugar mixture just until it is thoroughly absorbed, but no longer. 6. Pan and bake immediately. CHIFFON METHOD Chiffon cakes and angel food cakes are both based on egg-white foams. But here the similarities in the mixing methods end. In angel food cakes, a dry flour sugar mixture is folded into the egg whites. But in chiffon cakes, a batter containing flour, egg yolks, vegetable oil, and water is folded into the whites. Egg whites for chiffon cakes should be whipped until they are a little firmer than those for angel food cakes, but do not overwhip them until they are dry. Chiffon cakes contain baking powder, so they do not depend on the egg foam for all their leavening. PROCEDURE 1. Scale all ingredients accurately. Have all ingredients at room temperature. Use a good quality, flavorless vegetableoil. 2. Sift the dry ingredients, including part of the sugar, into the mixing bowl.
3. Mixing with the paddle attachment at second speed, gradually add the oil, then the egg yolks, water, and liquid • flavorings, all in a slow, steady stream. While adding the liquids, stop the machine several times and scrape down the • bowl and the beater. Mix until smooth, but do not overmix. • 4. Whip the egg whites until they form soft peaks. Add the cream of tartar and sugar in a stream and whip to firm, moist • peaks. • 5. Fold the whipped egg whites into the flour-liquid mixture. • 6. Immediately deposit batter in ungreased centertube pans (like angel food cakes) or in layer pans that have had the • bottoms greased and dusted, but not the sides (like sponge layers). • PREPARED MIXES • Many mixes are available that contain all ingredients except water and sometimes egg. These products also contain • added emulsifiers to ensure even blending of ingredients. To use them, follow the package instructions exactly. • Most mixes produce cakes with excellent volume, texture, and tenderness. Whether or not they also taste good is a • matter of opinion. On the other hand, cakes made "from scratch" are not necessarily better. They will be better only if • they are carefully mixed and baked, and prepared from good, tested formulas, using quality ingredients. • Cake Formula Types • The proper mixing method for a particular formula depends on the balance of ingredients. A baker can look at the • ingredients in a formula and know immediately which mixing method to use. • If fat is high, use creaming method or two-stage method. • Two-stage method may be used if the percentage of sugar is over 100 percent, and if the fat is emulsified shortening. • In other cases, the creaming method is used. • If fat is low and eggs and sugar are high, use an egg-foam method. • HIGH-FAT CAKES • The creaming method's major disadvantage is the labor it requires. The two-stage method is quicker, but because the • flour is mixed for a long time, two conditions are necessary to prevent the gluten from developing toughness: • 1. Increased percentage of sugar (sugar is a tenderizer). • 2. Emulsified shortening, which will blend very thoroughly to prevent toughness. • Cakes made by the two-stage method have good volume and lightness, fine velvety texture, and great tenderness. • Butter cakes made by the creaming method are usually graded lower because the texture is coarser and the • tenderness is generally somewhat less. • One factor seems to be neglected when cakes are rated, however—flavor. Shortening contributes no flavor to • cakes, only texture. Butter, on the other hand, is highly prized for its flavor. It also influences texture, because it melts • in the mouth, while shortening does not. Thus, butter cakes are and always will be in demand. As long as they are, the • creaming method will be important for you to know. • LOW-FAT CAKES • High-fat cakes depend on air incorporated by the creaming action of the fat and sugar for some of their leavening an • much of their texture. Low-fat or no-fat cakes obviously cannot. They must depend on the foaming action of eggs. • Sponge cakes have a springy texture and are tougher than shortened cakes. This makes them valuable for many • kinds of desserts that require much handling to assemble. For example, many European-style cakes or tortes are • made by cutting sponge cake layers horizontally into thinner layers and stacking them up with a variety of rich fillings, • creams, icings, and fruits.
PROCEDURE FOR SCALING CREAMING METHOD BATTERS These batters are thick and do not pour easily. Scale cakes as follows: 1. Place prepared cake pan on left side of balance scale. Balance the scale out by placing another pan on right side. 2. Set scale for desired weight. 3. Add batter to left pan until scale balances. 4. Remove pan from scale and spread batter smooth with spatula. 5. Repeat with remaining pans. 6.Give the pans several sharp raps on the bench to free large trapped air bubbles. Bake immediately. PROCEDURE FOR SCALING TWO-STAGE BATTERS These batters are more liquid than creamed batters. They may be scaled like creamed batters, or for greater speed, they may be scaled as follows: 1. Place empty volume measure on left side of balance scale. Balance the scale out to zero. 2. Set scale for desired weight. 3. Pour batter into measure until scale balances. 4. Note the volume of batter in the measure. 5. Pour batter into prepared pan, quickly scraping out the measure to get all the batter. 6. Scale remaining cakes with the volume measure, using the volume noted in step 4. 7. Give the pans several sharp raps on the bench to free large trapped air bubbles. Bake immediately. PAN PREPARATION Prepare pans before mixing cake batters, so that cakes can be baked without delay as soon as they are mixed. 1. For high-fat cakes the bottoms of layer pans must be greased, preferably with a commercial pan greasing PROCEDURE FORSCALING FOAM CAKES Foam cake batters should be handled as little as possible and baked immediately in order to avoid deflating the beaten eggs. Even if a high-ratio cake survived all this without breaking into crumbs, it would probably disintegrate when it absorbed moisture from the fillings. In addition, sponge layers in this kind of cake are usually moistened with a flavored sugar syrup to compensate for their lack of moisture. The fruit torte (illustrated in the photograph above) is an example of this type of cake. Genoise layers are split, moistened with dessert syrup, layered and iced with whipped cream, and topped with attractively arranged fruit pieces. The fruit is then coated with glaze to protect it and enhance its appearance. Sponge sheets for jelly rolls and other rolled cakes are made without any shortening, so that they do not crack when rolled. Flour for sponge cakes must be very weak to avoid making the cake tough. Cornstarch is often added to cake flour for sponge cakes to weaken the flour further. Scaling and Panning PAN PREPARATION Prepare pans before mixing cake batters, so that cakes can be baked without delay as soon as they are mixed. 1.For high-fat cakes the bottoms of layer pans must be greased, preferably with a commercial pan greasingpreparation. If this is not available, dust the greased pan with flour and tap out the excess. 2. For sheet cakes, line the pan with greased parchment. 3. For angel food cakes, do not grease the pan. The batter must be able to cling to the sides in order to rise. 4. For sponge cake layers with a small percentage of fat, grease the bottoms but not the sides.
Although they may be scaled like creamed batters, many bakers prefer to "eyeball" them in order to minimize handling. Have all prepared pans lined up on the bench. Scale first pan as for creamed batters. Quickly fill remaining pans to the same level as the first pan, judging the level by eye. Spread the batter smooth and bake immediately. See Table .1 for average scaling weights, as well as baking temperatures and times.
Table .1 AVERAGE CAKE SCALING WEIGHTS, BAKING TEMPERATURES, AND TIMES
Baking and Cooling BAKING Cake structure is very fragile, so proper baking conditions are essential for quality products. The following guidelines will help you avoid cake failures. 1. Preheat the ovens. (But to conserve expensive energy, don't preheat longer than necessary.) 2. Make sure ovens and shelves are level. 3. Do not let pans touch each other in oven. If pans touch, air circulation is inhibited and the cakes rise unevenly. 4. Bake at correct temperature. Too hot an oven causes the cake to set unevenly or to set before it has fully risen. Crusts will be too dark. Too slow an oven causes poor volume and texture because the cake doesn't set fast enough and may fall. 5. Do not open ovens or disturb cakes until they have finished rising and are partially browned. Disturbing the cakes before they are set may cause them to fall. 6. If steam in the oven is available, use it for creamed and two-stage batters. These cakes bake with a flatter top if baked with steam because the steam delays the formation of the top crust. 7. Tests for doneness: a. Shortened cakes will shrink away from sides of panslightly. b. Cake will be springy. Center of top of cake will springback when pressed slightly: c. A cake tester or pick inserted in center of cake willcome out clean. COOLING AND REMOVING FROM PANS 1. Cool layer cakes and sheet cakes 15 minutes in pans and turn out while slightly warm. They are too fragile to turn out when hot, and they may break. 2. Turn out layer cakes onto racks to finish cooling. 3. To turn out sheet cakes: a. Sprinkle top lightly with granulated sugar. b. Set an empty sheet pan on top, bottom side down. c. Invert both pans. d. Remove top pan. e. Peel parchment off cake. 4. Cool angel food cakes upside down in pans. Support the edges of the pan so that the top of the cake is off thebench. When cool, loosen cake from sides of pan withknife or spatula, and pull out carefully. COMMON CAKE FAULTS AND THEIR CAUSES Errors in mixing, scaling, baking, and cooling cakes cause many kinds of defects and failures. For easy reference, these various defects and their possible causes are summarized in the trouble-shooting guide in Table 2.2.
Altitude Adjustments At high altitudes, atmospheric pressure is much less than at sea level. This factor must be taken into account in cake baking. Formulas must be adjusted to suit different baking conditions above 2,000 or 3,000 feet (600 or 900 meters) above sea level. Although general guidelines can be given, the exact adjustments required will vary for different kinds of cakes. Many manufacturers of flour, shortening, and other bakery ingredients will supply detailed information and adjusted formulas for any given locality. In general, the following adjustments must be made above 2,000 or 3,000 feet elevation. Leavening Leavening gases expand more when air pressure is lower, so baking powder and baking soda must be decreased. Creaming and foaming procedures should also be reduced so that less air is incorporated. Tougheners: Flour and Eggs Cakes require firmer structure at high altitudes. Both eggs and flour must be increased to supply proteins for structure. Tenderizers: Shortening and Sugar For the same reasons, shortening and sugar must be decreased so that the structure will be firmer. Liquids At high altitudes, water boils at a lower temperature and evaporates more easily. Liquids must be increased to prevent excess drying both during and after baking. This also helps compensate for the decrease in moisturizers (sugar and fat) and the increase in flour, which absorbs moisture. Baking Temperatures Increase baking temperatures about 25°F (14°C) above 3,500 feet. Pan Greasing High-fat cakes tend to stick at high altitudes. Grease pans more heavily. Remove baked cakes from pans as soon as possible. Storing Wrap or ice cakes as soon as they are cool to prevent drying.
Cake Formulas Creaming Method Yellow Butter Cake
Brown Sugar Spice Cake Brown Sugar Spice Cake
Chocolate Butter Cake Chocolate Butter Cake
Old-Fashioned Pound Cake Old-Fashioned Pound Cake
Old-Fashioned RaisinPound Cake Raisin Pound Cake
Chocolate Pound Cake Chocolate Pound Cake
Two-Stage Method White Cake
Devils Food Cake Devils Food Cake
Foaming Methods Sponge Cake (Genoise)
Chocolate Genoise Chocolate Genoise
Milk and Butter Sponge Milk and Butter Sponge
Yellow Chiffon Cake Yellow Chiffon Cake
Chocolate Chiffon Cake Chocolate Chiffon Cake
Angel Food Cake Angel Food Cake
Chocolate Angel Food Cake Chocolate Angel Food Cake
Icings: Production and Application • Producing and Handling Basic Types • Icings or frostings (the two terms mean the same thing) are sweet coatings for cakes and other baked goods. Icings have three main functions: • 1. They improve the keeping qualities of the cake by forming a protective coating around it. • 2. They contribute flavor and richness. • 3. They improve appearance. • There are six basic kinds of icings: • Fondant • Buttercreams • Foam-type icings • Fudge-type icings • Flat-type icings • Royal or decorators icing • In addition, we will consider two other preparations for cakes: • Glazes • Fillings • Use top-quality flavorings for icings, so that they will enhance the cake rather than detract from it. Use moderation when adding flavorings and colors. Flavors should be light and delicate. Colors should be delicate, pastel shades—except chocolate, of course. • FONDANT • Fondant is a sugar syrup that is crystallized to a smooth, creamy white mass. It is familiar as the icing for napoleons, éclairs, petits fours, and some cakes. When applied, it sets up into a shiny, nonstick coating. • Because it is difficult to make in the bakeshop, fondant is almost always purchased already prepared, either in the ready-to-use moist form or in the dry form, which requires only the addition of water. • GUIDELINES FOR USING FONDANT • 1. Heat fondant over a warm-water bath, stirring constantly, to thin out the icing and make it pourable. Do not heat over 100°F (38°C), or it will lose its shine. • 2. If still too thick, thin out with a little simple sugar syrup or water (simple syrup blends in more easily). • 3. Flavorings and colorings may be added as desired. • 4. To make chocolate fondant, stir melted bitter chocolate into warm fondant until desired color and flavor are reached. Chocolate will thicken the fondant, so the icing may require more thinning with sugar syrup. • 5. Apply fondant by pouring over the item or by dipping items into it.
BUTTERCREAMS BUTTERCREAMS Buttercream icings are light, smooth mixtures of fat and confectioners' sugar. They may also contain eggs to increase their smoothness or lightness. These are popular icings used for many kinds of cakes. They are easily flavored and colored to suit a variety of purposes. There are three basic kinds of buttercreams: 1. Simple buttercreams are made by creaming together fat and sugar to the desired consistency and lightness A small quantity of egg whites may be whipped in. Decorator's buttercream is a simple buttercream used for making flowers and other cake decorations. It is creamed only a little, because too much air beaten into it would make it unable to hold delicate shapes. 2. Meringue-type buttercreams are prepared by first beating egg whites and adding a boiling syrup or just sugar. Soft butter is then mixed into the meringue. This is a very light, smooth icing. 3. French buttercreams are similar to the meringue type, but the foam is made with egg yolks (and sometimes whole eggs) and boiling syrup. This is a very rich, light icing. Butter, especially sweet, unsalted butter, is the preferred fat for buttercreams because of its flavor and melt-in-the-mouth quality Icings made with only shortening can be unpleasant because the fat congeals and coats the inside of the mouth and does not melt. However, butter makes a less stable icing because it melts so easily There are two ways around this problem: 1. Use buttercreams only in cool weather. 2. Blend a small quantity of emulsified shortening with the butter to stabilize it. Simple Buttercream
Decorator's Buttercream Decorator's Buttercream Cream Cheese Icing
Meringue-Type Buttercream Meringue-Type Buttercream French Buttercream
Chocolate Buttercream Chocolate Buttercream Coffee Buttercream
FOAM-TYPE ICINGS FOAM-TYPE ICINGS Foam icings, sometimes called boiled icings, are simply meringues made with a boiling syrup. Some also contain stabilizing ingredients like gelatin. Foam-type icings should be applied thickly to cakes and left in peaks and swirls. These icings are not stable. They should be used the day they are prepared. FLAT ICINGS Flat icings, also called water icings, are simply mixtures of 10X sugar and water, and sometimes corn syrup and flavoring. They are used mostly for coffee cakes, Danish pastry, and sweet rolls. Flat icings are warmed to 100°F (38°C) for application and are handled like fondant. FUDGE-TYPE ICINGS Fudge-type icings are rich, cooked icings. Many of them are made somewhat like candy. Fudge icings are heavy and thick, and they may be flavored with a variety of ingredients. They are used on cupcakes, layer cakes, loaf cakes, and sheet cakes. Fudge icings are stable and hold up well on cakes and in storage. Stored icings must be covered tightly to prevent drying and crusting. To use stored fudge icing, warm in a double boiler until it is soft enough to spread. Fudge-type icings do not necessaly contain chocolate. Plain white fudge icings may be flavored with vanilla, almond, maple, coffee, or other desired flavoring. Flat Icing
Caramel Fudge Icing Caramel Fudge Icing Quick White Fudge Icing
Cocoa Fudge Icing Cocoa Fudge Icing Vanilla Fudge Icing
ROYAL ICING • ROYAL ICING • This icing, also called decorating or decorator's icing, is similar to flat icings except that it is much thicker and is made with egg whites, which make it hard and brittle when dry It is used almost exclusively for decorative work. To prepare royal icing: • Place desired amount of 10X sugar in a mixing bowl. Add a small quantity of cream of tartar (for whiteness)—about 1/8 tsp per pound of sugar (1 g per kilogram). • Beat in egg white a little at a time, until the sugar forms a smooth paste. You will need 2 to 3 oz of egg whites per pound of sugar (125 g per kilogram). • 3. Keep unused icing covered with a damp cloth at all times to prevent hardening. • GLAZES • Glazes are thin, glossy, transparent coatings that give shine to baked products and also help prevent drying. • The simplest glaze is a sugar syrup or diluted corn syrup brushed onto coffee cakes or Danish while it is hot. Syrup glazes may contain gelatin or waxy maize starch. Fruit glazes, the most popular being apricot, are available commercially prepared. They are melted, thinned out with a little water, and brushed on while hot. • Fruit glazes may also be made by melting apricot or other preserves and forcing them through a strainer. • One of the most common uses of glazes in cake making is to coat the fruit arranged on the top of fruit tortes. • FILLINGS • Fillings are sometimes used instead of icings between cake layers. They are also used in such products as jelly rolls, Danish, and other pastries. • 1. Fruit fillings. • Fruit fillings may be cooked or uncooked. • Cooked fruit fillings are chopped or pureed fruits or fruit juicesthickened with starch or eggs. They are prepared somewhat like pie fillings. • Uncooked fruit fillings include jellies and preserves and dried fruits that have been ground and flavored. Fresh fruits, such as the strawberries in strawberry shortcake, are also used. • Many ready-to-use fruit fillings are on the market. • 2. Cream fillings. • Cream fillings include pastry cream (recipes in Chapter 30) and various pudding-type preparations. • Desserts with cream fillings should be assembled as close to service time as possible and kept refrigerated to avoid health hazards. • 3.Whipped cream. • Whipped cream is used as a dessert topping, filling, and frosting. See page 601 for instructions on whipping and handling heavy cream. • Artificial whipped toppings resemble whipped cream in appearance. They should be used only if your customers actually like them.
Assembling and Icing Cakes Assembling and Icing Cakes SELECTION OF ICING The flavor, texture, and color of the icing must be compatible with the cake. 1.In general, use heavy frostings with heavy cakes and light frostings with light cakes. For example, ice angel food cakes with a simple flat icing, fondant, or a light fluffy, boiled icing. High-ratio cakes go well with buttercreams and fudge-type icings. Shortened sponge layer cakes (genoise) are often combined with fruits or fruit fillings, light French or meringue-type buttercream, whipped cream, or flavored fondants. 2. Use the best-quality flavorings, and use them sparingly. The flavor of the frosting should not bestronger than the cake. Fudge-type icings may be flavored more strongly, as long as the flavor is of good quality. 3. Use coloring sparingly. Light, pastel shades are more appetizing than loud colors. Paste colors give best results. Mix a little color with a small portion of the icing, then use this icing to color the rest. PROCEDURE FOR ASSEMBLING LAYER CAKES 1. Cook cake layers completely before assembling and icing. 2. Trim layers, if necessary. a. Remove any ragged edges. b. Slightly rounded tops are easily covered by icing, but excessively large bumps may have to be cut off. c. If desired, layers may be split in half horizontally. This makes the cake higher and increases the proportion offilling to cake. See Figure .1. 3. Brush all crumbs from cakes. Loose crumbs make icing difficult. 4. Place the bottom layer upside down (to give a flat surface for the filling) on a cardboard cake circle of the same diameter. Place the cake in the center of a cake turntable. If a cake circle or turntable is not available, place the cake on a serving plate and slip sheets of waxed paper or parchment under the edges of the cake to keep the plate clean. 5. Spread filling on bottom layer out to the edges. If the filling is different from the frosting for the outside of the cake, be careful not to spread the filling over the edges. Use proper amount of filling. If applied too heavily, it will ooze out when top layer is placed on. 6. Place top layer on bottom layer, right side up. Figure .1. Cake layers may be split in half horizontally, using a lone-bladed, serrated knife.
7. Ice the cake: a. If a thin or light icing is used, pour or spread the icing onto the center of the cake. Then spread it to the edges and down the sides with a spatula. b. If a heavy icing is used, it may be necessary to spread the sides first, then place a good quantity of icing in the center of the top and push it to the edges with the spatula. Pushing the icing rather than pulling or dragging it with the spatula prevents pulling up crumbs and getting them mixed with the icing. Use enough icing to cover the entire cake generously, but not excessively, with an even layer. Smooth the icing with the spatula, or leave it textured or swirled, as desired. The finished, iced cake should have a perfectly level top and perfectly straight, even sides. SMALL CAKES 1.Cupcakes are iced by dipping the tops in a soft icing. Twist the cakes slightly and pull them out quickly in onesmooth motion. Cupcakes may also be iced by spreading icing on with a spatula. Practice is necessary to develop speed and efficiency. 2. Petits fours are tiny cakes cut from sheet cakes. Select a cake that doesn't crumble easily, and carefully cut it intodesired shapes. Remove all crumbs and place the cakes on a rack over a sheet pan. Ice them by pouring fondant or flat icing over them to cover completely. SHEET CAKES Sheet cakes are ideal for volume service because they require little labor to bake, ice, or decorate, and they keep well as long as they are uncut. For special occasions, sheet cakes are sometimes decorated as a single unit with a design or picture in colored icing, a "Happy Special Occasion" message, and so on. It is more common, however, to ice them for individual service as in the following procedure. PROCEDURE FOR ICING SHEET CAKES 1. Turn out the cake onto the bottom of another sheet pan or tray, as described on page 39. Cool the cake thoroughly. 2. Trim the edges evenly with a serrated knife. 3. Brush all crumbs from the cake. 4. Place a quantity of icing in the center of the cake, and, with a spatula, push the icing to the edges. Smooth the top with the spatula, giving the entire cake an even layer of icing. 5. With a long knife or spatula, mark the entire cake offinto portions, as in Figure .2, by pressing the back of the knife lightly into the icing. Do not cut the cake. 6. Using a paper cone or pastry bag fitted with a star tube, pipe a rosette or swirl of icing onto the center of each marked-off portion. Or select another decoration, as desired. Whatever decorations you use, keep them simple, and make them the same for every portion. The finished sheet cake will resemble that in Figure 3. 7. Hold for service. Cut as close as possible to service time to keep the cake from drying.
Cakes and Icings Figure .1 6 x 8 = 48 portions 8 x 8 = 64 portions 8 x 12 = 96 portions Figure .2 8-10 inch layers 12 portions 10-12 inch layers 16 portions Figure .2 Cake-cutting guides for sheet cakes and round layer cakes. For 13 X 18-inch (33 X 46-cm) sheets, simply divide the above diagrams for full-sized sheet cakes in half. Figure .3 Figure .3 A finished sheet cake marked off into portions and decorated so that each portion is identical.
Review& Questions 1.Creaming method 2. Foaming method 3.High-fat cakes 4. Buttercream 5. Fudge icing 6. Two-stage method 7. Angel food method 8. Low-fat cakes 9. Foam icing 10. Royal icing 11. Blending method 12.Chiffon method 13. Fondant 14. Flat icing 15. Glaze 1. Briefly list the steps in each of the four basic cake mixing methods that are presented in this chapter. 2. What are the reasons, in the creaming method, for creaming the butter and sugar until the mixture is light and fluffy? 3. In both the creaming method and the two-stage method, there is a lot of emphasis on scraping down the sides of the bowl. Why is this necessary? 4. What might the finished product be like if you tried to mix a low-fat cake by the two-stage method? Explain. 6. What is the most important rule to consider when using fondant? 7. Compare the keeping qualities of simple buttercreams and meringue-type buttercreams. 8. List the steps in assembling and icing a three-layer cake.