Download
1 / 54
540 likes | 824 Vues
Adobe Flash CS3 Revealed. Chapter 1 - GETTING STARTED WITH FLASH. Understand the Adobe Flash workspace Open a document and play a movie Create and save a movie Work with the Timeline Distribute an Adobe Flash movie Plan an application or a Web site. Chapter 1 Lessons. Chapter 1.

E N D
Adobe Flash CS3 Revealed Chapter 1 - GETTING STARTED WITH FLASH
Understand the Adobe Flash workspace Open a document and play a movie Create and save a movie Work with the Timeline Distribute an Adobe Flash movie Plan an application or a Web site Chapter 1 Lessons Chapter 1
What is Adobe Flash? An animation and interactive authoring program Has tools for complex animation, as well as excellent drawing tools Using Adobe Flash Chapter 1
What can Flash be used for? Web sites Web-based applications CD-Rom and interactive applications Video Using Flash Chapter 1
Optimized for the Web Flash uses vector images Vectors are scalable Reduces the size of graphic files Flash provides for streaming content over the Internet Does not need to wait for entire contents of Web page to load to start playing Chapter 1
Understanding the Adobe Flash Workspace You can customize your workspace Flash works on a movie metaphor Create scenes on a stage Scenes run in frames on a timeline Create a movie by arranging objects on the stage Play the movie on the stage using VCR-like controls Chapter 1
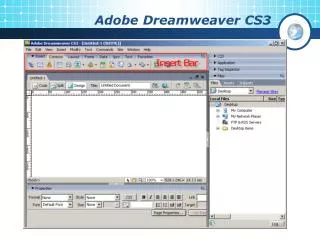
Understanding the Flash Workspace Three parts to the development workspace Menu bar Stage Timeline One or more panels may be displayed Chapter 1
Fig. 1: Flash Workspace Chapter 1
The Stage Contains all objects that are seen by the viewer in the final movie You can draw objects on, or import objects to the stage Chapter 1
The Timeline Used to organize and control the movie’s content by specifying when each object appears on the stage Contains images within frames Units of the timeline Has separate layers Has a playback head Chapter 1
The Tools Panel Panels are used to view, organize, and modify objects and features in a movie Most commonly used: Tools Properties Libraries Chapter 1
The Tools Panel Tools, View, Colors, Options Arranging tools: Dock panels together Stand alone Stacked above or below Floating Chapter 1
Fig. 2: Arranging Panels Grouped Stand alone Floating Stacked Chapter 1
The Blue Drop Zone The blue drop zone is the area to which the panel can move and is indicated by either a blue line or a rectangle with a blue border. A single blue line indicates the position for stacking a panel above or below another panel. A rectangle with a blue border indicates the position for grouping panels. If you move a panel without using a drop zone, the panel becomes a floating panel and is neither grouped nor stacked with other panels. Chapter 1
Fig. 3: Grouping Library Panel Rectangle with blue border Chapter 1
Fig. 4: Ungrouping Library Panel Collapse to icons button Collapse button Close button Blue line indicating drop zone Chapter 1
Fig. 7: Document Properties Chapter 1
Opening a Movie in Flash The .fla extension is native, and can only be opened in Flash Flash exports Web-ready files as .swf .swf files should be tested before being published Always keep the original .fla file for modifications Chapter 1
Previewing a Movie Flash movies can be previewed in the workspace by directing the playhead to move through a timeline Use control menu commands Play, rewind, step forward, step backward Use the Controller Toolbar command on the Window menu Chapter 1
Keyboard Shortcuts Play: [Enter] (Win) and [Return] (Mac) Rewind: ([Ctrl] [Alt] [R] (Win)) and ([Option] [R] (Mac)) Step Forward (.) moves the playhead forward progressively Step Backward (,) moves the playhead backward progressively Chapter 1
Testing a Movie When previewing a movie, some interactive functions do not work unless the movie is played using the Flash Player Use Control > Test Movie to test using the Flash player Chapter 1
Fig. 9: Control Menu Commands DVD-type commands Chapter 1
Fig. 10: Playhead Moving across Timeline Playhead Chapter 1
Creating a Flash Movie Movies are created by: placing objects on the stage editing these objects animating them adding interactivity You can create graphics in Flash or import them from another program such as Photoshop Chapter 1
Creating an Animation A basic animation requires two keyframes The first keyframe sets the starting position The second keyframe sets the ending position The number of frames between two keyframes determines the length of the animation Once the two keyframes are set, Flash automatically fills in the frames between them, with a process called motion tweening Chapter 1
Fig. 12: Oval Object in Frame 1 Object on the stage is in Frame 1 on the timeline Chapter 1
Adding an Effect to an Object In addition to animating an object’s location, you can also animate an object’s appearance Shape Color Brightness Transparency Chapter 1
Fig. 13: Motion Animation Chapter 1
Fig. 14: Object Drawing Option Object drawing option is not selected Chapter 1
Fig. 16: Creating a Marquee Selection Chapter 1
Understanding the Timeline Organizes and controls a movie’s content over time Determine and modify what is happening in a movie frame by frame Which objects are animated What types of animation to use Which objects will appear on top of others How fast movie will play Chapter 1
Fig. 18: Elements of the Timeline Chapter 1
Using Layers Layers are like transparent acetate sheets of content stacked on top of one another Each layer can contain one or more objects Adding a layer causes it to be placed on top of the other layers Can be re-ordered by dragging up or down Chapter 1
Fig. 19: Understanding Layers Chapter 1
Using Frames • The timeline is made up of individual units called frames • Content is displayed in frames as the playhead moves over them when the movie plays • Frames are numbered in increments of five for easy reference • The status bar indicates current frame the playhead is on Chapter 1
Using the Playhead The playhead indicates which frame is playing Can be dragged left or right Dragging back and forth allows you to check some animations in Flash without exporting to .swf Chapter 1
Understanding Scenes Are a way to organize long movies Each scene has its own timeline Give scenes descriptive names for faster editing Manage your flash movie production Chapter 1
Working with the Timeline By studying a timeline you can determine If different objects are on different layers If there is motion in any of the layers by looking for the motion arrow The length of the animation The frame rate Where the animation is in its sequence Chapter 1
Fig. 23: Changing the View of the Timeline Frame view icon Bar used to change the length of the timeline Chapter 1
Fig. 24: Changing the Frame Rate New frame rate Chapter 1
Distributing a Flash Movie Flash generates both the swf and HTML files when you use the publish feature .html (The HTML document) .swf (The Flash Player file) Chapter 1
Other Publishing Options Stand-alone Projector Files Quicktime .mov files Chapter 1
Fig. 25: HTML Code .swf file extension indicates a Flash player Code specifies color and size Chapter 1
Plan an Application or Web Site Step 1: State the purpose or goals of your site What do we want to accomplish? Step 2: Identify the target audience Who will use this application or Web site? Chapter 1
Plan an Application or Web Site Step 3: Determine the Treatment What is the look and feel? Tone Approach Emphasis Chapter 1
Plan an Application or Web Site Step 4: Develop the Specifications and Storyboard Playback System Elements to Include Functionality User Interface Chapter 1
Fig. 30: Sample Storyboard Chapter 1