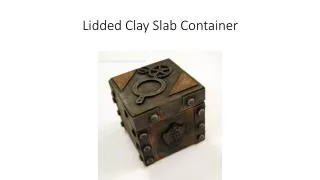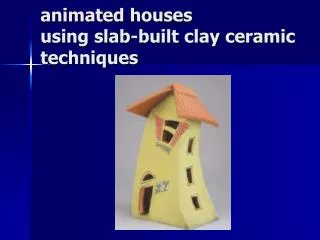
Create Your Own Lidded Clay Slab Container: A Step-by-Step Guide
Unleash your creativity by crafting a unique lidded clay slab container. Start by rolling out sufficient clay slabs for the top, sides, and bottom of your container. Personalize your pieces by carving or adding texture to the slabs as desired. Use the score and slip technique to securely attach the slabs together, ensuring a strong construction. Finally, create a fitting lid that complements your design while maintaining functionality. Explore negative space as an integral part of your design for added visual interest!


Create Your Own Lidded Clay Slab Container: A Step-by-Step Guide
E N D
Presentation Transcript
Lidded Clay Slab Box/Container • Roll out enough slabs to create the top, sides, and bottom of your container. • Carve and or add designs and texture to your slabs. • Score and slip slabs together to create container. • Add a top so that it fits the container without sliding off. • You may have negative space as a part of your design.