Comprehensive Guide to Installing Watertight Rubber Gaskets for Safe, Reliable Joints
This guide provides essential instructions for the proper installation of watertight rubber gaskets, including single offset and O-ring profiles. Safety is paramount, so always follow OSHA and manufacturer recommendations, wearing protective gear. Key steps include cleaning and inspecting joints, equalizing and lubricating gaskets before assembly, and ensuring sections are set level and plumb. Visual inspections post-installation confirm tight, secure joints. With these practices, achieve optimal performance and longevity for watertight seals.

Comprehensive Guide to Installing Watertight Rubber Gaskets for Safe, Reliable Joints
E N D
Presentation Transcript
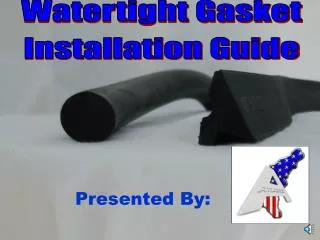
Watertight Gasket Installation Guide Presented By:
INSTALLINGRUBBER GASKETS FOR WATERTIGHT JOINTS SINGLE OFFSET O-RING PROFILES
THINK SAFETY 1st • Practice ALL safety precautions. • Follow all OSHA & Manufacturers’ safety recommendations. • Wear protective gear
O-Ring Circular Profile Single Off-Set Triangular Profile Gasket Types
O-Ring Circular Profile Single Off-Set Triangular Profile Gasket Types Assembly method of these 2 gaskets is NOT the same
Lube gasket and lube spigot BEFORE installing gasket onto spigot ONLY Assembly Difference O-RING Lube spigot AFTERputting on the gasket SINGLE OFFSET
Step One Clean & Inspect Joints
Step 1 – Clean & Inspect Clean the bell AND spigot Remove all dirt and debris
Step 1 – Clean & Inspect Inspect the Bell and Spigot
Step 1 – Clean & Inspect Look for cracks & chips.
Step 1 – Clean & Inspect REPORT findings to supervisor for disposition. Good
Step Two Install Gasket-Equalize
Step 2 – Placing the Gasket LIFT the precast following proper handling & safety procedures Lift Bar Lift Pins
Step 2 – Placing the Gasket LIFT the precast following proper handling & safety procedures
Step 2 – Placing the Gasket Step 2 – Placing the Gasket Place Ridges AGAINST Spigot Ridges Spigot
Step 2 – Placing the Gasket Make sure the gasket is fully seated in the shoulder or groove of the joint SHOULDER GAP
Step 2 – Placing the Gasket Push gasket against shoulder or groove Remove Gap. SHOULDER
Step 2 – Placing the Gasket It is important to equalize the gasket to remove bunching and overstretching
Step 2 – Placing the Gasket Insert screwdriver or other blunt, rounded instrument
Step 2 – Placing the GasketEqualize gasket to remove bunching and overstretching Go completely around the structure to insure the gasket is stretched evenly around the joint.
Step 2 – Placing the Gasket Visually recheck the gasket to make sure it is seated snugly against the groove
Step Three Lubricate
Step 3 – LubricationProper Lube Use clean lube
Step 3 – LubricationGenerously Lube the Bell LUBE INSIDE THE BELL
Step 3 – LubricationGenerously Lube For SINGLE OFFSET, place lube on top of gasket AFTER ASSEMBLY onto spigot For O-RING, lube spigot and lube gasket, THEN ASSEMBLE onto spigot.
Step 3 – LubricationGenerously Lube the Gasket REMEMBER! For Single Off-Set Gaskets…. Lube goes ON TOP of Gasket Do NOT Place Lube on a Bare Spigot
Step Four Set Sections
Step 4 – Set the Precast Section KEEP THE STRUCTURE LEVEL AND PLUMB
Step 4 – Set the Precast Section KEEP THE STRUCTURE LEVEL AND PLUMB
Step 4 – Set the Precast Section COMPLETE THE SECTIONS
Step Five Visually Check
Step 5 – Visual Inspections Walk around the structure to verify the section is seated evenly
Step 5 – Visual InspectionsLook inside and outside structure Make sure the joints are seated evenly all around
SUMMARY • SAFETY 1st • CLEAN, INSPECT JOINTS • PLACE GASKET - EQUALIZE • LUBRICATE • SET PRECAST – ENSURE LEVEL • RE-INSPECT Gasket Installation
REMEMBER Lube gasket and lube spigot BEFORE installing gasket onto spigot O-RING Lube spigot AFTERinstalling gasket SINGLE OFFSET
Questions? Watertight Gasket Installation Guide
Thank You! Watertight Gasket Installation Guide


![EVM System Surveillance Presented By: [NAMES] Presented to: [GROUP]](https://cdn0.slideserve.com/294105/slide1-dt.jpg)