Land Navigation
Land Navigation. Determine Location on the Ground & Navigate from One Point to Another. Map Basics. Definition: A map is a mathematically determined representation of the Earth’s surface systematically plotted to scale upon a plane surface. Map Basics: . Map Scales

Land Navigation
E N D
Presentation Transcript
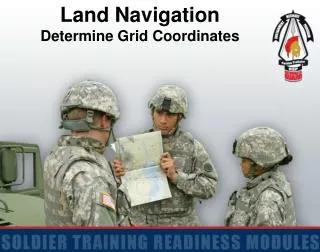
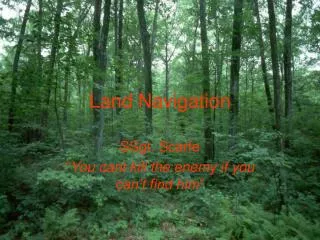
Land Navigation Determine Location on the Ground & Navigate from One Point to Another
Map Basics • Definition: A map is a mathematically determined representation of the Earth’s surface systematically plotted to scale upon a plane surface.
Map Basics: • Map Scales • Representative Fraction is the scale of the map which expresses the ratio of horizontal distance on the map to the corresponding horizontal distance on the ground: • 1:25,000 SCALE. • 1:50,000 SCALE • 1:100,000 SCALE • 1:250,000 SCALE • The smaller the number on the bottom, the larger the scale of the map
Map Basics: Colors • Black: Man-made objects • Buildings, some roads, cultural, etc. • Red: Main roads • Also some special features • Blue: Water features • Lakes, rivers, ponds, ocean, etc. • Green: Vegetation • Forrest, orchard, etc. • Brown: Relief features • Contour lines.
Terrain Features - Major • Hill • Valley • Ridge • Saddle • Depression Need help remembering? Hidden Valley Ranch Salad Dressing
HILL A hill is an area of high ground. From a hilltop, the ground slopes down in all directions. A map depicts a hill by showing contour lines forming concentric circles (circles having a common center). The inside of the smallest closed circle is the hilltop
VALLEY A valley is a stretched out groove in the land, usually formed by streams or major rivers. If standing in a valley, three directions offer high ground, while the fourth direction offers low ground. The contour lines forming a valley are either U-shaped or V-shaped. The closed end of the contour line (U or V) always points upstream or toward higher ground.
RIDGE A ridge is a sloping line of high ground. If you are standing on the centerline of a ridge, you will normally have low ground in three directions and high ground in one direction with varying degrees of slope. If you cross a ridge at right angles, you will climb steeply to the crest and then descend steeply to the base. Contour lines forming a ridge tend to be U-shaped or V-shaped. The closed end of the contour line points away from high ground.
SADDLE A saddle is a dip or low point between two areas of higher ground. A saddle is not necessarily the lower ground between two hilltops; it may be simply a dip or break along a level ridge crest. If you are in a saddle, there is high ground in two opposite directions and lower ground in the other two opposite directions.
DEPRESSION A depression is a low point in the ground or a sinkhole. It could bedescribed as an area of low ground surrounded by higher ground in all directions, or simply a hole in the ground. Usually only depressions that are equal to or greater than the contour interval will be shown. On maps, depressions are represented by closed contour lines that have tick marks pointing toward low ground.
Terrain Features - Minor • Draw • Spur Terrain Features - Supplementary • Cliff • Cut • Fill
DRAW A draw is a stream course that is less developed than a valley. In a draw, there is essentially no level ground and, therefore, little or no maneuver room within its confines. If you are standing in a draw, the ground slopes upward in three directions and downward in the other direction. A draw could be considered as the initial formation of a valley.
SPUR A spur is a short, continuous sloping line of higher ground, normally jutting out from the side of a ridge. A spur is often formed by two roughly parallel streams cutting draws down the side of a ridge. The ground will slope down in three directions and up in one. Contour lines on a map depict a spur with the U or V pointing away from high ground.
CLIFF A cliff is a vertical or near vertical feature; it is an abrupt change of the land. When a slope is so steep that the contour lines converge into one “carrying” contour of contours, this last contour line has tick marks pointing toward low ground. Cliffs are also shown by contour lines very close together and, in some instances, touching each other.
CUT A cut is a man-made feature resulting from cutting through raised ground, usually to form a level bed for a road or railroad track. Cuts are shown on a map when they are at least 10 feet high, and they are drawn with a contour line along the cut line. This contour line extends the length of the cut and has tick marks that extend from the cut line to the roadbed, if the map scale permits this level of detail.
FILL A fill is a man-made feature resulting from filling a low area, usually to form a level bed for a road or railroad track. Fills are shown on a map when they are at least 10 feet high, and they are drawn with a contour line along the fill line. This contour line extends the length of the filled area and has tick marks that point toward lower ground. If the map scale permits, the length of the fill tick marks are drawn to scale.
Determine Direction without a Compass The sun rises in the east and sets in the west.
Determine Elevation • Locate point on the map • Determine contour interval of map • Locate index contour line nearest point • Count number of contour lines up or down that must be crossed to get to point • Points at top of hill add half the contour interval • Points at bottom of depression subtract half the contour interval
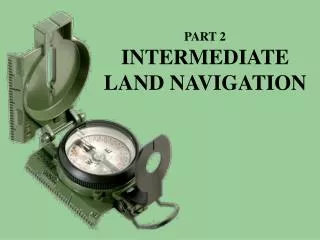
Compass Familiarization
Determine Azimuth Azimuth: a horizontal angle measured clockwise from a north base line. This north base line could be true north, magnetic north, or grid north. The azimuth is the most common military method to express direction. • Plot location of two points. • Use straight edge to draw line between both points (line must be long enough to cross scale on protractor) • Place the index of the protractor at the point where the drawn line crosses a vertical (north-south) grid line. • Keeping the index at this point, align the 0-to-180 degree line of the protractor on the vertical grid line. • Read the value of the angle from the scale; this is the grid azimuth from point A to point B.
A 104° B When measuring azimuths on a map, remember that you are measuring from a starting point to an ending point. If a mistake is made and the reading is taken from the ending point, the grid azimuth will be opposite, thus causing the user to go in the wrong direction.
Back Azimuth • A back azimuth is the opposite direction of an azimuth. It is comparable to doing an "about face." • Back Azimuth - azimuth taken from a distant point toward your location • Used in Resection • Numbers less than 180°: add 180° Ex: azimuth = 145°, resection = 145°+180° = 325° • Numbers greater than 180°: subtract 180° Ex: azimuth = 270°, resection = 270°-180° = 90°
The Three Norths • True North: A line from any point on the earth's surface to the north pole. All lines of longitude are true north lines. • Magnetic North: The direction to the north magnetic pole, as indicated by the north-seeking needle of a magnetic instrument. ie: a compass • Grid North: The north that is established by using the vertical grid lines on the map.
Grid-Magnetic Angle: The G-M angle value is the angular size that exists between grid north and magnetic north. Azimuths translated between map and ground will be in error by the size of the declination angle if not adjusted for it.
Converting Grid/Magnetic Azimuths Since the location of magnetic north does not correspond exactly with the grid-north lines on the maps, a conversion from magnetic to grid or vice versa is needed. Grid to Magnetic azimuth: • East G-M angle: subtract • Ex: GM angle: 21°, grid azimuth: 360° magnetic azimuth: 360°-21°=339° Magnetic to Grid azimuth: • East G-M angle: add • Ex: GM angle: 21°, grid azimuth: 360° magnetic azimuth: 360°+21°=21° • Refer to the conversion notes with Declination Diagram. 21° Easterly Declination *There are no negative azimuths on the azimuth circle; will be between 0° and 360° ex: -30° = 330°, 380°= 220°
Converting Grid/Magnetic Azimuths Since the location of magnetic north does not correspond exactly with the grid-north lines on the maps, a conversion from magnetic to grid or vice versa is needed. Grid to Magnetic azimuth: • West G-M angle: add • Ex: GM angle: 30°, grid azimuth: 140° magnetic azimuth: 140°+30°=170° Magnetic to Grid azimuth: • West G-M angle: subtract • Ex: GM angle: 30°, grid azimuth: 140° magnetic azimuth: 140°-30°=110° • Refer to the conversion notes with Declination Diagram. 30° Westerly Declination *There are no negative azimuths on the azimuth circle; will be between 0° and 360° ex: -30° = 330°, 380°= 220°
PRACTICAL EXERCISE 1. The G-M angle is 21° east. You plot an azimuth of 146 °. What is your magnetic azimuth? ANSWER: 146°-21° = 125° 2. The G-M angle is 45° west. You plot an azimuth of 30 °. What is your magnetic azimuth? ANSWER: 30°+45° = 75° 3. The G-M angle is 40° east. You plot an azimuth of 15 °. What is your magnetic azimuth? ANSWER: 15°-40° = 335° 4. The G-M angle is 21° east. You shoot an azimuth of 146 °. What is your grid azimuth? ANSWER: 146°+21° = 167° 5. The G-M angle is 45° west. You shoot an azimuth of 30°. What is your grid azimuth? ANSWER: 30°-45° = 345° 6. The G-M angle is 40° east. You shoot an azimuth of 15 °. What is your grid azimuth? ANSWER: 15°+40° = 55° • Grid to Magnetic azimuth: • East G-M angle: subtract • West G-M angle: add • Magnetic to Grid azimuth: • East G-M angle: add • West G-M angle: subtract