Land Navigation
Land Navigation. SSgt. Scarfe “ You cant kill the enemy if you can’t find him ”. Terminal Learning Objective. Without the aid of reference, complete a day and night land navigation orienteering course. Enabling Learning Objectives. Know how to: Inspect a compass Find your pace count

Land Navigation
E N D
Presentation Transcript
Land Navigation SSgt. Scarfe “You cant kill the enemy if you can’t find him”
Terminal Learning Objective • Without the aid of reference, complete a day and night land navigation orienteering course
Enabling Learning Objectives Know how to: • Inspect a compass • Find your pace count • Shoot an azimuth • Set compass for night Navigation • Dead Recon • Terrain associate
OCS Land Navigation • Focus on skills needed to complete the OCS land navigation course.
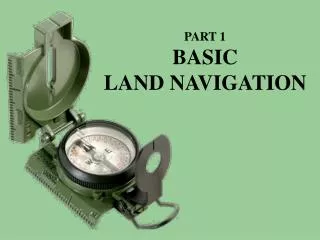
Step 1: Inspect your compass • Visual inspection: Open your compass to ensure glass is not cracked or clouded, ensure compass dial does not stick. • Inspect front cover to determine if sighting wire is bent or missing. • Place eye piece flat against the glass to ensure slot lines up with sighting wire.
Inspect your compass cont. • Check bezel ring, it should make distinct “clicks”
Inspection for Night Clarity The following parts should appear luminous: • Two dots at opposite ends of the sighting wire. • Luminous line on the crystal. • Luminous line on the north seeking arrow. • Luminous dots under “E” and “W”
Limitations of the Compass Metal objects and electrical sources can affect the performance of a compass: • High tension power lines 55m • Field gun, truck or tank 10m • Telephone wires or bobbed wire 10m • Machine gun 2m • Rifle .5m
Step 2: Calibration • A compass in good working order is very accurate, but it should be checked periodically on a known line of direction. • To complete this step you must understand how to shoot an azimuth.
What is an Azimuth? • An azimuth is defined as a horizontal angle measured from a base line. • In other words, the direction you want to go.
Base Directions • There are three universal base directions in common usage: True North, Magnetic North, and Grid North.
True North • True north is at the North Pole. Lines of longitude on a globe indicate this baseline direction. True north is seldom used by platoon commanders. It is usually used in celestial navigation.
Magnetic North • Magnetic north is the direction in which the compass points. There are no magnetic lines shown on the map. The magnetic north pole is located just north of the Hudson Bay in Canada. • Method used when walking the terrain.
Grid North • Grid north lines are a device of mapmakers and enable us to plot direction of the map. They are indicated by the vertical, parallel lines of the map. When the mapmaker interprets the rounded earth surface on a flat map sheet, it is necessary to create this artificial base direction. • Method used when plotting on your map.
Magnetic North • When using a compass magnetic north is your base line.
Step 3: Shooting an Azimuth • Two methods: 1) Compass to cheek 2) Center hold
Compass to Cheek Procedures • Fold back cover until it is just less than 90 degrees from the base. • Fold rear sight slightly forward of 90 degrees. • Look through rear sight slot and align the sighting wire with the desired object. • Glance at the dial to read azimuth, ensure that the dial is floating.
Choosing a Steering Mark • Choose an object that stands out. • Look at the terrain that you will be crossing. • If you loose sight of your steering mark, shoot again.
Center Hold Technique • Open compass so that it is fully extended. • Move lens to the 90 degree position. • Place thumb in the thumb loop. • Rest compass on the base of your extended thumb, align index fingers with the long edge of the compass. • Pull your elbows in tight. • Rotate body until desired azimuth is reached
Compass to Cheek vs. Center Hold • Compass to cheek is can be more accurate but also more time consuming. Good for open terrain during the day. • Center hold will be used during conditions of limited visibility, or thick brush. • You can use a combination of the two methods.
Step 4: Determine your Pace Count • Another of the basic tools required for successful land navigation. • Although it is not an exact science, knowledge of your pace count can provide you with a major portion of the information required to determine your location on the ground at any given time.
Average Pace count • To determine your pace count you must walk a straight line distance that represents the terrain that you will be navigating. • For simplicity 100m is the norm for finding your pace count. • Step off with the right foot, and count every time your left foot strikes the deck.
Pace Count Between Points • Determine distance to be traveled, we will use 370m • Set up problem: 370m x 60p 100m 3) Cancel like units. 4) X = 222p
Say it took 250 Paces, instead of 222 paces • Use “Algebra” to correct your pace count on the fly. • Ex: 250 = 370m x (X) 100m -New pace count = 68p for every 100m
Factors Affecting Pace • Slope: Lengthens downhill, shortens uphill. • Winds: Tailwinds lengthen, headwinds shorten • Surface: Loose surfaces tend to shorten pace. • Elements: Same as above.
Factors Affecting Pace • Clothing: Heavier burdens shorten pace. • Stamina: Fatigue will shorten pace. • Visibility: Usually shorter at night. • Wearing one boot: If missing left boot, you will tend to drift left and vice versa.
Dead Reckoning • Method you will be graded on during OCS. • This process is simply and blindly following an established azimuth for a specific distance without regard to terrain.
Procedure • 1) Locate your starting point and objective on the map or card. • 2) Determine the grid azimuth between the two points and convert it to a magnetic azimuth • 3) Determine the distance to your objective and convert it to a pace count.
Procedure Cont. • 4) Set the magnetic azimuth on your compass: 1 Rotate the compass until the desired azimuth falls under the fixed black index line. • 5) Holding the compass in hand, turn the bezel ring until the luminous line is matched up with the north seeking arrow.
Procedure Cont. • 5) To follow the azimuth, use the center-hold technique and turn your body until the north-seeking arrow is aligned with the luminous line. • 6) Proceed in the direction of the front cover, along the azimuth, the required number of paces.
Factors That Cause Drift 1) Physical attributes. Example: One leg may be shorter than the other, causing a tendency to deviate. 2) Unbalanced load. An unbalanced load may pull you slightly off-balance, causing deviation from your intended direction of movement.
Factors That Cause Drift 3) Elements. There is a normal tendency to edge away from rain, snow, or the sun in order to receive the impact over your shoulder or on your back. 4) Movement around obstacles. Right-handed people have an inherent tendency to move to the right around an obstacle, while left-handed people move to the left. A wise navigator alternates his direction of movement around obstacles.
Terrain Association • Terrain association. This is the process of using terrain features to guide the navigator to the objective with little or no reliance on the compass. Terrain association is, by far, the technique of choice, as it allows the navigator to know his location at all times just by referencing the surrounding terrain. (map required)
Procedure 1) Determine your start point and objective. 2) Identify the terrain features between these points. 3) Proceed to your objective, "reading" the terrain along the direction of your movement.
Bypassing Obstacles • Utilizing the 90° Offset rule to bypass obstacles. This technique is used when you are not able to cross a sizable obstacle. To execute this technique, you simply create a "box" around the obstacle by adding and subtracting 90° to your azimuth. You must keep track of your pace count during the evolution.
Set compass for night Navigation 1) Rotate the bezel ring until the luminous line is over the fixed black line. 2) Find the desired azimuth and divide it by three. The result is the number of clicks to rotate the bezel ring. 3) If the desired azimuth is smaller than a 180 degrees, the number of clicks on the bezel ring should be counted in a counterclockwise direction.
Setting compass for Night 4) If the desired azimuth is larger than 180 degrees, subtract the number of degrees from 360 and divide by 3 to obtain the number of clicks. 5) Count the clicks in a clockwise direction. 6) With the compass preset as described, assume a center hold technique and rotate your body until the north seeking arrow is aligned with the luminous line on the bezel.
Night Land Nav 7) Proceed forward in the direction you are facing or follow the direction the luminous dots which are aligned with the fixed black index line containing the azimuth. 8) Do not just follow the north seeking arrow.
Example Problem • If the desired azimuth is 51 degrees: divide by 3, which equals 17 clicks counterclockwise • The desired azimuth is 330 degrees: 360 - 330 = 30 30/3 = 10 clicks clockwise.
Trouble Shooting • Measure 1, 2, 3 times, cut once. • Don’t panic, and begin to wander. • Know which way you tend to drift, this will help when you reach the end of your pace count. • If all else fails, haul ass back to your start point and start again. (some points are very close together) • Continually check your azimuth.