DIMENSIONING
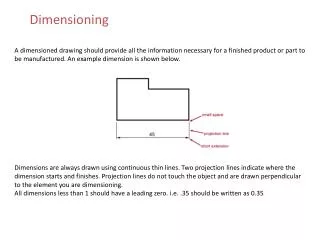
DIMENSIONING. Why do we need to dimension drawings? Dimensions and notes define the size, location, finish and other requirements to fully define what you want manufactured. Why is dimensioning important?.

DIMENSIONING
E N D
Presentation Transcript
DIMENSIONING Why do we need to dimension drawings? Dimensions and notes define the size, location, finish and other requirements to fully define what you want manufactured.
Why is dimensioning important? • Even if you make a drawing to scale, it would be difficult to determine the exact precision that is needed. • It would be time consuming to measure each of the lines to determine measurement. • The basis for modern part dimensioning is the need for interchangeable parts (being able to buy something off the shelf that fits what you already have)
Generally, dimensioning involves identifying the size and location dimensions. • Size Dimensions determine the overall size and shape of a drawing. • Location Dimensions typically determine where different entities are located within the drawing.
Location Dimensions • When locating an item within the drawing (locating a hole or other object) always give the horizontal and vertical position as it relates to the object. • Then give the size of the object • Eg. Where is the object located and how big is it?
Most dimensions consist of three types of lines • Dimension lines • Extension lines • Centerlines Dimension Centerlines Extension Lines
Dimension Lines • A Dimension Line is a thin, dark, solid line that is terminated by an arrowhead. Dimension 1.0 Dimension Line Arrow Head
Extension Lines • An Extension Line is a thin, dark, solid line that extends from a point on the drawing to which a dimension refers. 1/8 beyond Extension Line 5.0 1/16 gap
Centerlines • A Centerline is a thin, dark line alternating long and short dashes that is commonly used as an extension line in location holes or other symmetrical objects. Worksheet # 15 &16
Dimensions: Architectural Vs. Engineering • Architectural dimensions are placed above the dimension line • Engineering dimensions are placed within the dimension line dim dim
Dimensioning Systems • Unidirectional System: where all dimensions are read from the bottom of the sheet (like a book) • Aligned System: all the dimensions are aligned with the surface that they represent (read from bottom or right side of sheet)
Dimension Spacing • Typically, the spacing between the nearest dimension line and the object should be about .375 or 3/8” away while all other dimensions should be .25 or ¼” apart thereafter.
Dimension Stacking • When stacking dimensions, the shortest dimension goes closest to the object, while the longest (or overall) appears furthest. • Dimension Lines typically should not cross extension lines or other dimension line
Arrow Heads • When drawing Arrowheads they should be long and lean at a ratio of 3:1 (length:height) • In Architecture this is different!
Leaders • A Leader is a thin solid line that directs the viewer’s attention to a note or dimension. • A Leader with an arrow identifies a location. • A Leader with an dot identifies a surface. • Try not to draw leaders so that they are horizontal or vertical (and/or to long) • A Leader to a circle should be drawn so that it would pass through the center of the circle if extended. Note here Surface here
Dimensioning Arcs Vs. Circles • When dimensioning an arc use the radius symbol (R) • When dimensioning a circle use the diameter symbol ( ) R1.0 2.0
Datum Line Vs Chain Style • In Datum Line dimensioning, you start with a single reference line and then each dimension is developed off that line Datum line
Chain Style Dimensioning • Chain style is where the dimensions are linked from one to the next. (typically less accurate when dealing with high precision) In Chain Style Dimensioning tolerances are added to each individual dimension Takes up less room when dimensioning area is minimal
Over Dimensioning • When dimensioning, it is good technique to avoid listing the dimension more than once through out the drawing. • If you need to list a dimension more than once, for accuracy or ease of viewing, you must encase the dimension within a set of brackets. Reference Dimension (1.3753)
Dimensioning a Circular Object • When dimensioning a circle, or an object that is defined by an arc, it is good technique to dimension to the center point and then give the radius. Radius d d
Angular Dimensions Vs. Point Locations • You can draw angular surfaces by knowing a point of reference and the angle of the surface, or you can give two points of reference.
Rectangular, Polar, or Equally Spaced • Rectangle dimensioning refers to measuring change in horizontal and vertical positioning. • Polar measures the angular difference between objects (usually with a reference point). • Equally spaced gives a center locations of the entities, the number required, and then indicates the objects are all equally spaced (meaning same angle occurs between them)
Examples of each… • List each as you identify them.
Questions? The most important question that you could ask yourself is “Can this be drawn accurately with the information that I given the drawing? • Please complete worksheets

