Download
1 / 11
110 likes | 414 Vues
Welcome To your Visual Arts Lesson . Miss Moore. Introduction. This is the first part to a two week program which is exploring yourself within the Visual Arts. First task: on your own first, in your corner of the paper brainstorm everything you know about Visual Arts.

E N D
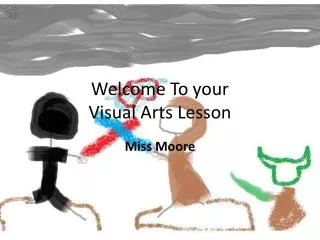
Welcome To yourVisual Arts Lesson Miss Moore
Introduction This is the first part to a two week program which is exploring yourself within the Visual Arts. First task: on your own first, in your corner of the paper brainstorm everything you know about Visual Arts. Discuss with the rest of the group what you know about the Visual Arts.
Content This slide show will show you different techniques from the tools that are available on Paint. Avoid using the eraser and the ‘new page’ button. Click on one of the buttons to start. Pencil Brush Click once finished all 4 Crayon Spray Can
Pencil For this one keep the same colour for the pencil. Click the Pencil. Place the pencil on the piece of paper and start drawing lines. Change the thickness of the pencil Use this pencil and start drawing lines on your page. What do you see? How many lines do you see?
Shading Click on the video below. Watch Kate as she demonstrate shading What are some of the things mentioned that shading can be used for. Click to return to the menu.
Crayons Click the Crayon. Place the crayon on the same piece of paper and start drawing lines. Change the colour of the crayon, Why did you choose those colours? How do they make you feel?
Colours Click on the link below learn more about colours http://www.technologystudent.com/designpro/pricol1.htm Choose one set of the complimentary colours and place them together. Do they go well together? Click to return to the menu.
Brush Click the Oil Brush. Place the oil brush on the paper and start painting. Change the colour. What do the strokes remind you of? Click to return to the menu.
Spray Can Click the Spray Can. Place the spray can on the paper and start spraying. Change the size of the spray. What does the size do? What happens when you hold it in the same spot? This picture was created only by Spray Can Click to go back to the menu.
Call the teacher over to get your final piece saved. Complete another piece using each of the techniques you just used, this should express who you are as a person. Once finished call the teacher over.
Early Finishers If you have finished early, open up word document. I want you to answer these questions. • Describe how this picture represents who you are as a person. • Why you chose those colours?