Multimeters
Learn how to properly use multimeters, including step-by-step instructions for using them as ammeters and voltmeters. Avoid common mistakes and ensure safety while measuring current and voltage in circuits.


Multimeters
E N D
Presentation Transcript
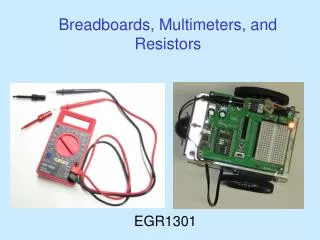
Multimeters How to use them
The Multimeter We have black and yellow ones – the black ones are the ‘newest’… Some of the yellow ones have ‘use only as an ammeter’ written on them… look at such advice!
‘COM’ • Always start by putting a wire into the ‘com’ connection – this is common to its use as a voltmeter and ammeter.
Use as an ammeter • You already have one wire in the ‘com’. You need to put another wire in the terminal with ’10A’ on it • Then turn the dial to 10A
Ammeter • The ammeter is placed in series in a circuit – never put it in parallel – it is of such low resistance that it will cause a short circuit and could make your power pack ‘blow’ or a battery get very hot! • You have to make a gap in your circuit to add it in. Put it next to the component you wish to investigate. • It tells you the rate at which the charge is moving through your component (how fast the charge is moving) • A ‘typical’ low current is 0.1A • A high current is anything more than 1A – 5A will make the wires smell and/or melt!
Use as a voltmeter • You already have one wire in the ‘com’. You need to put another wire in the terminal with a V on it • Then turn the dial to 20V
Voltmeter • The voltmeter is placed in parallel around the component you are investigating. Never put it in series – it has such a high resistance it will cut the flow of current down to a trickle! • It tells you the potential difference across the component – the ‘electrical slope’ that makes charge move through it. • It is always the last part of a circuit that you wire up and can be added or removed without changing the action of the circuit itself.
Always turn the dial ‘off’ after use • These multimeters operate on 9V batteries. • They are expensive to run all day and night! • Make sure they are ‘off’ when you are not using them