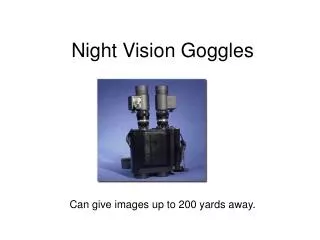
Z -Goggles
Multi-function Vision System. Z -Goggles. Group 1 C.J. Silver Geoff Jean Will Petty Cody Baxley. What are Z-Goggles?. Vision Enhancement System 3 cameras – Visible, IR, UV Image change functions – Shift, Drunken Vision, Photo-negative, Spectrum Shift Function control via UI controller

Z -Goggles
E N D
Presentation Transcript
Multi-function Vision System Z-Goggles Group 1 C.J. Silver Geoff Jean Will Petty Cody Baxley
What are Z-Goggles? • Vision Enhancement System • 3 cameras – Visible, IR, UV • Image change functions – Shift, Drunken Vision, Photo-negative, Spectrum Shift • Function control via UI controller • Portable, helmet-mounted screen • Battery-powered
Goals and Objectives • Cost-effective engineering • Low cost components requiring more work • Portability • Battery and backpack/helmet system allows movement • Simple to use • Simple UI controller for video mode and functions • Effective video processing and display • Minimize choppiness by maximizing processing speed via parallel logic implementation
Processor Optics Display User Interface Design ApproachSeparate systems – Integrated at later stages • Optical System • Video Processor • Display • User Interface • Power supply
Optical System Specs and Reqs • The unit shall contain three cameras to capture live video data. • One camera will be filtered normally to allow color video. One camera will be filtered with a UV pass filter to allow UV video. The final camera will be filtered with an IR pass filter to allow IR video. • Cameras resolution will be at least 320 x 240, up to 640 x 480. • The Optical System will output RGB or YUV data in a usable or convertible size (8bit is the target for the Video Processor). • The system shall be capable of achieving at least 15 fps (30 preferred).
Design Decision– Webcam issue • Initial design concept used Logitech C200 webcam for cameras • Discussion with Logitech technical support revealed necessity to create a dummy Windows driver to run cameras • Reverse engineering the driver to decode the USB information was deemed too time intensive – thus the move to the CM-26N
Checking IR filter • Opened camera and determined an IR filter was present • Filter will be removed and replaced with Wood’s Glass for the UV cam, and photo negative film for the IR camera.
Difficulty – NTSC camera not working • No image found within the output, though color changes slightly when objects are moved into view. • Camera is experiencing sync signal issues. • Connections are properly grounded and powered. • Tested on multiple televisions, old and new.
Design decision – Camera Replacement • Due to issues, decided to check other cameras. • Found a digital output camera that has the specifications we need, the C3188A, based on OV7620 sensor from OmniVision. • 16/8 bit output RGB or YUV, or monochrome composite for testing. • Programmable through I2C interface.
Video Processor overview IR UV RGB Grayscale Buffer Controller Merge UI Blur Edge Detect Palette Shifter VGA Output
Design decision – Platform (DSP vs. FPGA) • FPGA • Scattered support of operations • Time-consuming implementation • Timing guarantees • Cheap development environments • DSP • Strong compiler and toolchain support • Fast linear multiply/add • Greatly simplify implementations of 2d transforms • No guarantee of timing/throughput
Design decision – Which FPGA used, why? • S3BOARD • 1Mb onboard asynchronous SRAM 10ns access time • 500MHz max internal clock speed • Too few GPIO pins for 16-bit inputs • Nexys2 • 8bpp Video • Lots of GPIO pins • Higher gate count
Video ProcessorSpecs and Reqs • 640x480 30fps 8/16bpp • Pixel process time: 108ns • Multiply/Add time <20ns • Buffer Read at least 3x faster than pixel clock • FIFO based system • Dual-buffer cache system • 3 video lines of storage for transforms • 3x3 storage element to reduce memory load
Success – Subsystem Construction • Optimization of edge detection with Sobel Operator • Optimization and proof for integer blur • Buffer controller design • Video output controller
Design – Edge Detection/Blur Gx=(H-A)+(F-C)+(G-B)<<1 Gy=(H-A)+(C-F)+(E-D)<<1 G=|Gx|+|Gy| (2^Z)(2^(X+3)+2^Y)=1
Difficulty – Possible Timing problems • Synchronization of video frames • Merge latency • Data sampling • I2C control translation between UI and camera
DisplaySpecs and Reqs • The unit’s display system shall be capable of displaying at least 15 fps (30 preferred). • The unit’s display system shall be VGA compatible for easy interfacing. • The unit’s display system shall be mounted approx 6” from the user’s face, and enclosed in a manner that allows the user to focus on the screen. • The unit’s display system will be capable of outputting a resolution of 640x480. • The unit’s display system shall receive valid frame data via a VGA controller on a FPGA board.
VGA Interface Software: VGA Controller: • Signal Timing: • Output Signals:
VGA Interface Sony LCD screen needs to be modified to support VGA connection Pin layout of VGA connector Solder points from VGA connection
Display work for prototype • Programmed an 8-bit VGA controller in Verilog • Soldered the connecting wires of the VGA output cord to the correct pins on the screen • Assembled working VGA connection cord with ribbon wire and the correct DB-15 connector • Tested the output of screen with VGA controller on FPGA
Display Screen Difficulties • Composite Sync Pulse timing problems -Not a XOR of Vertical and Horizontal Syncs • Backlight LED issues - Never worked; Need to be replaced • No Datasheet -Hard to find consistent information
UI Specs and Reqs • An ATMega168 microcontroller will be uses to control the user interface. • The system’s user interface shall be contained in a switch box remote • The system’s user interface shall contain one switch for each individual camera and function • The user interface software shall allow for multiple functions when feasible, and deal with multiple function switches when not. • The user interface software shall allow for easy modification should multiple camera image fusion become feasible.
User Interface overview User Interface Remote Control • Three Camera Switches • Four Function Switches • Power Light (LED) Microcontroller/ FPGA Interface Directly Connected Signals • Simple 7 High/Low Signals • Plenty of Open Pins on FPGA
User Interface Hardware Design ATmega168 Microcontroller
User Interface Software Design • Look-UP-Table • Array of 128 possible choices • Valid choice =1, Invalid choice = 0 • Reason for Design • Goal is to allow for any possible combination • of Cameras and Functions • Current design allows for easy modification • of any choice to be allowed or not
User Interface Development Tools ArduinoDuemilanove board • Easy Java-like Wiring language • Free Open Source Software • USB Programmable • Free, We already had one!
Power Specs and Reqs • The unit shall have a portable power supply, such as a type of battery. • The unit shall provide power outputs of 12 Volts and 5 Volts. • The power source shall be safely placed in the backpack, and any power lines that are run outside will be covered safely. • The power source shall have storage capacity capable of running the system for 2 hours. • The power supply shall have an On/Off switch to shut the system off.
Battery • Original battery chosen: 12 Volt, 7 Amphour, Lead Acid • Could be replaced with a new battery for final system; new cameras only require 5V input. • New battery will likely be 6 Volt, 2.2 Amp hour, NiMH; this will cause a shorter use-time, but it is lighterand cleaner.
LMZ12003 Regulator Design [ • Regulator for original design. • Input 12V : Output ~5 V, as shown. • Capable of up to 3A output load, which covers our entire system, if necessary. • Automatic shutdown when 1.18 V is reached.
Efficiency and Thermal Considerations • Over 90% efficient from 0.3 A to roughly 2.5A output. • Likely no thermal issues at the regulator. • If using new power source, another regulator with comparable or better specs has been found.
Physical Specs and Reqs • The unit shall have a weight of no more than 50 lbs. • No more than 10 lbs. can be attached to the user’s head; the remaining weight shall be distributed elsewhere. • Any electrical components attached to the helmet shall be covered for safety. • Components in the system will be secured properly with screws and within the backpack to prevent problems during movement.
Physical Specs and Reqs • The unit shall have a weight of no more than 50 lbs. • No more than 10 lbs. can be attached to the user’s head; the remaining weight shall be distributed elsewhere. • Any electrical components attached to the helmet shall be covered for safety. • Components in the system will be secured properly with screws and within the backpack to prevent problems during movement.
Current Project budget/ Estimated Final budget • C3188A Camera - $56.95 x3 = $170.88 • UV and IR lenses - $60.00 • Nexsys2 FPGA - $100.00 • PSOne Display Screen - $60.00 • 12 V7 AH PS1270 Battery - $19.00 • Power Supply 5V Regulator - $5.00 • Arduino Duemilanove - $30.00 • Backpack and Bicycle Helmet - $40.00 • Testing supplies - $100.00 • Total: $584.88
Immediate plans for completion • Resolve camera issue; configure new camera for digital output while testing filtering via composite output. • Continue building FPGA code for video processor. • Continue UI microcontroller programming and setup, order PCB. • Reconfigure power supply design for new camera, if cost and time permit; otherwise, build as currently designed.