Download
1 / 68
680 likes | 698 Vues
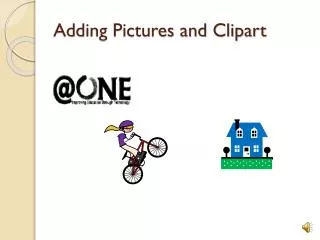
Learn how to insert pictures and shapes into a worksheet in Microsoft Excel 2013. This lesson covers inserting pictures from a file, using Office.com Clip Art, and searching for images via Bing Image Search.

E N D
Adding Pictures and Shapes to a Worksheet Lesson 13 MicrosoftExcel 2013 Microsoft Official Academic Course, Microsoft Word 2013
Objectives Microsoft Official Academic Course, Microsoft Word 2013
Step by Step: Insert a Picture from a File • GET READY. LAUNCH Excel and open a new, blank workbook. Download the image files for this lesson and SAVE them in the My Pictures folder. Alternatively, you can create a subfolder in your student data folder named Lesson 13 Images and save the images in that subfolder. • On the INSERT tab, in the Illustrations group, click the Pictures button. The Insert Picture dialog box opens (right). Microsoft Official Academic Course, Microsoft Word 2013
Step by Step: Insert a Picture from a File • Navigate to the folder that holds the image files for this lesson. Double-click the 13 Happy Kids image, or click it once and then click the Insert button. The picture is inserted into your worksheet. • SAVE the workbook as 13 Insert Pictures. • PAUSE.Leave the workbook open to use in the next exercise. Microsoft Official Academic Course, Microsoft Word 2013
Step by Step: Insert Office.com Clip Art • GET READY. USE the workbook from the previous exercise. • Click in cell J1. • On the INSERT tab, in the Illustrations group, click the Online Pictures button. The Insert Pictures dialog box appears. • To the right of Office.com Clip Art, click in the Search box. Type a keyword or phrase, such as canned food (above). Microsoft Official Academic Course, Microsoft Word 2013
Step by Step: Insert Office.com Clip Art • Click the magnifying glass icon at the right end of the search box or press Enter to begin the search. Excel searches the online Office clip art database for images containing the keywords “canned food” in their metadata. • The dialog box displays the images that meet the search criteria. To insert one of theimages, click on it and then click the Insert button in the dialog box. You can also double-click the desired image to insert it into your worksheet. When an image is inserted, the dialog box closes automatically. The figure at right shows a clip art image inserted into the worksheet. Microsoft Official Academic Course, Microsoft Word 2013
Step by Step: Insert Office.com Clip Art • SAVE the workbook. • PAUSE. Leave the workbook open to use in the next exercise. Microsoft Official Academic Course, Microsoft Word 2013
Step by Step: Insert an Image via a Bing Image Search • GET READY. USE the workbook from the previous exercise. • On the INSERT tab, in the Illustrations group, click the Online Pictures button. The Insert Pictures dialog box appears. • Click in the Search Bing box to the right of Bing Image Search. • Type a keyword or phrase, such as children eating lunch, to search the Internet via the Bing web browser for images containing those keywords in their metadata. • Click the magnifying glass icon at the right end of the search box or press Enter to begin the search. Microsoft Official Academic Course, Microsoft Word 2013
Step by Step: Insert an Image via a Bing Image Search • The dialog box displays the images that meet the search criteria. To insert one of the images, click on it and click the Insert button in the dialog box. You can also double-click the desired image. Once an image is inserted, the dialog box closes automatically. Notice that the image was inserted over the top of the clip art image. • Click the newly inserted image to select it, and then press the Delete key on your keyboard. • PAUSE. Leave the workbook open to use in the next exercise. Microsoft Official Academic Course, Microsoft Word 2013
Step by Step: Insert an Image from Your SkyDrive • GET READY. USE the workbook from the previous exercise. You must have an account at SkyDrive.com. Accounts are free to set up and use. SkyDrive is Microsoft’s cloud solution for sharing and collaboration. If you installed Office 2013 on your own computer, you most likely became an Office 365 subscriber, which gave you space within the SkyDrive cloud. You can use this space to store files of all kinds, including pictures. Microsoft Official Academic Course, Microsoft Word 2013
Step by Step: Insert an Image from Your SkyDrive • Connect to your SkyDrive account, navigate to the Pictures folder, and upload the Lesson 13 images. If a Pictures folder doesn’t exist, create it and then upload the images. • Click in cell Q1. • On the INSERT tab, in the Illustrations group, click the Online Pictures button. The Insert Pictures dialog box appears. • Click the Browse link to the right of the SkyDrive option. Your SkyDrive folders, including a Public folder, appear. Microsoft Official Academic Course, Microsoft Word 2013
Step by Step: Insert an Image from Your SkyDrive • Double-click the Pictures folder or whichever folder contains the picture you want to insert. The folder opens, displaying the images it contains (right). • Scroll through the images, select the 13 Canned Veges image, and then click the Insert button. You can also double-click the desired image. Microsoft Official Academic Course, Microsoft Word 2013
Step by Step: Insert an Image from Your SkyDrive • Once an image is inserted, the dialog box closes automatically. • SAVE the workbook as 13 Insert Pictures Solution and CLOSE the file. • PAUSE.LEAVE Excel open to use in the next exercise. Microsoft Official Academic Course, Microsoft Word 2013
Step by Step: Add a Shape • GET READY. LAUNCH Excel if it’s not already running. • OPEN 13 Add Shapes from the data files for this lesson. • On the INSERT tab, in the Illustrations group, click the Shapes button. A menu of shape categories appears, as shown at right. Microsoft Official Academic Course, Microsoft Word 2013
Step by Step: Add a Shape • Click the Up Arrow shape in the Block Arrows section. The Up Arrow shape is on the first line in the Block Arrows section, third from the left. • Move the mouse pointer onto the worksheet, just below the FUNDS RAISED column. The mouse pointer appears as a crosshair. Draw the shape by clicking and dragging down and a little to the right. The shape appears as you drag. Microsoft Official Academic Course, Microsoft Word 2013
Step by Step: Add a Shape • When the shape is the desired size (both size and proportions can be changed later, so don’t worry about being perfect), release the mouse button. Your block arrow should look similar the one at right. • Click any blank cell. • SAVE the workbook. • PAUSE. Leave the workbook open to use in the next exercise. Microsoft Official Academic Course, Microsoft Word 2013
Step by Step: Draw Lines • GET READY. USE the workbook from the previous exercise. • On the INSERT tab, in the Illustrations group, click the Shapes button. • In the Lines section, click the Arrow line (right). • Move the mouse pointer onto the worksheet (it appears as a crosshair), and click over the left side of cell D22 and drag diagonally up and to the right, toward cell D19. Microsoft Official Academic Course, Microsoft Word 2013
Step by Step: Draw Lines • When your line is complete, release the mouse button and click a blank cell. A finished line is shown at right. • SAVE the workbook. • PAUSE. Leave the workbook open to use in the next exercise. Microsoft Official Academic Course, Microsoft Word 2013
Step by Step: Add Text to a Shape • GET READY. USE the workbook from the previous exercise. • On the INSERT tab, in the Illustrations group, click the Shapes button. • In the Stars & Banners section, click the Explosion 1 shape (right). Microsoft Official Academic Course, Microsoft Word 2013
Step by Step: Add Text to a Shape • Click and drag the mouse pointer under the FUNDS NEEDED column, so the shape looks similar to the figure at right. • With the shape still selected, type Goal Exceeded!. The text begins in the upper left of the shape and wraps within the shape if the width is too small to display all text on one line. Don’t press Enter unless you want to force the text onto a new line to create a new paragraph or to place words or phrases on separate lines. Microsoft Official Academic Course, Microsoft Word 2013
Step by Step: Add Text to a Shape • To format the text in the shape, select the text by clicking just to the left of the “G” in Goal and dragging through all text. Note that when you’re within the shape that contains text, the mouse pointer turns to an I-beam cursor. • With the text selected, use the formatting tools in the Mini Toolbar or on the HOME tab to bold and center the text, and change the font size to 14. Grab a sizing handle on either side of the shape and pull to the left, right, or down a bit until all text appears, above. • SAVE the workbook. • PAUSE. Leave the workbook open to use in the next exercise. Microsoft Official Academic Course, Microsoft Word 2013
Step by Step: Add a Text Box • GET READY. USE the workbook from the previous exercise. • On the INSERT tab, in the Text group, click the Text Box button, right. • Move the mouse pointer onto the worksheet over cell B20. The mouse pointer turns into a vertical cursor. • Click and drag to cell C24 to draw a small box. If you draw a box that’s too big or too small for the text you will type into the box, you can resize the box after typing the text. Microsoft Official Academic Course, Microsoft Word 2013
Step by Step: Add a Text Box • The text box contains a blinking cursor. Type These numbers are preliminary. I need to check with the director before releasing the worksheet to the board for review. See below. • Click in cell A1 to make the text box non-active and to prepare for the next exercise. • SAVE the workbook. • PAUSE. Leave the workbook open to use in the next exercise. • You can use the formatting tools on the HOME tab or on the Mini Toolbar to format text in a text box. Microsoft Official Academic Course, Microsoft Word 2013
Step by Step: Use WordArt • GET READY. USE the workbook from the previous exercise. • On the INSERT tab, in the Text group, click the Insert WordArt button. The WordArt styles gallery appears, as shown below. • Select the Fill - Blue, Accent 1, Shadow style, which is on the first row, second from the left. Microsoft Official Academic Course, Microsoft Word 2013
Step by Step: Use WordArt • A box of sample text appears on the worksheet. Triple-click in the box to select all sample text and type Great Fundraisers!. Notice in the figure below that the style you chose in Step 2 is applied to the sample text. • SAVE the workbook as 13 Add Shapes Solution and CLOSE the file • PAUSE.LEAVE Excel open to use in the next exercise. Microsoft Official Academic Course, Microsoft Word 2013
Step by Step: Delete Graphics • GET READY. LAUNCH Excel if it’s not already running. • OPEN13 Delete Copy Move from the data files for this lesson. • On the Fundraising Events worksheet, click the WordArt graphic. Handles appear on its edges as shown below. Microsoft Official Academic Course, Microsoft Word 2013
Step by Step: Delete Graphics • Press the Delete key on your keyboard. Excel deletes the graphic. • Click the block arrow graphic and press the Delete key. • SAVE the workbook. • PAUSE. Leave the workbook open to use in the next exercise. Microsoft Official Academic Course, Microsoft Word 2013
Step by Step: Move Graphics • GET READY. USE the workbook from the previous exercise. • Click the starburst shape. Handles appear on its edges. • Point the mouse pointer inside the graphic. The mouse pointer should change to a four-headed arrow, as shown below. Microsoft Official Academic Course, Microsoft Word 2013
Step by Step: Move Graphics • Click and drag the graphic so it appears under the % of GOAL column. Release the mouse button. • Click and drag the arrow shape so it points to the FUNDS RAISED column, as shown below. • SAVE the workbook. • PAUSE. Leave the workbook open to use in the next exercise. Microsoft Official Academic Course, Microsoft Word 2013
Step by Step: Copy a Graphic • GET READY. USE the workbook from the previous exercise. • On the Fundraising Events worksheet, click the text box to select it. • Right-click a border of the text box and select Copy from the shortcut menu. • Click the Volunteers tab. • Right-click in cell A1 and under Paste Options in the shortcut menu, select the Use Destination Theme. Microsoft Official Academic Course, Microsoft Word 2013
Step by Step: Copy a Graphic • Triple-click inside the text box to select all text, and then type Confidential. Do not share this information without permission from a committee chair. The text box is shown below. • SAVE the workbook as 13 Delete Copy MoveSolution and CLOSE the file. • PAUSE.LEAVE Excel open to use in the next exercise. Microsoft Official Academic Course, Microsoft Word 2013
Step by Step: Apply a Style to a Shape • GET READY. LAUNCH Excel if it’s not already running. • OPEN13 Format Graphics from the data files for this lesson. • In the Fundraising Events worksheet, click the starburst shape to select it. • On the DRAWING TOOLS FORMAT tab, in the Shape Styles group, hold your mouse over each of the styles in the Shape Styles mini gallery. Excel previews each style using the selected shape. Microsoft Official Academic Course, Microsoft Word 2013
Step by Step: Apply a Style to a Shape • To see the full list of styles, click the More arrow in the lower right corner of the Shape Styles mini gallery. The Shape Styles gallery appears (see Figure 13-22). • From the gallery, select Light 1 Outline, Colored Fill - Olive Green, Accent 3. This style is on the third row, fourth from the left. The style is applied to your shape. Microsoft Official Academic Course, Microsoft Word 2013
Step by Step: Apply a Style to a Shape • To change the shape’s fill color, in the Shape Styles group, click the Shape Fill button. The color palette appears. • From the first row of the palette under Theme Colors, select Dark Blue, Text 2. The object’s background color changes to dark blue (above). Microsoft Official Academic Course, Microsoft Word 2013
Step by Step: Apply a Style to a Shape • SAVE the workbook. • PAUSE. Leave the workbook open to use in the next exercise. Microsoft Official Academic Course, Microsoft Word 2013
Step by Step: Resize a Graphic • GET READY. USE the workbook from the previous exercise. • Select the starburst shape. • Point to the lower-left corner handle. When the mouse pointer turns to a two-headed arrow, drag inward to make the graphic smaller. With the handle still selected, drag outward to make the graphic larger. By pressing the Shift key while using a corner handle, you maintain the current width-to-height ratio when resizing a graphic. Microsoft Official Academic Course, Microsoft Word 2013
Step by Step: Resize a Graphic • To change the height of the shape, drag a top or bottom handle. This allows you to stretch the shape vertically. • To change the width of the shape, drag a side handle–drag outward to widen it and inward to make it narrower. Adjust your starburst shape so it resembles the figure above. • SAVE the workbook. • PAUSE. Leave the workbook open to use in the next exercise. Microsoft Official Academic Course, Microsoft Word 2013
Step by Step: Rotate a Graphic • GET READY. USE the workbook from the previous exercise. • Select the starburst shape. • Point to the rotation handle (below). The mouse pointer turns to a circular arrow. • Drag the mouse counterclockwise. As you drag, the mouse pointer changes to a series of arrows in a circle. Microsoft Official Academic Course, Microsoft Word 2013
Step by Step: Rotate a Graphic • When the shape is rotated to the desired angle, similar to the figure at right, release the mouse button. • SAVE the workbook. • PAUSE. Leave the workbook open to use in the next exercise. Microsoft Official Academic Course, Microsoft Word 2013
Step by Step: Control Stacking Order when Graphics Overlap • GET READY. USE the workbook from the previous exercise. • In the Format Graphics workbook, click the Overlap sheet tab. The worksheet contains several overlapping graphics. • Select the border of the WordArt graphic (Great Fundraisers), which has other graphics stacked on top of it. The figure at right shows the stack of graphics. The WordArt object, which is further down in the stack, is selected. Microsoft Official Academic Course, Microsoft Word 2013
Step by Step: Control Stacking Order when Graphics Overlap • On the DRAWING TOOLS FORMAT tab, in the Arrange group, click the Bring Forward button. The WordArt graphic moves up one level in the stack. • Click the Bring Forward arrow button and select Bring to Front. The WordArt graphic appears at the top of the stack (below). Microsoft Official Academic Course, Microsoft Word 2013
Step by Step: Control Stacking Order when Graphics Overlap • With the graphic still selected, click the Send Backward button to move it back one level. The Food Drive shape is now on top. • SAVE the workbook as 13 Format Graphics Solution and CLOSE the file. • PAUSE.LEAVE Excel open to use in the next exercise. Microsoft Official Academic Course, Microsoft Word 2013
Step by Step: Make Corrections to a Graphic • GET READY. LAUNCH Excel if it’s not already running. • OPEN 13 Enhancements from the data files for this lesson. • In the Correction worksheet, select the photo of two boys. • On the PICTURE TOOLS FORMAT tab, in the Adjust group, click the Corrections button. The menu shown above appears. Microsoft Official Academic Course, Microsoft Word 2013
Step by Step: Make Corrections to a Graphic • Using the thumbnails of your selected photo from the Sharpen/Soften corrections section, make a choice that represents the adjustment you’re looking for—more sharpness for a blurry picture or perhaps softening for an image that’s too sharp or where the exposure was too harsh. At the far right end of the Sharpen/Soften section, select Sharpen: 50%. The figure below shows two side-by-side images—the image on the left before applying 50% sharpening and the image on the right after. Microsoft Official Academic Course, Microsoft Word 2013
Step by Step: Make Corrections to a Graphic • To adjust a photo that’s too dark or too light, use the Brightness/Contrast settings, also represented by thumbnails showing your selected photo in varying stages of correction. Hold your mouse over each of the settings to see their effect on your photo, but don’t select any of the settings. • SAVE the workbook. • PAUSE. Leave the workbook open to use in the next exercise. Microsoft Official Academic Course, Microsoft Word 2013
Step by Step: Change the Color of an Image • GET READY. USE the workbook from the previous exercise. • Click the Color sheet tab and select the top photo, which shows a baby holding a spoon. • On the PICTURE TOOLS FORMAT tab, in the Adjust group, click the Color button. The menu shown above appears. Microsoft Official Academic Course, Microsoft Word 2013
Step by Step: Change the Color of an Image • Hold your mouse over each thumbnail of your photo to see its effect. • In the Recolor section of the Color menu, on the first line of the gallery, select Sepia. The image takes on brown tones. • On the PICTURE TOOLS FORMAT tab, in the Adjust group, click the Color button, and then select Picture Color Options at the bottom of the menu. Microsoft Official Academic Course, Microsoft Word 2013
Step by Step: Change the Color of an Image • In the Format Picture pane on the right, move the Sharpness slider to the right until you reach the 33% value. Your photo should look similar to the figure below. • Close the Format Picture pane. • SAVE the workbook. • PAUSE. Leave the workbook open to use in the next exercise. Microsoft Official Academic Course, Microsoft Word 2013
Step by Step: Apply Artistic Effects • GET READY. USE the workbook from the previous exercise. • In the Color worksheet, select the donation box photo. • On the PICTURE TOOLS FORMAT tab, in the Adjust group, click the Artistic Effects button. The gallery of effects thumbnails is shown below. Microsoft Official Academic Course, Microsoft Word 2013
Step by Step: Apply Artistic Effects • Hold your mouse over each effect to see its preview on the photo. Select the Line Drawing effect. The figure below shows the Line Drawing effect applied. Microsoft Official Academic Course, Microsoft Word 2013