Download

1 / 75
770 likes | 1.11k Vues
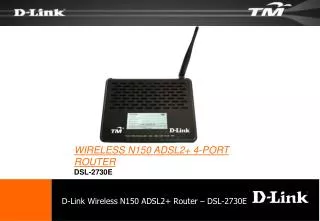
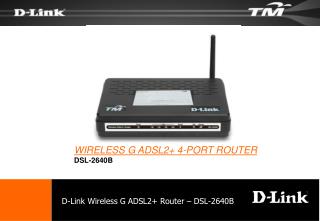
D-Link Wireless N150 ADSL2+ Router – DSL-2730E. WIRELESS N150 ADSL2+ 4-PORT ROUTER DSL-2730E. Agenda. Bridge Mode Configuration Dial-Up on PC (IE8) for Bridge Mode Other Features Status Menu Advanced Wireless Port Forwarding Port Mapping Wireless Router Deployment Diagram.

E N D
D-Link Wireless N150 ADSL2+ Router – DSL-2730E WIRELESS N150 ADSL2+ 4-PORT ROUTER DSL-2730E
Agenda • Bridge Mode Configuration • Dial-Up on PC (IE8) for Bridge Mode • Other Features • Status Menu • Advanced Wireless • Port Forwarding • Port Mapping • Wireless Router Deployment Diagram Overview Of The Wireless ADSL2+ Router Wireless Modem Sticker Warranty Sticker Front LEDs Rear Ports Hardware Connection Connecting DSL-2730E Factory Default Settings Configure PC (Windows XP) Web Setup Wizard Manual Internet Configuration
Overview Of The Wireless ADSL2+ Router • PPP (Point-to-Point Protocol) Security • The DSL-2730E ADSL Router supports PAP (Password Authentication Protocol), CHAP (Challenge Handshake Authentication Protocol), and MSCHAP for PPP connections. • DHCP Support • Dynamic Host Configuration Protocol automatically and dynamically assigns all LAN IP settings to each host on your network. This eliminates the need to reconfigure every host whenever changes in network topology occur. • Network Address Translation (NAT) • For small office environments, the DSL-2730E allows multiple users on the LAN to access the Internet concurrently through a single Internet account. This provides Internet access to everyone in the office for the price of a single user. NAT improves network security in effect by hiding the private network behind one global and visible IP address. NAT address mapping can also be used to link two IP domains via a LAN-to-LAN connection.
Overview Of The Wireless ADSL2+ Router • TCP/IP (Transfer Control Protocol/Internet Protocol) • The DSL-2730E supports TCP/IP protocol, the standard language used for Internet access. It is compatible with access servers manufactured by major vendors. • RIP-1/RIP-2 • The DSL-2730E supports both RIP-1 and RIP-2 exchanges with other routers. Using both versions lets the Router to communicate with all RIP enabled devices. • Static Routing • This allows you to select a data path to a particular network destination that will remain in the routing table and never “age out”. If you wish to define a specific route that will always be used for data traffic from your LAN to a specific destination within your LAN (for example to another router or a server) or outside your network (to an ISP defined default gateway for instance).
Overview Of The Wireless ADSL2+ Router • Default Routing • This allows you to choose a default path for incoming data packets for which the destination address is unknown. This is particularly useful when/if the Router functions as the sole connection to the Internet. • Precise ATM Traffic Shaping • Traffic shaping is a method of controlling the flow rate of ATM data cells. This function helps to establish the Quality of Service for ATM data transfer. • Full Network Management • The DSL-2730E incorporates SNMP (Simple Network Management Protocol) support for web-based management and text-based network management. • Easy Installation • The DSL-2730E uses a web-based graphical user interface program for convenient management access and easy set up. Any common web browser software can be used to manage the Router.
Overview Of The Wireless ADSL2+ Router 4 x LAN ports + 1 x DSL port 1 x 2dBi Omni-Directional antennas (Non-detachable) 2.4GHz wireless b/g/n150 channels Wireless speed of 150 Mbps WEP/WPA/WPA2 - Personal/Enterprise(RADIUS) PPPoE/PPPoA/Bridge mode WPS support
Overview Of The Wireless ADSL2+ Router Firewall/NAT/DMZ Port forwarding/Port triggering TR-069 ready Network/Website filtering WAN management DDNS
Rear Ports Network Storage - DNS-323
Hardware Connection Laptop (Wireless) Power Adapter RJ-11 Cable (Red Cable) RJ-11 Cable(Black Cable) RJ-45 Cable(Yellow Cable) Power Telephone Wall Socket RJ-11 Cable (Blue Cable) ADSL Splitter Desktop (Wired) Telephone Network Storage - DNS-323
Connecting DSL-2730E Step 1: Plug the power cable into the power outlet of the router and the other end plug to the wall power socket. Step 2: Switch on the power for both the wall socket and the ON/OFF switch at the rear of the router. Ensure that the Power LED on the front of the unit turns Green. Step 3: Connect the Ethernet cable (Yellow Cable) from any one of the device’s LAN ports to the computer’s Ethernet port. Ensure that LAN Link LED on the front of the unit is lit and correspond to the LAN port at the rear. Step 4: Connect a black color telephone cord from the wall telephone socket to the ADSL splitter’s Line Jack. Connect Red color telephone cord from the router’s DSL port to the ADSL splitter’s DSL Jack. Ensure that the DSL LED on the front of the unit if lit. Network Storage - DNS-323
Factory Default Settings on DSL-2730E • Login Username/Password • Administrator (tmadmin/tmadmin) • User (tmuser/tmuser) • Default IP address: 192.168.1.1 • DHCP Server: Enabled • Wireless SSID: Dlink (OFF) • Wireless mode: 802.11b/g/n150 • Wireless security: None • Remote Management: None Network Storage - DNS-323
DHCP IP AssignationPC Configuration (Windows XP) Network Storage - DNS-323
Configure PC (Windows XP) Step 1: Configure your PC receives an IP address from the router. Go to “Control Panel”, open “Network Connection”. Network Storage - DNS-323
Configure PC (Windows XP) Step 2: Open, Local Area Network, under “Support” tab Check that your computer’s IP address type is “Assigned by DHCP”. The “Default Gateway” will show the router’s IP address. Network Storage - DNS-323
Configure PC (Windows XP) Please change the PC’s address type if it is not assigned by DHCP. Step 3: Click on “Properties” under the “General” tab. Network Storage - DNS-323
Configure PC (Windows XP) Step 4: Scroll down and click on “Internet Protocol (TCP/IP)”, click on “Properties” Network Storage - DNS-323
Configure PC (Windows XP) Step 5: Check on both the radio button to obtain both IP address and DNS server address automatically. Click “OK” to save the settings. Network Storage - DNS-323
Web Setup Wizard (PPPoE)tmuser/tmuser Network Storage - DNS-323
Web Setup Wizard – Login Network Storage - DNS-323
Web Setup Wizard – Run Setup Wizard Click “QUICK SETUP” tab. Network Storage - DNS-323
Web Setup Wizard – PPPoE-1 Enter the Streamyx ID and Password, Protocol and Connection Type. Then Click “Next” Network Storage - DNS-323
Web Setup Wizard – PPPoE-2 Enter a preferred Wi-Fi Name (SSID) and password key for the wireless network. Default security is WEP as basic. Then Click “Next” Network Storage - DNS-323
Web Setup Wizard – PPPoE-3 Check on the information. Then Click “Restart” Network Storage - DNS-323
Web Setup Wizard – Restart Wait for the Modem router to reconnect. Network Storage - DNS-323
Web Setup Wizard (PPPoA)tmuser/tmuser Network Storage - DNS-323
Web Setup Wizard – Login Network Storage - DNS-323
Web Setup Wizard – Run Setup Wizard Click “QUICK SETUP” tab. Network Storage - DNS-323
Web Setup Wizard – PPPoA-1 Enter the Streamyx ID and Password, Protocol and Connection Type. Then Click “Next” Network Storage - DNS-323
Web Setup Wizard – PPPoA-2 Enter a preferred Wi-Fi Name (SSID) and password key for the wireless network. Default security is WEP as basic. Then Click “Next” Network Storage - DNS-323
Web Setup Wizard – PPPoA-3 Check on the information. Then Click “Restart” Network Storage - DNS-323
Web Setup Wizard – Restart Wait for the Modem router to reconnect. Network Storage - DNS-323
Web Setup Wizard (Bridge)tmuser/tmuser Network Storage - DNS-323
Web Setup Wizard – Login Network Storage - DNS-323
Web Setup Wizard – Run Setup Wizard Click “QUICK SETUP” tab. Network Storage - DNS-323
Web Setup Wizard – PPPoA-1 Enter the Streamyx ID and Password, Protocol and Connection Type. Then Click “Next” Network Storage - DNS-323
Web Setup Wizard – PPPoA-2 Enter a preferred Wi-Fi Name (SSID) and password key for the wireless network. Default security is WEP as basic. Then Click “Next” Network Storage - DNS-323
Web Setup Wizard – PPPoA-3 Check on the information. Then Click “Restart” Network Storage - DNS-323
Web Setup Wizard – Restart Wait for the Modem router to reconnect. Network Storage - DNS-323
Bridge Mode Dial-Up on PC (IE8) Network Storage - DNS-323
Bridge Mode Dial-Up on PC (IE8) Step 1: Open a web browser (using Internet Explorer 8 as example) From the top menu, go to “Tools” “Internet Options” Go to “Connection” tab Click “Add…” to add a Dial-up network. Network Storage - DNS-323
Bridge Mode Dial-Up on PC (IE8) Step 2: Choose “Connect to the network via broadband” Click “Next” to continue. Network Storage - DNS-323
Bridge Mode Dial-Up on PC (IE8) Step 3: Enter a preferred name for this connection profile. Click “Finish” to continue. Network Storage - DNS-323
Bridge Mode Dial-Up on PC (IE8) A window will popup to configure the settings for the connection profile that is just created. Step 4: Check the box “Automatically detect settings” Enter into the Dial-up settings the account information given by the ISP Click “OK” Network Storage - DNS-323
Bridge Mode Dial-Up on PC (IE8) When user first try to connect to the internet, a Dial-up Connection window will popup to connect to the internet. Step 5: Choose from the drop down list the connection profile. Click “Connect” to continue Network Storage - DNS-323
Bridge Mode Dial-Up on PC (IE8) This information is provided automatically from the connection profile, so do not change anything. Step 6: Click “Connect” Network Storage - DNS-323
Bridge Mode Dial-Up on PC (IE8) Windows will try to connect using the information provided in the connection profile. If connection is unsuccessful, please check the profile settings. Network Storage - DNS-323