Download
1 / 10
100 likes | 265 Vues
Line and Form – Creating a design for a lino print. To design an idea for a lino print. The objective of the lesson. At the end of the lesson you will have designed your idea on the work sheet and chosen your colours in preparation to begin your lino print in the mock exam.

E N D
Line and Form – Creating a design for a lino print
To design an idea for a lino print. The objective of the lesson At the end of the lesson you will have designed your idea on the work sheet and chosen your colours in preparation to begin your lino print in the mock exam. The aim of the lesson
Sketch your final design for your lino print. The size of the piece of lino is 25 cm x 15cm and therefore you need to create a composition that is suitable for the piece of lino. Name: Class: Final Design • Sketch your final design for your lino in the below box (18cm x 15cm). • Firstly outline your design in pencil. Remember that the design will overlap. • Create a simple but interesting design but don’t include too much detail. • Chose 2 colours for you design, remember white is the first colour and black is the fourth colour. What colours?? White Black Note the strengths of your work and one target for improvement?
A Successful Design 1. Interesting composition, e.g. a variety of basic shapes that fill the space and create an effective balance. 2. To show awareness of the work of an artist, e.g. cubism. 3. A total of four colours. 4. Strength and variety in the lines.
Choose 1 colour for your design, and remember that white is the first colour and black is the last colour in terms of the order of printing. Think carefully about the colour scale, discuss with your partner what colours would be suitable or what colours would work unexpectedly!!! ? ? Remember the colour scale – light → dark Choosing your colours
Cold colours Warm colours Harmonic colours Opposite colours
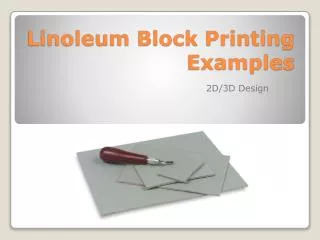
Outline your design using a pencil to begin with. Ensure that you fill the page and consider the pattern and shapes that you create. You can change the scale of your design to correspond with the size of the piece of lino.
Add your first colour to your design. Remember that the colour white is already part of your design, so leave spaces that will make use of the colour white. Ensure that you fill the basic shapes that you have chosen with your first colour. Consider the pattern and the basic shapes that you create.
Add the third colour to your design, namely black. Ensure that you fill the basic shapes in with black. You can also strengthen the black lines if you wish, in order to achieve a better contrast between colours.
What is your opinion of the design? The composition? The choice of colours? The basic shapes? Please give your personal opinion.


![The Features of Highly Effective Forms [SmashingConf NYC 2016]](https://cdn4.slideserve.com/7568502/the-features-of-highly-effective-forms-dt.jpg)