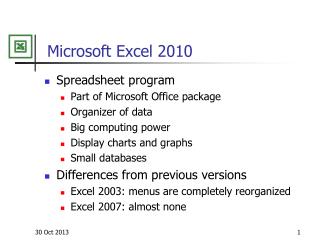
Microsoft Excel 2010
Microsoft Excel 2010. Chapter 4 Financial Functions, Data Tables, and Amortization Schedules. Objectives. Control the color and thickness of outlines and borders Assign a name to a cell and refer to the cell in a formula using the assigned name

Microsoft Excel 2010
E N D
Presentation Transcript
MicrosoftExcel 2010 Chapter 4 Financial Functions, Data Tables, and Amortization Schedules
Objectives • Control the color and thickness of outlines and borders • Assign a name to a cell and refer to the cell in a formula using the assigned name • Determine the monthly payment of a loan using the financial function PMT • Use the financial functions PV (present value) and FV (future value) • Create a data table to analyze data in a worksheet • Add a pointer to a data table Financial Functions, Data Tables, and Amortization Schedules
Objectives • Create an amortization schedule • Analyze worksheet data by changing values • Use names and print sections of a worksheet • Set print options • Protect and unprotect cells in a worksheet • Use the formula checking features of Excel • Hide and unhide cell gridlines, rows, columns, sheets, and workbooks Financial Functions, Data Tables, and Amortization Schedules
Project – Loan Payment Calculator with Data Table and Amortization Schedule Financial Functions, Data Tables, and Amortization Schedules
General Project Guidelines • Create and format the data entry section of the worksheet • Create and format the data table section of the worksheet • Create and format an amortization schedule in the worksheet • Specify and name print areas of the worksheet • Determine which cells to protect and unprotect in the worksheet Financial Functions, Data Tables, and Amortization Schedules
Adding Custom Borders to a Range • Select the desired range, and then right-click to display a shortcut menu and Mini toolbar • Click Format Cells on the shortcut menu to display the Format Cells dialog box • Display the Border tab • Select the desired color, border style, and outline • Click the OK button Financial Functions, Data Tables, and Amortization Schedules
Adding Custom Borders to a Range Financial Functions, Data Tables, and Amortization Schedules
Creating Names Based on Row Titles • Select the desired range • Click the Create from Selection button (Formulas tab | Defined Names group) to display the Create Names from Selection dialog box • Click the OK button to name the cells selected in the right column of the selection Financial Functions, Data Tables, and Amortization Schedules
Creating Names Based on Row Titles Financial Functions, Data Tables, and Amortization Schedules
Entering the Loan Amount Formula Using Names • Select the cell to contain the formula • While entering the formula, click the cells to include in the formula to use the names of the cells rather than the cell references Financial Functions, Data Tables, and Amortization Schedules
Entering the PMT Function • Select the cell to contain the formula • Enter the PMT function • ex: –pmt(Rate/12,12*Years, Loan_Amount Financial Functions, Data Tables, and Amortization Schedules
Other Financial Functions Financial Functions, Data Tables, and Amortization Schedules
Creating a Percent Series Using the Fill Handle • Type the first two percentages in the series, each in an individual cell • Select the two cells containing the percentages • Drag the fill handle through the last cell in the desired series, and release the mouse button Financial Functions, Data Tables, and Amortization Schedules
Creating a Percent Series Using the Fill Handle Financial Functions, Data Tables, and Amortization Schedules
Defining a Range as a Data Table • Select the range in which to create the data table • Click the What-If Analysis button (Data tab | Data tools) to display the What-If Analysis menu • Click Data Table on the What-If Analysis menu to display the Data Table dialog box • Click the ‘Column input cell’ box and then click the cell to select as the desired input cell for the data table • Click the OK button to create the data table Financial Functions, Data Tables, and Amortization Schedules
Defining a Range as a Data Table Financial Functions, Data Tables, and Amortization Schedules
Adding a Pointer to the Data Table • Select the desired range, and then click the Conditional Formatting button (Home tab | Styles group) to display the Conditional Formatting list • Click New Rule on the Conditional Formatting list to display the New Formatting Rule dialog box • Click ‘Format only cells that contain’ in the Select a Rule Type box (New Formatting Rule dialog box) to select the type of rule to create • Select equal to in the second box from the left • Type the desired absolute cell reference in the right box to complete the condition for the rule based on a cell value Financial Functions, Data Tables, and Amortization Schedules
Adding a Pointer to the Data Table • Click the Format button, and then select the desired format for the cells meeting the condition • Click the OK button to display the New Formatting Rule dialog box with a preview of the conditional format • Click the OK button to apply the conditional formatting rule Financial Functions, Data Tables, and Amortization Schedules
Adding a Pointer to the Data Table Financial Functions, Data Tables, and Amortization Schedules
Entering the Formulas in the Amortization Schedule Financial Functions, Data Tables, and Amortization Schedules
Entering the Formulas in the Amortization Schedule Financial Functions, Data Tables, and Amortization Schedules
Entering the Formulas in the Amortization Schedule Financial Functions, Data Tables, and Amortization Schedules
Setting Up a Worksheet to Print • Click the Page Setup Dialog Box Launcher (Page Layout tab | Page Setup group) to display the Page Setup dialog box • If necessary, click the Page tab (Page Setup dialog box) to display the Page sheet and then click Fit to in the Scaling area to set the worksheet to print on one page • Click the Sheet tab to display the tab and then click ‘Black and white’ in the Print area to select the check box • Click the OK button to close the Page Setup dialog box Financial Functions, Data Tables, and Amortization Schedules
Setting Up a Worksheet to Print Financial Functions, Data Tables, and Amortization Schedules
More about Print Options Financial Functions, Data Tables, and Amortization Schedules
Setting the Print Area • Select the range to set as the print area, and then click the Print Area button (Page Layout tab | Page Setup group) to display the Print Area menu • Click Set Print Area on the Print Area menu to set the range of the worksheet which Excel should print • To clear the print area, click the Print Area button (Page Layout tab | Page Setup group) to display the Print Area list and then click the Clear Print Area command on the Print Area list to reset the print area to the entire worksheet Financial Functions, Data Tables, and Amortization Schedules
Setting the Print Area Financial Functions, Data Tables, and Amortization Schedules
Naming and Printing Sections of a Worksheet • If necessary, select the range to name, and then type the desired range name as the name of the range to create a range name • Press the ENTER key to create a range name • Select the desired range to print • Click File on the Ribbon to open the Backstage view and then click the Print tab in the Backstage view to display the Print gallery • If necessary, click the Print Active Sheets button in the Settings area and select Print Selection to select the desired item to print Financial Functions, Data Tables, and Amortization Schedules
Naming and Printing Sections of a Worksheet Financial Functions, Data Tables, and Amortization Schedules
Naming and Printing Sections of a Worksheet Financial Functions, Data Tables, and Amortization Schedules
Protecting a Worksheet • Select the range(s) to unprotect • Right-click one of the selected ranges to display a shortcut menu and Mini toolbar • Click Format Cells on the shortcut menu to display the Format Cells dialog box • Click the Protection tab and then click Locked to remove the check mark • Click the OK button to close the Format Cells dialog box • Deselect the ranges Financial Functions, Data Tables, and Amortization Schedules
Protecting a Worksheet • Click the Protect Sheet button (Review tab | Changes group) to display the Protect Sheet dialog box • When Excel displays the Protect Sheet dialog box, ensure that the ‘Protect worksheet and contents of locked cells’ check box at the top of the dialog box and the first two check boxes in the list contain check marks so that the user of the worksheet can select both locked and unlocked cells • Click the OK button to close the Protect Sheet dialog box Financial Functions, Data Tables, and Amortization Schedules
Protecting a Worksheet Financial Functions, Data Tables, and Amortization Schedules
Hiding and Unhiding a Sheet • Right-click the sheet tab to hide to display a shortcut menu • Click Hide on the shortcut menu to hide the sheet • Right-click any sheet tab to display a shortcut menu • Click Unhide on the shortcut menu to open the Unhide dialog box • When Excel displays the Unhide dialog box, click the sheet to unhide • Click the OK button to unhide the hidden sheet Financial Functions, Data Tables, and Amortization Schedules
Hiding and Unhiding a Sheet Financial Functions, Data Tables, and Amortization Schedules
Hiding and Unhiding a Workbook • Click the Hide button (View tab | Window group) to hide the workbook • Click the Unhide button (View tab | Window group) to display the Unhide dialog box • If necessary, click to select the workbook to unhide • Click the OK button to unhide the selected hidden workbook and display the workbook in the same state as it was in when it was hidden Financial Functions, Data Tables, and Amortization Schedules
Hiding and Unhiding a Workbook Financial Functions, Data Tables, and Amortization Schedules
Formula Checking Financial Functions, Data Tables, and Amortization Schedules
Chapter Summary • Control the color and thickness of outlines and borders • Assign a name to a cell and refer to the cell in a formula using the assigned name • Determine the monthly payment of a loan using the financial function PMT • Use the financial functions PV (present value) and FV (future value) • Create a data table to analyze data in a worksheet • Add a pointer to a data table Financial Functions, Data Tables, and Amortization Schedules
Chapter Summary • Create an amortization schedule • Analyze worksheet data by changing values • Use names and print sections of a worksheet • Set print options • Protect and unprotect cells in a worksheet • Use the formula checking features of Excel • Hide and unhide cell gridlines, rows, columns, sheets, and workbooks Financial Functions, Data Tables, and Amortization Schedules
MicrosoftExcel 2010 Chapter 4 Complete