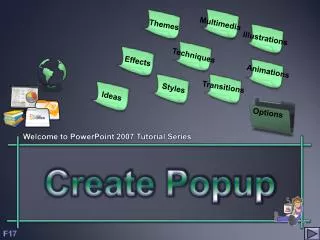
Create Popup
Multimedia. Themes. Illustrations. Techniques. Effects. Animations. Transitions. Styles. Ideas. Options. Welcome to PowerPoint 2007 Tutorial Series. Create Popup. F17.

Create Popup
E N D
Presentation Transcript
Multimedia Themes Illustrations Techniques Effects Animations Transitions Styles Ideas Options Welcome to PowerPoint 2007 Tutorial Series Create Popup F17
I want to click or rollover a spot on the slide and reveal an explanation box or another small image or whatever, like a callout that only appears when you scroll over or click something. Pop-up windows and images that appear when you click are a great way to add interactivity to PowerPoint. You can use them in an educational or business context. One way to accomplish this is with triggers. What are triggers? They are objects that you click to cause some animation to occur. Essentially, you turn an object into a clickable button. I used AutoShape callouts for the pop-up windows. You could also use images or any other object that you can insert on a slide. For the entrance and exit custom animation; I chose Zoom Action to do: First click on the Red Button, then on the White Button, followed by the Blue and last the Yellow Button. Ctrl + A will show your Pointer on screen PowerPoint Series
I am sure you get the picture! First insert your picture, ie a map Insert Callouts from the Illustration Shapes The Yellow diamond help you to position the callout exactly where you need it Under Drawing Tools change Border of Callout and Insert a Picture from your collection as Fill. I used a Circle from Shapes and change appearance with Shape Styles / Shape Effects Ctrl + D to duplicate each Dot and Callout The Bevel Effect cannot be used for Callouts PowerPoint Series
Select your Destinations Position Callouts and Dots Drag Yellow Diamonds to Dots Each Callout needs an Entrance and Exit Effect Select a Callout / Animations / Custom Animation / Entrance / Zoom Change Speed / From Where … My Exit start ‘after previous’ Set Timing (if you click now a chaotic effects will show) PowerPoint Series
The Animation Selection Pane now looks like this Under Format select This will help with Triggers Start with the first picture / select / right-click / Effect Options / Select Timing Tab / Triggers / Start effect on click of / select your Destination (see Selection and Visibility Pane idea below) Repeat for each callout and button object. Tip: When you create a shape and then duplicate it many times, they're named Oval 1, Oval 2, etc. This makes it hard to choose the right one when you need to choose a trigger. PP 2007 has a great feature, the Selection and Visibility task pane. In this task pane, you can rename objects. This is a great help in animation, because you can give objects meaningful names (Watch the Trigger / Start effect inside the red rectangle while you click once) PowerPoint Series
I have added Triggers to all the Callouts After Previous for Exit & Timing of 2s Now click on Red, Orange, Yellow and Blue Now click any color you want (You may add your own effects ) Ctrl + A to show Pointer on Screen PowerPoint Series
Your Animation Pane now looks like this Teachers may use this as an interactive tool with students. See also the Lesson on Typing on screen! Text may also be Triggered in the same way, you type your info in a textbox and select it as you did the callouts! VBA code may also be added to animate in a certain way Something else we will add to the Lessons is Invisible Buttons and Action Buttons! Something else I found helpful is the Screen Tip Effect Hover your Mouse over the picture to the left! To add this effect; select object / Insert Hyperlink / Select Place in this document / Select your Slide / Complete typing your Tip / Click OK / OK Ctrl + A to show Pointer on Screen PowerPoint Series
Thank you for watching this short Lesson This is just one of several free Lessons available All these Ideas are readily available on the Internet Come back soon! Creator: Frans Kruger 2009 The End http://outoppie-presentations.blogspot.com www.encryptologic.co.za