
SlideServe
Menu
Préférences
© SlideServe · v2026

HAAS MILL SETUP

dean-hoffman avatar
1 diapositives · 122 Views · Nov 16, 2014

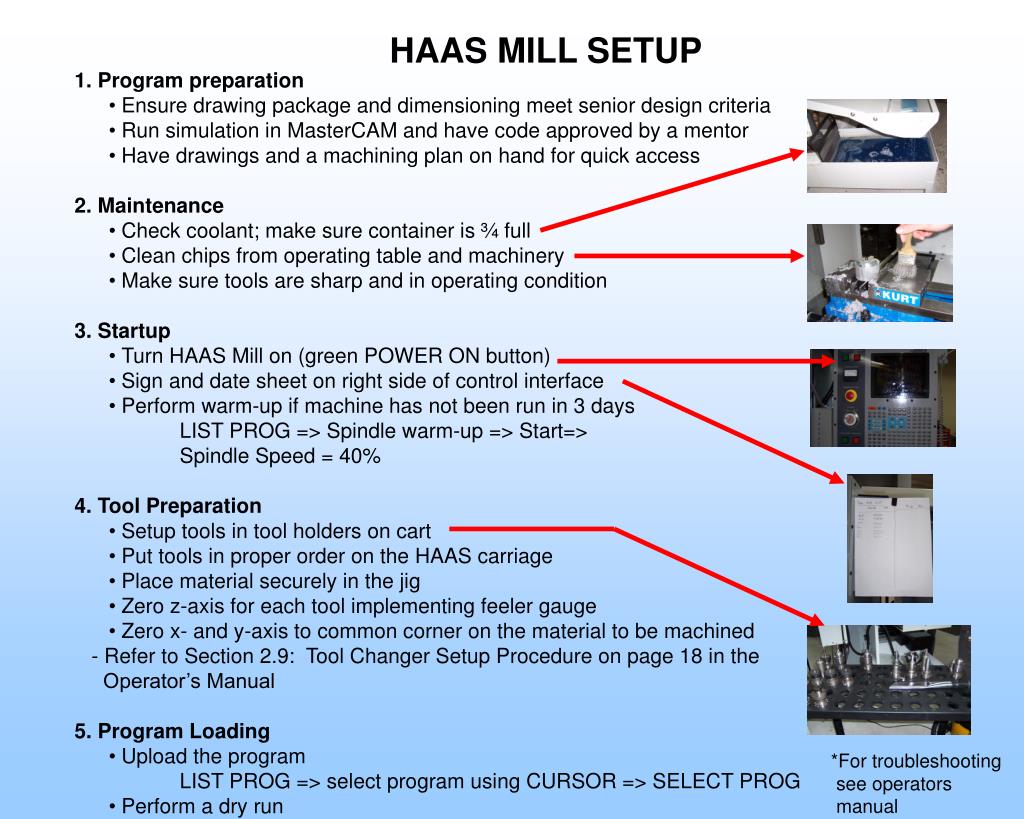
Program preparation Ensure drawing package and dimensioning meet senior design criteria Run simulation in MasterCAM and have code approved by a mentor Have drawings and a machining plan on hand for quick access 2. Maintenance Check coolant; make sure container is ¾ full
HAAS MILL SETUP - slide 1
01 / 1HAAS MILL SETUP
1 / 17

Télécharger la présentation

HAAS MILL SETUP
Une image / un lien ci-dessous est fourni (tel quel) pour télécharger la présentation

Politique de téléchargement : le contenu du site vous est fourni TEL QUEL pour votre information et votre usage personnel ; il ne peut être vendu, concédé sous licence ni partagé sur d’autres sites sans l’accord de son auteur.Le contenu vous est fourni TEL QUEL, pour votre information et votre usage personnel uniquement. Téléchargez la présentation en cliquant sur ce lien. Lors du téléchargement, si vous ne parvenez pas à télécharger une présentation, l’éditeur a peut-être supprimé le fichier de son serveur.Pendant le téléchargement, si vous ne parvenez pas à obtenir une présentation, le fichier a peut-être été supprimé par l’éditeur.

F I N

Plus de contenu associé

Transcription de la présentation
  1. Program preparation • Ensure drawing package and dimensioning meet senior design criteria • Run simulation in MasterCAM and have code approved by a mentor • Have drawings and a machining plan on hand for quick access • 2. Maintenance • Check coolant; make sure container is ¾ full • Clean chips from operating table and machinery • Make sure tools are sharp and in operating condition • 3. Startup • Turn HAAS Mill on (green POWER ON button) • Sign and date sheet on right side of control interface • Perform warm-up if machine has not been run in 3 days • LIST PROG => Spindle warm-up => Start=> • Spindle Speed = 40% • 4. Tool Preparation • Setup tools in tool holders on cart • Put tools in proper order on the HAAS carriage • Place material securely in the jig • Zero z-axis for each tool implementing feeler gauge • Zero x- and y-axis to common corner on the material to be machined • Refer to Section 2.9: Tool Changer Setup Procedure on page 18 in the • Operator’s Manual • 5. Program Loading • Upload the program • LIST PROG => select program using CURSOR => SELECT PROG • Perform a dry run HAAS MILL SETUP *For troubleshooting see operators manual