Download
1 / 6
60 likes | 277 Vues
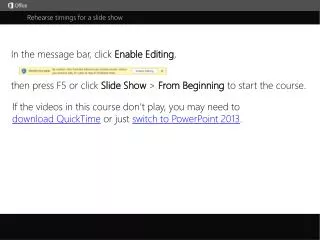
Rehearse timings for a slide show. In the message bar, click Enable Editing , . then press F5 or click Slide Show > From Beginning to start the course. . If the videos in this course don’t play, you may need to download QuickTime or just switch to PowerPoint 2013 . j.

E N D
Rehearse timings for a slide show In the message bar, click Enable Editing, then press F5 or click Slide Show > From Beginning to start the course. If the videos in this course don’t play, you may need to download QuickTime or just switch to PowerPoint 2013. j
Rehearse timings for a slide show Closed captions When you want to record a running time for each slide, use the Rehearse Timings feature. Up next: Edit slide timings. and click Clear Timings on All Slides. This enables you to run through your presentation in Slide Show view and record the time each slide takes. Then, use the timings to run the show automatically, either to help you rehearse or for a self-running show. PowerPoint opens Slide Show view and begins recording a time for the first slide. To clear the timings completely, click the arrow next to Record Slide Show, point to Clear, If you want to turn off the slide timings, on the Slide Show tab, uncheck Use Timings. and you can focus on rehearsing the presentation, refining your points for each slide. Now, when you click From Beginning to review the show, the slides advance according to the recorded times, To record slide timings: When you’re ready to run through your show, click the Slide Show tab > Rehearse Timings. On your last slide, when you click to advance, you see this message, which shows you the total time for the show, here, Talk through the slide show and keep advancing to your last slide. To interrupt the recording, click the X on the toolbar. To reset the clock for the slide, click Repeat, and, when you’re ready, click Resume Recording. If you need to pause the clock, click Pause. And when you’re ready, click Resume Recording. and asks whether you want to save the timings. Let’s click Yes. The clock starts fresh for the next slide. But note that the total time for the show appears here and keeps advancing. click Next—or use whichever method you prefer—to advance to the next slide. Rehearse your points for the slide, and when you’re ready, To move the toolbar, drag it to a preferred position. On the Recording toolbar, look here for the elapsed time on the current slide. Press F5 to start, Esc to stop 1/2 videos 1 • 2 • 3 4 5 2:25 2:09 Help Rehearse timings Edit timings Feedback Summary
Rehearse timings for a slide show Closed captions In the Timing group, you’ll see the After box, If you’ve recorded slide timings and find that there are a couple of timings you want to tweak, you don’t need to re-record the whole show. Instead, click the slide with the timing you want to change — let’s say we need more time for the quick facts on slide 2. which is checked and shows the recorded timing for the selected slide — 50 seconds. I need to bump it up to 1 minute, so I’ll click the Up Arrow and change the number to 1 minute. Note that the On Mouse Click box is also checked. This means that, if I want to, I can click to advance the slide without waiting for the full minute. If I uncheck On Mouse Click, I have to wait for the automatic timing to elapse on the slide before the slide will advance. Then, click the Transitions tab. say, for instance, this process slide, which can take a while to step through—select the slide, and uncheck the After box for that slide. If you want to review all the slide timings and make sure they’re set as you expect, click Slide Sorter. The slide timings show below each slide thumbnail. Click Normal to return to Normal view. If there’s any slide for which you don’t want an automatic timing — To turn off slide timings, the quickest way is to click Slide Show and uncheck Use Timings. Or, to clear timings completely, click the arrow next to Record Slide Show, point to Clear, and click either Clear Timing on Current Slide, for selected slides, or Clear Timings on All Slides. For more information, see the course summary and experiment some more with PowerPoint. Press F5 to start, Esc to stop 2/2 videos 1 • 2 • 3 4 5 2:25 2:09 Help Rehearse timings Edit timings Feedback Summary
Help Course summary—Rehearse timings for a slide show Course summary Rehearse and time the delivery of a presentation You can rehearse your presentation to make sure that it fits within a certain time frame. While you rehearse, use the Slide Timing feature to record the time that you need to present each slide, and then use the recorded times to advance the slides automatically when you give your presentation to your actual audience. The Slide Timing feature is ideal for creating a self-running presentation. Note: Be prepared to start delivering your presentation immediately after you complete step 1 below. • On the Slide Show tab, in the Set Up group, click Rehearse Timings. The Rehearsal toolbar appears, and the Slide Time box begins timing the presentation. • While you time your presentation, do one or more of the following on the Rehearsal toolbar: • To move to the next slide, click Next. • To temporarily stop recording the time, click Pause. • To restart recording the time after pausing, click Pause. • To restart recording the time for the current slide, click Repeat. • After you set the time for the last slide, a message box displays the total time for the presentation and prompts you to do one of the following: • To keep the recorded slide timings, click Yes. • To discard the recorded slide timings, click No. Slide Sorter view appears and displays the time of each slide in your presentation. See also • Rehearse and time the delivery of a presentation • Set the speed and timing of transitions • Record and add narration and timings to a slide show • More training courses • Office Compatibility Pack Press F5 to start, Esc to stop 1 • 2 • 3 4 5 2:25 2:09 Help Rehearse timings Edit timings Feedback Summary
Help Rating and comments Course summary How did we do? Please tell us what you think Thank you for viewing this course! Check out more courses Press F5 to start, Esc to stop 1 • 2 • 3 4 5 2:25 2:09 Help Rehearse timings Edit timings Feedback Summary
Help Help Course summary Using PowerPoint’s video controls Point at the bottom edge of any video to start, stop, pause, or rewind. You drag to rewind. Stopping a course If you’re viewing online, click your browser’s Back button. If you’re viewing offline, press Esc. If you’re watching a video, press Esc once to stop the video, again to stop the course. Going places You can go to any part of a course by clicking the thumbnails (light or shaded) below the video. You can also click the forward and back arrows, or press Page Up or Page Down. If you download a course and the videos don’t play Click Enable Editing if you see that button. If that doesn’t work, you may have PowerPoint 2007 or earlier. If you do, you need to get the PowerPoint Viewer. If you have PowerPoint 2010, you need the QuickTime player, or you can upgrade to PowerPoint 2013. Press F5 to start, Esc to stop 1 • 2 • 3 4 5 2:25 2:09 Help Rehearse timings Edit timings Feedback Summary