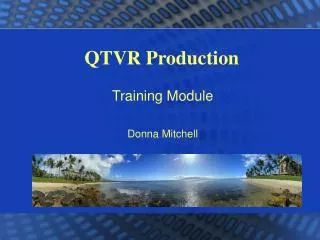
QTVR Production Training Module by Donna Mitchell
Explore QTVR fundamentals, object and scene generation, panorama maker software, file handling, hot spots, and more in this interactive presentation. Ideal for teaching students to create engaging virtual reality media.

QTVR Production Training Module by Donna Mitchell
E N D
Presentation Transcript
QTVR Production Training Module Donna Mitchell
Table of Contents • Suggestions for Use • Overview • Fundamentals • Object Generation • Scene Generation • Panorama Maker Software • Overview • File Handling • Settings • Nodes and Linking • Hot Spots • Making QTVR’s • Instructor Setup • Review quiz questions • Sample exercises
Suggestions for Use This Power Point Presentation is meant to be used as either an overview or teaching module to students who will use QTVR’s in an Inquiry Based Lesson or Project. A specific Lesson Plan, including the goals and objectives, rubric, and additional evaluation material, is included separately with this presentation. This presentation should be adapted to the learners ability, interests and goals of the project. It can simply be an overview, but it could just as easily be lengthen with the addition of a student manual and additional job aids to teach a several session course on QTVR production. In any case, QTVR’s can provide students with yet another technology option to enhance creativity and authentic learning which could include all aspects of the curriculum. Although this Power Point is limited in scope, it ideally would include a pre-assessment, a rubric, a post-assessment and a student evaluation of the tool itself. This tool could be a work in progress and improved by the students themselves. Many happy returns as you use this tool to put excitement into student learning!
Overview This module will teach the basic functions, terms, layout, setup, and production and use of Quick Time Virtual Reality Media.
Fundamentals QTVR Panorama If you don’t see the Movie here, please double click the icon below. The QTVR Panorama shows you a view of an environment, activity, object or a scene from a variety of angles. A full 360 degree panorama provides the view that you are standing in the center of the panorama.
Fundamentals Equipment Setup You will need a camera, a tripod, and a special panning head to make a QTVR. You can view a panorama by pressing the mouse and dragging it over the image in any direction to view the entire 180 or 360 degree rotation.
35mm EQUIVALENT CHART FOR POPULAR DIGITAL CAMERAS Camera Focal Length (35mm equivalent) # of images Agfa ePhoto 1280 &1680 38mm 18 Apple QuickTake 200 38mm 18 Canon PowerShot 600N 28mm 12 Casio QV-5000SX 35mm 16 Epson PhotoPC 550, 600, &700 36mm 18 Fuji DC 300, MX-700 35mm 16 HP PhotoSmart C20 39mm 18 Kodak DC-50 and DC-120 38mm 18 Kodak DC210 Plus 29mm 14 Kodak DC260 & 265 38mm 18 Minolta Dimage V 38mm 18 Minolta Dimage EX 1500 28mm 12 Nikon CoolPix 900&950 38mm 18 Nikon CoolPix 600 36mm 16 Olympus D-400 Zoom 35mm 16 Olympus D-620L 36mm 16 Ricoh RDC-4200 35mm 16 Polariod PCD-2000 38mm 18 Sony Mavica FD7 40mm 20 Toshiba PDR-M1 35mm 16 Vivitar Vivicam 38mm 18 Yashica KC600 47mm 20 Job Aid for Full Panorama DEGREES BETWEEN IMAGES FORMULA (full panorama) 360 degrees / # of images = degrees between images For example: 360 / 18 = 20 degrees between each image
The Panorama If you don’t see the Movie here, please double click the icon below. The number of images you need to take depends on the camera lens or camera used. Generally, you need enough shots so that there is an overlap of about 40-50 percent, that usually translates into 12 to 18 images. Depending on your lens size we have included a job aid that will help you decide how many images you will need for your camera.
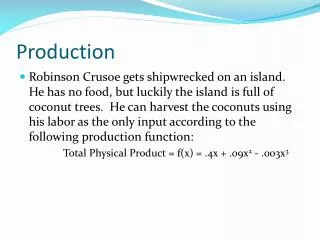
Object Generation A QTVR object lets you view a three-dimensional object from a variety of angles. It gives you the illusion that you are holding and manipulating it by turning it around. The object is made from a number of images that are joined together by the QTVR software. Images are shot in the vertical and horizontal plane to make rows and columns. The more images you get the better quality and smoother motion you will get when the object is rotated.
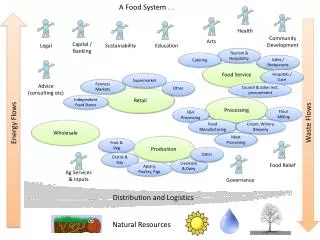
A QTVR Scene is made up of several elements, each element being called a node. A scene might look just like a panorama but it is possible to interact with parts of the scene. Scene Generation Scenes have HOT SPOTS located in a node which are areas that can be linked to other nodes in the scene or a variety of other media or even a web site.
Panorama Maker Software There are currently several panorama maker type software packages on the market. As with any software a complete evaluation of the product should be initiated prior to its purchase. Specifically, the educational needs, students technical background, and project goals should be considered. The following slides are meant to be somewhat generic areas of instruction that are inherent in current panorama software. These slides can serve as a beginning when specific software is encountered and specific aspects need additional demonstration or explanation. Review of this material may serve as a basic overview allowing the instructor and students to proceed without further teaching. As new products are developed this technology will continue to offer our students increasing possibilities for higher level thinking and project format.
Overview Specifics • File Handling • Importing Images • Selection of correct lenses • Image Alignment • Saving files / using the correct file options • Authoring Studio file types • Job Aid – Playback settings a must • Creating and adding nodes to a scene file • Linking nodes in the scene file • Selecting HOT SPOTS for the full panorama
Importing Images A QTVR scene can be made of several different elements • Create a new folder for images • Copy the images into the folder • Make sure the files are named with an order format Add images to the panorama stitcher to make a scene • Create a new panorama stitcher file • Save the file with the new name • Click the “add images” button and add all • Click on one of the rotate buttons to make the images all right side • up in order for them to be aligned properly
Selection of Correct Lens • Obtain the lens size from the users camera • If using a digital camera use the job aid to find the 35 mm equivalent of the lens • In the software select or create the new lens definition • If a new definition enter the focal length of the lens, calculate, this will calculate the Vertical Field of View of the lens • Select the correct film type or use “other” for a digital camera along with correct width and height values • Calculate for the correct lens setting
Image Alignment When determining the lens and panorama to be shot, you must verify the image alignment for the software. Generally there is a default of “30 degrees between shots” but if your camera lens is unique you may have to use the job aid and change the value.
Authoring Studio File Types Authoring Studio creates and uses these file types to complete panorama
Saving Files VERY IMPORTANT!! It is HIGHTLY suggested that you use and save these intermediate files as you work with your new panorama. If you later decide to change setting and then stitch later this will prevent you from remaking shots. Study carefully the three different files types your Authoring Studio makes to create the complete panorama.
Check Settings Settings will depend on your final output, check the following job aid for a quick reference then change the Authoring Studio accordingly.
Job Aid Playback settings a must!
Creating and adding nodes • It is fairly simple to create nodes. • Start a new scene maker • Drag and drop or insert a movie file • Click on the URL button on the toolbar • Click on the working space and you will have a URL node where you clicked • Double click on the node and enter the address, then rename the untitled node
Linking nodes Links can be either single or double. Use single links when you want to go one way, remember you can not put a hot spot on some one else’s web page just to get back to your panorama.
Hot Spots • Your Authoring Studio allows you to define hot spots. • Bring up a “edit hot spots” menu • Select the correct node • Draw a rectangle around your hot spot • Drag the node URL to the highlighted area • Click either single or double link
Instructor Setup Materials QTVR Software with manual Power Point presentation Student Manual Job aids Equipment Student computers Quick time player installed Web browser installed QTVR software installed Overhead projector or Proxima for demos Digital camera, QTVR panning head, tripod Paper and pencils for quizzes or notes Setup Setup will depend on time, purpose and the project to be done If prior knowledge is sufficient folders and practice files can be added Prepare any special materials that might be needed to address special need or alternative learning style students
What is a QTVR panorama? (Quick Time Virtual Reality file that rotates to 360 degrees) • What are the three pieces of equipment needed to shoot a QTVR Panorama? ( A camera, a QTVR pan head, and a tripod) • Why is it better to take more images when shooting a panorama? (More shoots result in a smoother motion when the image is rotated) • If the plan was to take 12 images to make a 360 degree panorama, how many degrees would be in between each image? (360 degrees/12 images = 30 degrees in between) • Why would you want to create a QTVR scene rather than a plane panorama? ( A scene can have hot spots which will allow the user to have more interactivity, and it is more interesting to see and to make) • What would you do if the images you are going to use are in no order? (All the images must be viewed for order, renames, and placed in order) • What are the ways images can be loaded into the computer? ( camera, digital camera, scanning, flash card) • What is the difference between a panorama maker and a panorama stitcher? ( The maker only uses one image to wrap and made the panorama, the stitcher takes a group of images putting them together side by side to create the panorama.) • Why do we need to rotate the images once they are imported? ( Images are stitched side to side and if they are sideways they would not stitch properly. Review Quiz Questions