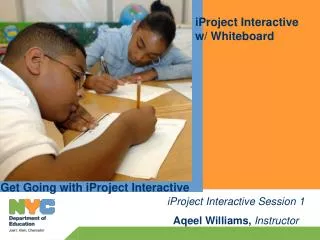
iProject Interactive Session 1
Using the Projector and Interactive Whiteboard to Enhance Instruction Get Going with iProject Interactive - Out of the Box. iProject Interactive Session 1. Focusing Questions. How can we set up the projectors and interactive whiteboards in our classrooms?

iProject Interactive Session 1
E N D
Presentation Transcript
Using the Projector and Interactive Whiteboard to Enhance InstructionGet Going with iProject Interactive - Out of the Box iProject Interactive Session 1
Focusing Questions How can we set up the projectors and interactive whiteboards in our classrooms? What are the different parts of the projector and interactive whiteboard?
Framing The Session • Today we will learn how to set up our projectors and interactive whiteboards by looking at their connections and the ports they are associated with • (For OOTB) • (We will label the different parts of the projector and interactive whiteboards and attach them to our mobile device. )
Framing The Session • Use this slide to tell participants what we’ll be teaching them. • The explanation should indicate how this lesson fits into the work they’ve been doing and how it fits into their lives as teachers and learners.
Teaching • Power Cable • This provides power for our projector. • This is a cable that will be used every time you use your projector. • Can be plugged into the surge protector, our carts have internal surge protectors; however, generally in large spaces these surge protectors need to be attached to an extension cord.
Teaching • RGB Cable • Sometimes referred to as a VGA cable. • It has two large blue ports on either end. • This is another cable that will be used all the time. • Connects from the mobile device to the projector. • Enables the projector to project the image on your computer. • If you have no image being projected this is the first cable to check.
Teaching • USB Cable • This cable connects your mobile device to the Interactive whiteboard. • Your whiteboard is a USB device. • It gets its power from your computer. • Using this device will drain your battery. It is important to have your mobile device plugged in when running a whiteboard from it.
Teaching • Whiteboard Power Cable • Provides power to the speakers, not the board.
Guided Practice • Examine the projector. • Examine the cart. • Connect the ports for the four cables: • Power to Projector • RGB (VGA) • USB to Mobile Device • Power to Speakers
Getting Started • Connect all four cables” • Power to Projector • RGB (VGA) • USB to Mobile Device • Power to Speakers • Adjust the height. • Adjust the distance and mark on floor.
Work Time • Participants will take turns in small groups connecting the three devices: • Projector • Interactive Whiteboard • Mobile Device • Power on. • Power off.
Share • Today we have learned about the different cables and how they are used to set up our projectors with the Interactive Whiteboards and our mobile devices. • What steps did we find to be most difficult and how can we remember to complete them to have our projector working properly?
For more information • Office of Instructional Technology • oittc@schools.nyc.gov • www.nyc.gov/schools