Download
1 / 3
30 likes | 40 Vues
Taking a screenshot on iPhone 13 is not at all so difficult, and you can do it just some simple steps, follow the steps to proceed. Read more @ https://digitalsushma.com/how-to-take-a-screenshot-on-iphone-13/

E N D
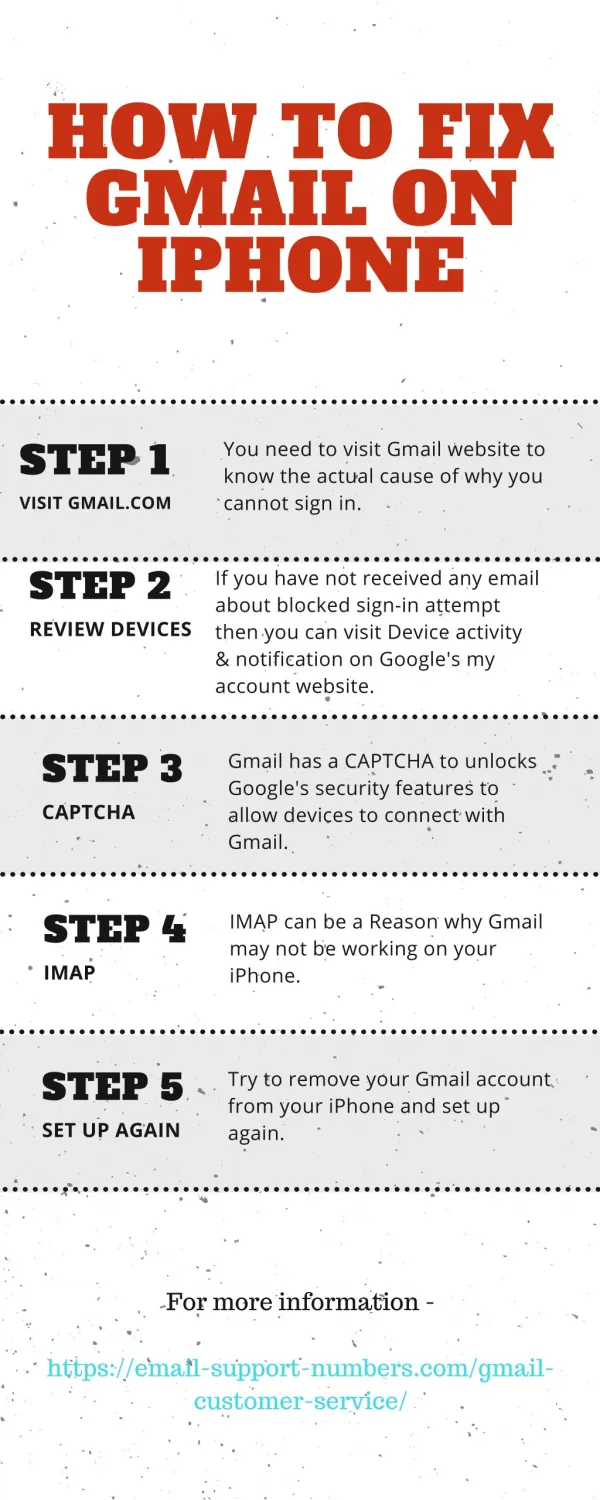
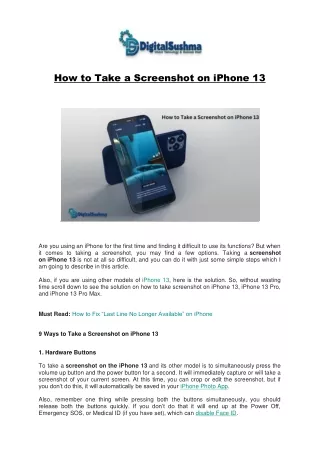
How to Take a Screenshot on iPhone 13 Are you using an iPhone for the first time and finding it difficult to use its functions? But when it comes to taking a screenshot, you may find a few options. Taking a screenshot on iPhone 13 is not at all so difficult, and you can do it with just some simple steps which I am going to describe in this article. Also, if you are using other models of iPhone 13, here is the solution. So, without wasting time scroll down to see the solution on how to take screenshot on iPhone 13, iPhone 13 Pro, and iPhone 13 Pro Max. Must Read:How to Fix “Last Line No Longer Available” on iPhone 9 Ways to Take a Screenshot on iPhone 13 1. Hardware Buttons To take a screenshot on the iPhone 13 and its other model is to simultaneously press the volume up button and the power button for a second. It will immediately capture or will take a screenshot of your current screen. At this time, you can crop or edit the screenshot, but if you don’t do this, it will automatically be saved in your iPhone Photo App. Also, remember one thing while pressing both the buttons simultaneously, you should release both the buttons quickly. If you don’t do that it will end up at the Power Off, Emergency SOS, or Medical ID (if you have set), which can disable Face ID.
2. Use Shortcuts Apple allows their users who are using the version of iOS 14.5 and above, can take a screenshot with the help of Shortcuts on iPhone 13. Steps to create shortcuts are: I. Go to “My Shortcuts” II. Tap the + sign to start a new work flow. III. Then tap “Add Action” and select “Take Screenshot” IV. Finally click “Save to Photo Album”, so that your screenshots get saved to your device. Also Read: Download iPhone 14 and iPhone 14 Pro Wallpapers iOS 16 Features: How to Turn Off Search Button from your iPhone Home Screen How to Turn on Location Service on iPhone? Few Reasons for Owning Apple Watch Series 6 3. Back Tapping Apple also allows their users the feature of Back Tap to take a screenshot on iPhone 13 and other variants, this feature supports in iOS 14 and iOS 15. You can take a screenshot by simply tapping twice or thrice at the back of the iPhone. To turn on the Back Tapping feature on your iPhone, go to Settings → Accessibility → Touch → Back Tap to toggle it on. Then select “Double Tap” or Triple Tap,” → select “Screenshot”. 4. Siri You can use another option to take screenshot on iPhone Siri, the virtual assistant of the iPhone. Let’s start the setting up process for Siri. Go to Settings and search for Siri, then select Listen for “Hey Siri,” to enable Siri. Once you are done with the settings process, all you have to say “Hey Siri, take a screenshot.” Instead of that, “Press Side Button for Siri” to enable Siri settings. To do this you can long- press the side button, and then say “take a screenshot”. Another way to enable the “Type to Siri” feature, all you need to do is to go to the settings → Accessibility → Siri. With the help of this feature, you need not give any voice commands, it allows you to type. 5. Screen Mirroring Another way to take a screenshot on iPhone 13 is by using a Mac. When you swipe down the iPhone screen to access the Control Center, there is a Screen Mirroring button on the left side of the brightness column. You can see your iPhone screen on a Mac book with
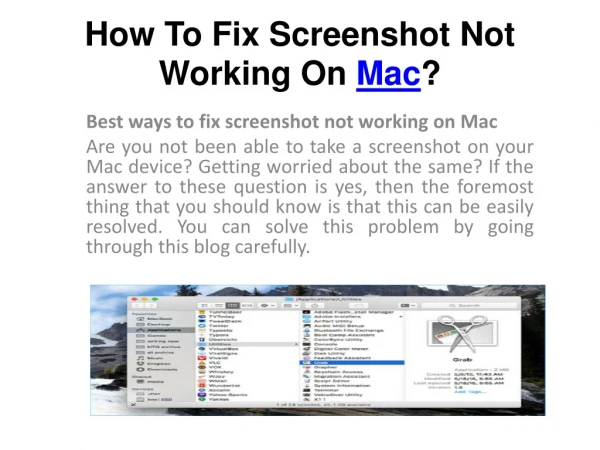
Screen Mirroring when you enable this feature. You need to connect and tap the name of your macOS. Once you connected your iPhone to you Mac, can now take a screenshot. Though its only mirroring the screen, you cannot access to control your iPhone. To do this, press Command-Shift-3. After pressing the keys, you will hear click sound and the captured image will be saved to the Desktop. You can crop the screenshots later. You will notice black bars on the top, bottom, or sides of your screenshot, which you should probably crop out later. On some screens, though, like those where a screenshots thumbnail appears, you will be able to take screenshots that you might not have been able to otherwise. To use the selection tool for more precise screenshot boundaries, press Command-Shift-4. To disable the Screen Mirroring function, go to Control Center from your iPhone, select the “Screen Mirroring” button, and tap “Stop Mirroring.” Continue Reading……. --------------------------------------------------------- Visit us at: Digital Sushma Email: contact@digitalsushma.com Stay Connected Via: https://www.facebook.com/digitalsushma https://www.instagram.com/digitalsushma/ https://www.linkedin.com/company/digital-sushma/ https://in.pinterest.com/digitalsushmacom/ https://www.twitter.com/digitalsushma