
TrackWrestling Open Tournament Demo
Learn how to run a High School JV wrestling tournament using www.trackwrestling.com. Follow the event live online, manage brackets, deadlines, and basic information.

TrackWrestling Open Tournament Demo
E N D
Presentation Transcript
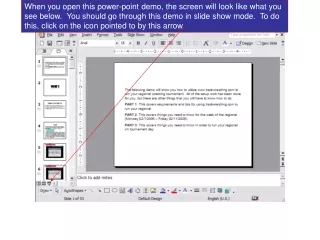
When you open this power-point demo, the screen will look like what you see below. You should go through this demo in slide show mode. To do this, click on the icon pointed to by this arrow
The following slide show is a demo of how to utilize www.trackwrestling.com to run an open tournament like a High School JV wrestling tournament.The program is an online program so wrestlers, coaches, fans, and media can follow the event live online as it progresses. There are many benefits to using the program to run a tournament and you will see them after you go through this demo. PART 1: This covers requirements and tips for using trackwrestling.com to run your tournament. PART 2: This covers things you need to know how to do about 1-2 weeks before your tournament. PART 3: This covers things you need to know in order to run your tournament on tournament day. NOTE: MINOR CHANGES HAVE BEEN MADE TO THE PROGRAM THAT MAY NOT BE REFLECTED IN THIS DEMO. IF YOU CAN’T MAKE THE CONNECTION BETWEEN THIS DEMO AND THE PROGRAM AS YOU SEE IT, JUST LET ME KNOW AND I WILL HELP YOU.
PART 1 REQUIREMENTS AND TIPS
Requirements • You need a person that knows how to use a computer relatively well, and depending on the size of the tournament, that person should have helpers that know how to type. • The computers need to be connected to the internet and a printer. The number of computers depends on the size of the tournament, I would say 1 computer every 100 wrestlers is safe. • The printer(s) should be fast, and they should be tested before the day of the tournament to verify how fast they print bout sheets. (Sometimes people think a printer is fast when it really isn’t). • Make sure that the person who will be running the computer goes through this power-point demo.
Tips • The recommended platform is a PC running Internet Explorer. Some views may be distorted if you are using a different platform. If you decide to use a different platform, thoroughly test everything on that platform before the tournament day. • If you can, go through this demo on a computer that is next to another computer, that way you can try things out as you follow along. • When printing things, always set your margins as small as possible and make sure you select the right orientation. (For example: when printing brackets, you should print landscape, but when printing bout sheets you should print portrait). • There are 4 servers that are used to operate trackwrestling.com • 1. http://www.trackwrestling.com • 2. http://www.trackwrestling1.com • 3. http://www.trackwrestling2.com • 4. http://www.trackwrestling3.com • 3. http://www.trackwrestling.com is used for viewers. This separates the server that people look at results on, from the servers you will use to run your tournament. Therefore if a million people hit trackwrestling.com and crash it, you will still be able to run your tournament because you will be working on trackwrestling 1, 2, or 3. When you login as an ‘Administrator’, the system automatically forwards you to one of these servers, but you can go directly to any of them if you need to. Please visit all of these sites before the day of your tournament, so you make sure you know how to do this. The next 4 slides illustrate what I am talking about.
This is http://www.trackwrestling1.com http://www.trackwrestling1.com
This is http://www.trackwrestling2.com http://www.trackwrestling2.com
This is http://www.trackwrestling3.com http://www.trackwrestling3.com Notice that they are all the same, the only difference is that only people that are running tournaments can login to 1, 2, or 3.
PART 2 1-2 WEEKS BEFORE TOURNAMENT
Find the tournament in the tournament list and click on it. The tournament name will appear here. Select ‘Administrator’ as your user type and then enter your username and password before clicking on the [Enter Tournament] button.
When you login, you will see a screen that looks like what you see below. The left menu contains many buttons to begin doing or looking at different things. I will explain them as we go through this demo. BASIC INFORMATION allows you to enter information you would like people to have if they come to this website looking for tournament info. Sort of like a text flyer. DEADLINES allows you to specify how long coaches will have to get there lineups in before the tournament. I recommend setting this to be the night before your tournament. That will minimize changes you have to make on the day of the tournament. The first thing I will show you how to do in this demo is select a bracket type. To do this, click on BRACKET TYPES in the left menu and you will be taken to the following screen.
Once you have added your bracket type, the screen will look similar to what you see below. You can specify the width, height, and font size you would like to use for the bracket. The width and height are specified in pixels. The values above are good for printing landscape brackets. After clicking on a bracket type, it will appear under the ‘Added Tournament Bracket Types’. The next thing to do is add a group to your tournament. To do this, click on GROUPS in the left menu. All the possible bracket types are listed here under the ‘Unadded Tournament Bracket Types’. To add a bracket type to your tournament, simply click on the name of the bracket type you would like to use.
Once you have added a group to your tournament, the screen will look similar to what you see below. The next thing to do is add all the teams that will be coming to your tournament. To add a group, click on the [Add Group] button and fill out the form that comes up. I chose to name the group HS JV since this is a High School Junior Varsity tournament. You can name the group whatever you would like to name it (Keep it kind of short though).
Once you have added the teams that will be part of your tournament, the screen will look like what you see below. To add a team, select the ‘Add Team’ operation and then click on the [Invoke Operation] button. If you are going to keep track of team scores, you can specify how you want to score the tournament by clicking on SCORING in the left menu.
The page below is used to setup how a tournament will be scored. There are 4 facets to scoring a tournament. Activity Points (points awarded for winning a bout by a given win-type), Advancement Points (points awarded just for winning a bout), Placement Points (points awarded for obtaining a given place), and you can also indicate bouts that wrestlers are not allowed to score any points in. Click on each of the links and setup the points according to how you will score your tournament. The pages are pretty self explanatory. Take note of the select box surrounded in red. This box indicates how you would like to handle byes in your tournament. There is one on the Activity Points and Advancement Points page so make sure you set both to be what you want them to be. The next thing to address is how to setup your tournaments rounds. To do this use the ‘ROUNDS’ button in the left menu.
The screen you see below is used to specify the order you will wrestle matches in your tournament. The default rounds will already be added to your tournament, but you can modify the default using this screen if you chose to. I recommend changing the number of bouts to print per sheet. To do this, click on the name of the round, and you will see a drop down box with the number of bouts per sheet. I would change it to be how ever many bouts are part of that round. For example: in this tournament, we are wrestling 2 bouts in each round, and therefore we should print 2 bouts per sheet.
I will now show you how to setup the mats for your tournament. Click on MATS in the left menu. Notice that the number of bouts per sheet is 2 for all rounds.
Below is what the screen will look like when you have added the mats to your tournament. To add a mat, click on the [Add Mat] button. The next thing to do is setup the teams to be able to login and enter their teams roster. To do this, click on ‘USERS’ in the left menu.
To add a statistician to every team, click on the ‘Statistician Operations’ menu and select the ‘Add Team Statisticians’ option.
You can search my email archive for email addresses by clicking on the ‘Statistician Operations’ menu and clicking on the ‘Search Email Archive’ option. You must enter the email address for each of the statisticians. To edit a statistician, click on the name of the statistician you want to edit.
You should use the ‘Last Login’ column to monitor who has and who has not logged in. It will track the last login time of each of the teams. If someone doesn’t login, then you know you need to contact them again in order to ensure they get their lineup entered. Once all email addresses have been entered, you should click on the ‘Send Notification Emails’ option and an email will be sent to every contact with a set of instructions and their login information (this should be done about 1 week prior to the tournament). You can track all the emails that were sent out by viewing the email log. The two entries you see filled in should be filled in like that for everyone. You can and should monitor the statisticians carefully to make sure they are entering information. You can login as one of the statisticians to see what their data entry process is like. Just go to the login screen, chose to login as a ‘Statistician’ and use one of the usernames and passwords from above. That concludes the tournament setup phase.
PART 3 TOURNAMENT DAY
By this time, the initial information regarding teams should have been entered by the coaches. Then click on the ‘Weigh-In Sheet’. You should print the weigh in sheet by team and have the teams weigh in as a team as they arrive. Any additions should be noted on that team weigh in sheet. Once a weigh-in is done for a team, that team’s weigh in sheet should be taken to one of the data entry people. They will then enter the weights and make any additions that need to be made. To enter weights by team, click on TEAMS in the left menu. To print out the weigh-in sheet, first click on PRINT DOCUMENTS in the left menu.
Then choose the operation ‘Save Actual Weights’ and click on the [Invoke Operation] button. To make additions, click on PARTICIPANTS in the left menu. Enter the weights into the boxes in the ‘Actual Weight’ column. Once the weights are entered AND saved, they should be double checked by someone other than the person who entered those weights. This is absolutely crucial, because if you get someone’s weight wrong, you will have to repair which is a much bigger hassle than just double checking the weights and getting it right the first time.
Once you are ready to start bracketing, click on BRACKETING in the left menu. To add a new wrestler to the tournament, click on the ‘Add Participant’ button. You can use the [Search] button to filter this list and find someone you want to find. You can delete everyone that didn’t show up and weigh in for the tournament by clicking on the [Delete No-Shows] button. THIS SHOULD NOT BE DONE UNTIL YOU HAVE ENTERED THE WEIGHTS FOR EVERYONE AT THE TOURNAMENT, AND YOU ARE READY TO START BRACKETING. You can edit a wrestlers information by clicking on the name of the wrestler you would like to edit.
After clicking on BRACKETING in the left menu, you have to click on ‘Grouping Wizard’ in order to see the screen that you see below. You must select the number of wrestlers you would like to place in a bracket. I am going to try to build 4 man brackets. You must select the group you would like to bracket. You must select the weight difference tolerance that you will allow for the brackets. You must select the bracket type you would like to assign to each of the brackets. Quickly scan through the list of suggested brackets and make sure things look good. Once you decide to create the brackets, click on the [Create Brackets] button. When creating the brackets, the program will first assure that it doesn’t violate you weight difference tolerance. It will then attempt to separate teams the best it can, then it will try to match on skill level, then it will try to minimize the weight difference. NOTE: minimizing the weight difference is not the same as not violating the tolerance. Use the ‘Move Up’ and ‘Move Down’ links to manually move wrestlers if you would like to. The default bracket type will show up here as the bracket type to be used for this bracket. This can be manually changed If for some reason you don’t want to create a bracket, uncheck the ‘Create Bracket’ box.
Once all the wrestlers have been bracketed, you will see a message like what you see above indicating all wrestlers for this group have been bracketed. The next thing to do is assign the weight classes to mats. To do this, click on MATS in the left menu.
After clicking on MATS in the left menu, you have to click on ‘Assign Mats’ to see the screen below. Once you decide this is how you want the mats to be assigned, click on the [Save Mat Assignments] button. You are not ready to print the documents you need to operate the tournament. To do this, click on PRINT DOCUMENTS in the left menu. The program will automatically assign weight classes to mats in an effort to maintain the order of weight classes, and minimize the actual wrestling time on a mat. Notice Mat 1 has 430 minutes of wrestling, Mat 2 has 504 minutes… You can see how many minutes each weight class contributes as well. If you want to manually move weight classes, use the arrows to move them left or right.
The first thing to print is the brackets. To print the brackets, click on ‘Brackets’. The thing to remember here is to select the correct orientation (portrait or landscape). You should always use PRINT PREVIEW, set your margins to .25 all around, and remove the header and footer. If you print preview before printing, you know what you will get when you print. You should test printing some charts before the day of your tournament. The next thing to print is bout sheets, but you will only print the first round of bout sheets from this screen. To print the bout sheets, click on ‘Bout Sheets’.
You can actually use this page to specify any bouts that you want to print. For example: You could use this screen to print 1 bout for a weight class. The best way to learn how to use this screen is to try different things and verify what you expected to come up does in fact come up. To print the first round of bouts, select the 1st round in the round select box and click on the [PRINT] button. You will be asked to click ok if you want to mark the bouts as printed, and you should click ok. The reason you just print the first round is because that is all you need to get the tournament rolling. Once the tournament is going, you can print the bouts needed to continue running the tournament. Also, depending on the bracket type you use, you may have to wait for results from round 1 before you can print bouts for round 2.
You should also print the schedules so people know the planned schedule for the day. To do this, click on ‘Mat Schedules’.
You can use this screen to specify what the schedule will look like. The values below are defaulted in, and are what I recommend, but once again you can play with what you display and what you do not by changing what shows up in each of the columns of the schedule. To display the schedule, click on the [GO] button. Once again, try this before the tournament so you know how it works.
You should make two copies of the mat schedules. One copy would get hung in the hallway next to the charts, and the other should go to the corresponding mat. Throughout the day, the table workers should cross off the bouts as they get done, that way people can stop by a mat and see where the mat is at, and how long before they will wrestle. The hallway display should look something like what you see below. Mat 1 Mat 2 Charts on Mat 1 Charts on Mat 2 Schedule for Mat 1 Schedule for Mat 2 As I said above, the mat schedule should also be hung at the mats themselves. The bout sheets will come out in order of mat, and then in the order they should be wrestled on that mat. Therefore you should bring the stack of first round bouts to each mat and just have them continue wrestling matches by taking bouts off the top of the stack. You will then continue to bring out subsequent rounds of bouts, and place them under the stack. To finish the tournament, you enter bout results, print bouts, and do team scores if you are keeping a team score for your tournament. I will now show you how to do these things.
To enter bouts and monitor the flow of the tournament, you will start by clicking on WORKER WIZARD in the left menu. To monitor the flow of the tournament, and print bouts for the rest of the day, click on ‘Bout Schedule’. To enter a bout result, select the weight class you would like to enter the result for. Enter the bout number you would like to edit, and hit enter or click on the [GO] button. Select the winner, win type, score… and then click on the [Save] button.
This screen is very helpful for tracking the progress of your tournament. It shows your tournament’s planned schedule, this way you can always see where you are at in your tournament, along with some other very nice features. You should always select the mat you want to see the schedule for. Right now we are looking at the schedule for Mat 1. Green and crossed out means those bouts have been completed and entered into the system. A grey background means the bouts are ready to be printed, therefore whenever you see a grey background indicated as NOT Printed, you should print it. Yellow means the bouts are not ready to be printed yet because they are waiting on the results of earlier rounds. This column is used to indicate whether or not something has been printed yet.
Place a check next to the bouts you want to print, and click on the [Print Selected Bouts] button. NOTE: You should always print bouts in order, meaning if 108-116 was ready to print, but 101-110 was not ready to print, you should wait until 101-110 is ready. That way you don’t get the bouts out of order. Monitoring this bout flow and getting the bouts out to the appropriate mats is the most important job in order to keep the tournament flowing. Therefore this should be done by the most responsible person, and this is what they should do all day. Just continue to flip back and forth between mat schedules looking for something ready to print. If you notice a mat is falling behind or bouts are not completed that you think should be completed, then you should get someone to look into it right away.
The simplest way to calculate team scores is to use the score best function. To get to this page, click on TEAMS in the left menu. Then choose the ‘Score Best’ operation, and then click on the [Invoke Operation] button. It will ask you how many wrestlers you would like to score for each team, and you can enter that number. For Example: If you enter 10, it will find the 10 highest scorers for each team, and that is how that teams score will be computed. The teams may also enter media contacts that they want tournament results sent to. To send the media information, click on ‘MEDIA CONTACTS’ in the left menu and then click on the [Email Media Updates] button. That concludes running the tournament on tournament day. There are many things that you can do beyond this, and you are welcome to explore them or talk with me about more options. What I have covered here is the basics of running a tournament.
If you would like to utilize this service to run a wrestling tournament, please send email to justin@trackwrestling.com with your contact information and I will set you up.