Download
1 / 43
430 likes | 611 Vues
Adobe Dreamweaver CS4 - Illustrated. Using and Managing Images. Unit Objectives. Insert an image Align an image Enhance an image Use alternate text and set Accessibility preferences View the Assets panel. Unit Objectives. Insert a background image Delete image files from a Web site

E N D
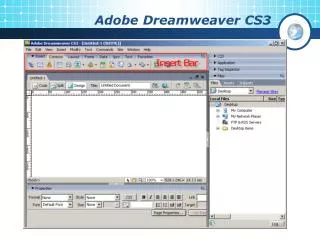
Adobe Dreamweaver CS4 - Illustrated Using and Managing Images
Unit Objectives • Insert an image • Align an image • Enhance an image • Use alternate text and set Accessibility preferences • View the Assets panel Adobe Dreamweaver CS4 - Illustrated
Unit Objectives • Insert a background image • Delete image files from a Web site • Create and find images for a Web site Adobe Dreamweaver CS4 - Illustrated
Inserting an Image • Start Dreamweaver, open The Striped Umbrella Web site, open dwe_1.html from the drive and folder where your Unit E Data Files are stored, then save it as about_us.html in the striped_umbrella root folder, overwriting the existing file and not updating the links, then close dwe_1.html • Click the Attach Style Sheet button in the CSS Styles panel, attach the su_styles.cssstylesheet, then apply the body_text style to all of the paragraph text on the page Adobe Dreamweaver CS4 - Illustrated
Inserting an Image • Click to place the insertion point in front of When in the first paragraph, select the Common category on the Insert panel if necessary, click the Images button to open the Select Image Source dialog box, navigate to the Unit E Data Files assets folder, double-click club_house.jpg, open the Files panel if necessary, then click the Refresh button on the Files panel toolbar if necessary Adobe Dreamweaver CS4 - Illustrated
Inserting an Image • Save the file, click the Assets panel tab, click the Images button on the Assets panel if necessary, then click the Refresh button at the bottom of the Assets panel, if necessary • Repeat steps 3 and 4 to insert the boardwalk.jpg image at the beginning of the second paragraph • Repeat steps 3 and 4 to add the pool.jpg, sago_palm.jpg, and sports_club.jpg files at the beginning of each of the next paragraphs, then save your work Adobe Dreamweaver CS4 - Illustrated
Inserting an Image Adobe Dreamweaver CS4 - Illustrated
Inserting an Image Adobe Dreamweaver CS4 - Illustrated
Aligning an Image • Scroll to the top of the page, click the club house image to select it, double-click the empty space in the right side of the Property inspector to expand it if necessary, then click the Align list arrow on the Property inspector • Click Left • Scroll down the page if necessary, click the boardwalk image to select it, click the Align list arrow in the Property inspector, then click Right Adobe Dreamweaver CS4 - Illustrated
Aligning an Image • Repeat steps 1 through 3 to align the next three images, alternating the alignment between left and right • Save your work • Click the Preview/Debug in Browser button on the Document toolbar, then click Preview in [your browser name] • Close the browser Adobe Dreamweaver CS4 - Illustrated
Aligning an Image Adobe Dreamweaver CS4 - Illustrated
Aligning an Image Adobe Dreamweaver CS4 - Illustrated
Enhancing an Image • Click the club house image to select it • Type 1 in the Border text box, then press [Tab] to apply the border size • Repeat steps 1 and 2 for the other four images • Click the club house image to select it, type 10 in the V Space text box in the Property inspector, press [Tab], type 10 in the H Space text box, press [Tab], then deselect the image Adobe Dreamweaver CS4 - Illustrated
Enhancing an Image • Repeat step 4 for the rest of the images • Click the sago palm image to select it, click the W and H settings in the Property inspector, click the Crop button in the Property inspector, then click OK to close the warning message that says you are about to permanently alter the image Adobe Dreamweaver CS4 - Illustrated
Enhancing an Image • Position the pointer over the bottom-center resizing handle, slowly move the handle up toward the center of the image to remove part of the lower leaves, then double-click the image to crop it • Click Edit on the Application bar (Win) or Menu bar (Mac), click Undo Crop (Win) or Undo (Mac) to restore the image to the original size, then save the file Adobe Dreamweaver CS4 - Illustrated
Enhancing an Image Adobe Dreamweaver CS4 - Illustrated
Enhancing an Image Adobe Dreamweaver CS4 - Illustrated
Clues to Use • Resizing an image using the Property inspector • Drag the image’s selection handle to resize the image • Dragging a selection handle distorts the image • Hold [Shift] key to avoid distortion Adobe Dreamweaver CS4 - Illustrated
Using Alternate Text and Setting Accessibility Preferences • Click the club house image to select it, type The Striped Umbrella Club House in the Alt text box on the Property inspector, press [Tab], then save the file • Preview the page in your browser, then place your pointer over the club house image • Close your browser window Adobe Dreamweaver CS4 - Illustrated
Using Alternate Text and Setting Accessibility Preferences • Click the boardwalk image to select it, type Boardwalk to the beach in the Alt text box in the Property inspector, then press [Tab] • Click the pool image to select it, type The pool area in the Alt text box in the Property inspector, then press [Tab] • Click the sagopalm image to select it, enter Sago palm in the Alt text box in the Property inspector, then press [Tab] Adobe Dreamweaver CS4 - Illustrated
Using Alternate Text and Setting Accessibility Preferences • Click the sports club image to select it, enter The Sports Club in the Alt text box in the Property inspector, then press [Tab] • Click Edit (Win) or Dreamweaver (Mac) on the Application bar (Win) or Menu bar (Mac), click Preferences, click Accessibility in the Category list, if necessary, click the four options shown to select them if necessary, then click OK • Save your work, preview the page in your browser, then place your pointer over each image on the page • Close your browser to return to the Dreamweaver window Adobe Dreamweaver CS4 - Illustrated
Using Alternate Text and Setting Accessibility Preferences Adobe Dreamweaver CS4 - Illustrated
Using Alternate Text and Setting Accessibility Preferences Adobe Dreamweaver CS4 - Illustrated
Clues to Use • Setting alternate text limits • Alternate text stays on the screen for a limited time • Avoid using more than 50 characters • Create a separate file for alternate text over 50 characters • Enter the location of the file in the Long Description text box Adobe Dreamweaver CS4 - Illustrated
Viewing the Assets Panel • Click the Assets tab in the Files Tab group, if necessary • Click each category button on the Assets panel • Click the Colors button to display the Colors category Adobe Dreamweaver CS4 - Illustrated
Viewing the Assets Panel Adobe Dreamweaver CS4 - Illustrated
Clues to Use • “Graphics” versus “Images” • Graphics refer to most non-text items on the Web page • Photographs, logos, navigation bars, Flash animations, graphs, background images, and illustrations • Images refer to pictures or photographs • Narrower term • Referred to by file type • JPEG, GIF, PNG Adobe Dreamweaver CS4 - Illustrated
Clues to Use • Using Favorites in the Assets panel • You can place assets you use repeatedly in the Favorites list in the Assets panel • You can right-click (Win) or [ctrl]-click (Mac) an image on a Web page or the name of the image in the Site list, then click Add to Image Favorites. When you click the Favorites option in the Assets panel, you will see the image in the list • You can create a folder for storing assets Adobe Dreamweaver CS4 - Illustrated
Inserting a Background Image • Click Modify on the Application bar (Win) or Menu bar (Mac), then click Page Properties • Click Browse next to the Background image text box, navigate to the drive and folder where your Unit E Data Files are stored, double-click the assets folder, double-click umbrella_back.gif, then click OK • Click Modify on the Application bar (Win) or Menu bar (Mac), click Page Properties, click Browse next to the Background image text box, navigate to the drive and folder where your Unit E Data Files are stored if necessary, double-click the assets folder, double-click stripes_back.gif, then click OK Adobe Dreamweaver CS4 - Illustrated
Inserting a Background Image • Click Modify on the Application bar (Win) or Menu bar (Mac), then click Page Properties • Highlight the information in the Background image text box, press [Delete], then click OK to close the Page Properties dialog box • Save your work Adobe Dreamweaver CS4 - Illustrated
Inserting a Background Image Adobe Dreamweaver CS4 - Illustrated
Clues to Use • You can manage project files with Adobe Bridge • View files outside the Web site before bringing them into the site • Integrated with Photoshop and Illustrator • Add meta tags and search text • To open Bridge, click Browse in Bridge on the File menu, or click the Browse in Bridge button on the Standard toolbar Adobe Dreamweaver CS4 - Illustrated
Clues to Use • Integrating Photoshop CS4 with Dreamweaver • Users can set Photoshop as the default image editor • Many functions are integrated • Copy and paste Photoshop PSD files directly from Photoshop to Dreamweaver • Dreamweaver will prompt you to choose file format and settings for the Web • To edit the image later, double-click it in Dreamweaver to open it in Photoshop Adobe Dreamweaver CS4 - Illustrated
Deleting Image Files from a Web Site • Display the Assets panel, if necessary; click the Images button on the Assets panel, verify that the Site option is selected, then click the Refresh button to refresh the list of images • Right-click (Win) or [ctrl]-click (Mac) stripes_back.gif in the Assets panel, then click Locate in Site • Press [Delete] to delete the file, click Yes in the dialog box asking if you really want to delete the file, display the Assets panel, then refresh the list of images using the Assets panel Adobe Dreamweaver CS4 - Illustrated
Deleting Image Files from a Web Site • Right-click (Win) or [ctrl]-click (Mac) umbrella_back.gif in the Assets panel, then click Locate in Site • Press [Delete] to delete the file, click Yes in the dialog box asking if you really want to delete the file, display the Assets panel, then refresh the list of images • Save your work, then preview your file in your browser • Close the page, then Exit (Win) or Quit (Mac) Dreamweaver Adobe Dreamweaver CS4 - Illustrated
Deleting Image Files from a Web Site Adobe Dreamweaver CS4 - Illustrated
Deleting Image Files from a Web Site Adobe Dreamweaver CS4 - Illustrated
Creating and Finding Images for a Web Site • Original Images • Original Photography • Clip Art Collections • The Internet Adobe Dreamweaver CS4 - Illustrated
Creating and Finding Images for a Web Site Adobe Dreamweaver CS4 - Illustrated
Creating and Finding Images for a Web Site Adobe Dreamweaver CS4 - Illustrated
Clues to Use • Managing image files • Store original, unedited copies of images in a separate folder • Save edited files under a different name • Keep assets folder free of clutter Adobe Dreamweaver CS4 - Illustrated
Unit Summary • Insert an image • Align an image • Enhance an image • Use alternate text and set Accessibility preferences • View the Assets panel Adobe Dreamweaver CS4 - Illustrated
Unit Summary • Insert a background image • Delete image files from a Web site • Create and find images for a Web site Adobe Dreamweaver CS4 - Illustrated