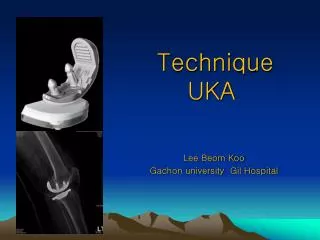
Technique UKA
Technique UKA. Lee Beom Koo Gachon university Gil Hospital. Pre-op measurement of tibia resection line & slope. Lateral joint line ì„ ê¸°ì¤€ìœ¼ë¡œ joint ì— parallel 하게 ì„ ì„ ê¸‹ê³ ê·¸ì„ ì—ì„œ 7mm 하방으로 ì„ ì„ ê·¸ì€ í›„ ê·¸ì„ ê³¼ tibia medial plateau ì™€ì˜ ê±°ë¦¬ë¥¼ ì¸¡ì •í•œ 다 ( 대개 2-4 mm ì´ë‹¤ )

Technique UKA
E N D
Presentation Transcript
Technique UKA Lee Beom Koo Gachon university Gil Hospital
Pre-op measurement of tibia resection line & slope Lateral joint line을 기준으로 joint에 parallel 하게선을 긋고 그선에서 7mm하방으로 선을 그은 후 그선 과tibia medial plateau와의 거리를 측정한 다 ( 대개 2-4 mm이다) Lateral 사진을 보고sagittal slope측정하여 7 도 이하이면 natural slope로 ,cuttingline을 정하고 7도이상이면 slope를 7도 정도에 맞추어 자른 다
Approach AM arthrotomy후 proximal tibia의medial soft tissue 를 elevation하는 데 deepMCL과 MCL tibia insertion중 proximal insertion은 elevate 한다 그후 The anterior part of medial meniscus 을 자르고 The medial spur도 rongeur and osteotome 으로 자른 다
Evaluation of joint While the patella is retracted. Resistance of ACL and state of cartilage of lateral & patellofemoral joint is inspected
Exposure of medial compartment patella를 retraction후 MCL 을MCL retractor로 retract하고 다리를 slight external rotation of leg 하면 전체적으로 좋은 시야가 나온 다
Adjustment and fixation of tibia guide Guide의 shaft를 tibia crest에 맞추어coronal alignment결정후 하나의 screw를 박아서 coronal alignment를 정한다 Guide의 center를 술전 tibiaaxis맞나는 곳에 둔다 . .
Adjustment and fixation of tibia guide Sagittal slope 를재고 distal 에서 guide를 올려서slope 를정한다 . The natural slope is preferred But slope greater than 7 is not recommended
Horizontal cut • MCL retractor 로 MCL protection요하며. • 역시 너무 깊이 들어가 N_V 손상주지 않도록 조심 해야한다
The sagittal tibial cut 위치 ; The sagittal cutting line is marked at the medial edge of ACL Rotation; Sagittalcut line point toward the Femoral head in flexion ,akaki line medial femoral condyle wall방향 깊이; 너무 깊지 않게 , 깊으면 후에 tibia fx올수 있다
Balance in extension After placement of sliding spacer block, the medial joint space should open up 1 or 2 mm when valgus stress is applied with the knee in full extension. It is very important to avoid overstuff & overcorrection
Balance in flexion , 2 to 3 mm laxity is suggested.in medial UKA after placing block For the balance in flexion, the thigh should be lifted with one arm to balance the flexion gap
If the flexion gap is too tight;first step 종종 pre-optibia slope가 7도 이상이나 tibia 를 slope를 7도로 주고 하면 flexion gap이 tight해진 다 If the flexion gap is too tight , cartilage or bone should be removed from the posterior condyle offemur with rasp or saw
If the flexion gap is too tight;2nd step or The slope should be slightly increased
Marking of femoral rotation line Next step for the Marking of femoral rotation line the center of the tibial spacer block is marked with a Bovie on the femoral condyle in different positions It should not be judged while the patella is everted or perpendicular line to the cut tibia bone can be chosen
Distal femoral cut the distal femoral cutting guide is slided in extension and fixed with two pin and resected . The knee should be flexed 5 if the resected posterior slope of tibia is 5 to avoid hyperextension. shim can be used to manage the bone defect. Distal cut가 flex해지면 flex gap이 tight해진다
Finishing cutting guide placement Femur finishing guide is inserted in 90 degree flexion .
Finishing cut ;Size If the size is proper, 1 to 2 mm of exposed bone . At the anterior edge
Mediolateral dimension For the correct mediolateral position, The guide should be placed in the center of the femoral condyle,mediolaterally
Rotation femoral rotation may follow the previously Marked rotation line or This guide should also be rotationally set so that the posterior cutting surface of femoral condyle is parallel to the resected tibia
Fixation of finishing guide Posterior & Champer cut Finishing guide is fixed with two screw. at the Anterior margin of guide, bone is gouged slightly to accept the curved prosthesis While the MCL is protected with MCL retractor placed at femoral side, the posterior femur is resected and after anterior and posterior chamfer cut , two femoral peg hole is drilled
Post. Condyle trimming to avoid impingement posteriorly Post. Condyle trimming to avoid impingement posteriorly
The final preparation of the tibia;exposure The leg is externally exposed, while the MCL is retracted to expose the whole medial compartment
The size of the tibial tray Size는 AP 길이를 보고 결정해야한다 종종 ACL 보다떨어져서 sagittal cut하는데 medial크기가 작아진 다 그후 coronal plane으로크기 정하면 AP상 적은 크기가 들어가고 cortical support가 안 된다; tibia plate가 cancelleous bone에만 걸치므로 조기collapse가 온 다
Tibia preparation; tibia guide 넣고 일시적으로 tensor로 눌러서 고정후 the keel 을특수한 osteotome을 써서 하며 peg hole 을 drilled • tibia의 posterior margin을 정확히 파악 후 하여야 하며 • 종종 tibia guide가 뒤로 가는 경우가 많으니 anterior corticalshell에 guide의 margin을맞 추는 것 이 좋다
Tibia cement • Staged cementing • Avoid tilt of tibia plate especially posterior ( which result in tightness in flexion. • adequate exposure of posteromedial tibia • adequate sizing
tilt of tibia plate especially posterior • Easily happen when simultaneous cementing because knee extension cause pressure anteriorly • which result in tightness in flexion • Cement defect posteriorly.
Femoral cement • Cement is applied wholly to prosthesis and femoral cut surface except posterior condyle & prosthesis is inserted & impacted Argenson, Jean-Noel A MD; Parratte, corr 464 Nov 2007 P32
Liner insertion • In flexion , the liner is inserted with hand
alignment • The ideal correction as measured on the postoperative full weightbearing view will probably consist of a tibiofemoral axis crossing the knee between the tibial spines and the medial third of the tibial plateau for a medial UKA Argenson, Jean-Noel A MD; Parratte, corr 464 Nov 2007 P32 Kennedy WR, White RP. Unicompartmental arthroplasty of the knee; post-operative alignment and its influence on overall results. Clin Orthop Relat Res. 1987;221:278-285
Lateral Unicompartmental Knee Arthroplasty: Survivorship and Technical Considerations at an Average Follow-Up of 12.4 Years • unique tibial component positioning in 10° to 15° of internal rotationto compensate for the “screw-home” mechanism • Transpatella tendon sagittal sawing or medial approach is helpful( AAOS 2012) Pages 13-17 Jan'06 J arthroplasty Donald W. Pennington, John J. Swienckowski, William B. Lutes and Gregory N. Drake
Trans patella tendon sag saw in lat UKA to achive IR in tibia resection , trans tibial axis rotation Femur ; trans tibia rotation Keith R. Berend Clin Orthop Relat Res (2012) 470:77–83
Flexion gap balancing • Balancing is similar to that for a medial UKA, but looser; play of 2 to 3 mm instead of 1 to 2 mm (medial UKA) is suggested. Scott Insall 4th edit P 1413