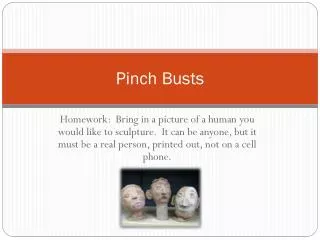
Pinch Busts
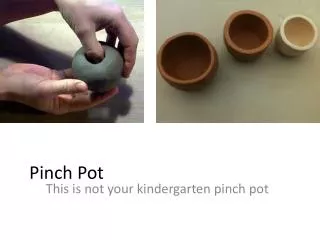
Pinch Busts. Homework: Bring in a picture of a human you would like to sculpture. It can be anyone, but it must be a real person, printed out, not on a cell phone. Steps 1, 2, and 3. 1: Hold a ball of clay the size of a tangerine in your hand.

Pinch Busts
E N D
Presentation Transcript
Pinch Busts Homework: Bring in a picture of a human you would like to sculpture. It can be anyone, but it must be a real person, printed out, not on a cell phone.
Steps 1, 2, and 3 • 1: Hold a ball of clay the size of a tangerine in your hand. • 2: Insert your thumb from the other hand into the middle of the clay, and press in a circular motion to a crude bowl shape. • Keep walls thick enough in order to fashion features out of this in future steps (about ½”) • 3: Using chart of the proportions of the face, draw the chart on your clay face, and draw the chart on the picture of the person you will be sculpting. • This will help you see where to put each feature.
Steps 4, 5, and 6 • 4: Turn the bowl on its side; push the clay out along the bottom from the inside to create a chin. • 5: Hold the front of the face toward you, using your thumbs press eye sockets for your eyes. This should force clay up between the eyes to form a bridge of the nose. Cut down to correct proportions. • 6: now pull more clay into the nose from the cheeks. To form the remainder of the nose, slip one larger ball for the end of the nose and two smaller ones for the sides of the nose. After attaching smooth all three balls into a nose. Create nostrils using a wood tool.
Steps 7 and 8 • 7: Half way down between the bottom of the nose and the chin use a small wooden tool to create a line for the mouth. • Next using same tool, begin at the corner of the mouth and pull clay down toward the chin. You are outlining the bottom of the lip here. Follow the lines of the lips in your picture. • After you have done this from one side of the mouth to the other side, pull this excess clay into the chin. This move should form the lower lip, the scoop under the chin, and enhance the chin. • 8:Next form the upper lip. Using the small wood tool, pull clay from under nose down to the upper lip. • Repeat this step a few times until you build up the upper lip. • Make the middle line from nose to upper lip.
Steps 9 and 10 • 9: Roll two balls for eyes. • Slip and score the areas in the eye sockets, insert the eyeballs. • Press them down to form two half spheres. • Using a pencil, make pupils (roll the pencil around to make the iris and pupil larger) • 10: Roll very small coils for the eye lids. • The top ones should be placed over the top part of the iris and blended back into the eye socket with a wood tool. (do not place these around he top of the eye, rather across the top of the iris.) • The bottom coils can be laid around the bottom edge of the eye, and blended downward to create a lower lid. • Use a needle tool to create eyebrows, in a sweeping short motion create the look of short eyebrow hairs.
Step 11 Second, Form the outer ridge Finally, Poke sideways to create the ear hole and tragus • 11: Sculpt two ears: • Begin with a flatten oval of clay, form into a kidney like shape, with a small lobe at each end. • Use a wooden tool to create the first ridge inside the ear along the top. • Inside this ridge, create the inner shapes of the ear. • Use your thumb and forefinger to flatten and shape the lobe of the ears. • Using a needle tool poke through sideways to create the ear hole and tragus. • Pierce the ears if desired. • Score, slip, and smooth the ears into the side of the head, position between the eyes and the bottom of the nose. Then work on inner details First make a oval with a Lobe
Steps 12 and 13 • 12: To create the back of the skull, create another pinch pot to attach to the face you have created. • This bowl shape should be deeper to correctly resemble to cranium or larger a back area of the skull. • 13: For the neck, Create a small tube using pinch pot method. • Take a small ball of clay in your hand and push your thumb all the way through. • Pinch the neck so that the top and bottom flare out slightly. • Sit the head on the neck. • Score, Slip, and Attach. BE SURE THE HEAD HAS AN OPENING INTO THE NECK
Step 14 and 15 • 14: To create the shoulders, make a pinch pot that is like a canoe. • Pinch out the interior and round the shoulders to proportionally fit your head and person you are sculpting. • Stuff with newspaper to hold shape. • Turn the canoe pinch pot of the canoe upside down • Score, Slip, and Attach the neck to the shoulders, be sure it is centered. • KEEP SHOULDERS STUFFED UNTIL THE PROJECT IS LEATHER HARD. • Create a hole in the bottom of the shoulders to vent the head and neck • 15: It is your choice to add clothing or sculpt the anatomy of the shoulders or neck. • Clothing – use slabs to sculpt collars and shirts. Use your needle tool to make the impressions of stitches and seams. • Anatomy – do your best to sculpt collar bones, ligaments of the neck, and the tops of the scapula on the back.
Step 16, 17, 18, and 19 • 16: Finish the Hair of your person. • Use slabs of clay for short hair, use coils for long hair. • For short buzzed hair, use your needle tool to create texture of short hair • 17: Add any last remaining details such as glasses, etc. to make your sculpture an individual. • 18: Let bisque dry and fire • 19: Glaze and glaze fire