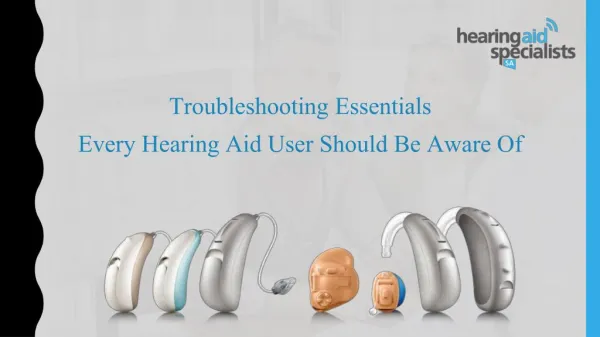
Hearing Aid Troubleshooting
Hearing Aid Troubleshooting. Amy Mellonig Nancy Lucas Kim Smith. Listening Check. Listen for: No output Muffled sound Feedback Distortion Intermittent sound. Without earmold. With earmold. Listening Check.

Hearing Aid Troubleshooting
E N D
Presentation Transcript
Hearing Aid Troubleshooting Amy Mellonig Nancy Lucas Kim Smith
Listening Check Listen for: • No output • Muffled sound • Feedback • Distortion • Intermittent sound Without earmold With earmold
Listening Check • Turn the hearing aid on and speak while turning the volume control wheel slowly up and down • Use of the sounds /a/, /u/, /e/, /sh/, and /s/ are a good measure of the frequency response of the hearing aid • The hearing aid should be squeezed while do the listening check to check for intermittent sound
No Output • Battery- • Replace battery • Check battery with battery tester
No Output • Make sure that positive and negative terminal of battery are in proper position in the battery compartment
No Output • Make sure you have the correct type of battery for the aid.
No Output • Check for corrosion on battery compartment. This can be removed with a pencil eraser.
No Output • Check external switches- • Check to see that external switch is not set to “telecoil” or “off” position.
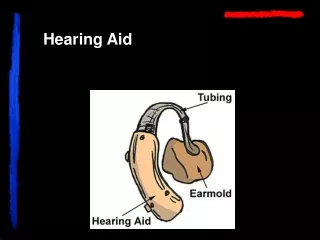
No Output • Earmolds- • Check to see that earmold is not impacted with wax. • The earmold may be washed with warm soapy water. • Be sure that earmold is completely dry before putting it back in the ear.
No Output • Tubing- • Make sure that tubing is not collapsed or clogged.
No Output • Moisture- • Check for moisture • If the hearing aid is wet, place aid in dry aid container
Review-No output • Test or replace battery • Make sure battery is inserted correctly • Make sure correct type of battery is being used • Check for corrosion on battery contact • Correct setting on external switches • Check to see that ear wax is not impacted on the opening of the earmold • Make sure tubing is not collapsed or clogged • Check for moisture • If the problem is unresolved, consult an audiologist
Weak/Muffled Sound • Nearly exhausted battery • Battery that registers 1.0 volts or less should be discarded • If battery leakage occurs, discard battery properly
Muffled/Weak Sound • Check for dirty or clogged microphone screen
Muffled/Weak Sound • Earmold almost completely clogged with wax
Review Muffled/Weak Sound • Check for nearly exhausted battery • Discard battery if leakage occurs • Microphone opening dirty or clogged • Earmold almost completely clogged with wax • If internal defects are suspected, consult audiologist
Feedback • Volume control setting is too high
Feedback • Improper fitting of earmold
Feedback • Crack in tubing
Feedback • With the volume control set at normal setting, put finger over earmold opening and listen for feedback. If no feedback occurs, then feedback is due to volume control or improper fitting of the earmold. If feedback still occurs . . .
Feedback • Remove earmold, and place finger over earhook. If feedback does not occur, then the problem is in the earmold or tubing. If feedback still occurs. .
Feedback • Remove earhook, and place finger over opening of the aid. If feedback does not occur, then the problem was in the earhook. If feedback still occurs, it is “internal feedback” and consult an audiologist.
Review Feedback • Check volume control setting • Improper fitting of earmold • Crack in tubing • Check for feedback in earmold/tubing • Check for feedback in earhook • Check for internal feedback • If internal feedback is suspected, consult an audiologist
Distortion • Distortion can be characterized as sounding scratchy, having static, weak volume or a “motorboating” effect.
Distortion • Check for corrosion on battery contacts and terminals • Clean contacts with battery contact cleaner (follow instructions carefully)
Distortion • Defective volume control • Change battery • Check for moisture
Distortion • Check for covered or clogged microphone opening
Distortion • Excessive wax in ear in student’s ear
Distortion • Earmold needs venting
Review Distortion • Check for corrosion on battery terminal • Change battery • Check microphone opening if it is covered or clogged • Excessive wax in child’s ear • Earmold needs venting • Moisture in hearing aid • Defective volume control • If problem is unresolved, consult an audiologist
Intermittent Sound • May be characterized by scratchy sound or hearing aid sounding like it is going on and off
Intermittent Sound • Corrosion on battery contacts and battery terminal
Intermittent Sound • If tubing collapses, sound may cut off
Intermittent Sound • Make sure that the battery is correctly seated and snug in battery compartment
Intermittent Sound • Possible defective volume control • Possible internal problems
Review- Intermittent Sound • Check for corrosion on battery contacts and terminals • Make sure battery is correctly seated and snug in battery compartment • Make sure tubing does not collapse or bend when head is turned • Defective volume control • If internal problems are suspected, consult an audiologist
Routine care • Avoid high temperatures- Don’t leave hearing aid on the radiator or in the direct sunlight, or any other equipment that generates heat. Heat can damage the hearing aid amplifier and can cause batteries to deteriorate.
Routine care • Avoid Moisture- Keep hearing aid dry. Even perspiration can cause damage. If the child has trouble with excessive perspiration, you can purchase a dry aid kit. Place the aid in the kit overnight and it should be dry in the morning.
Routine care • Battery Care- • Keep several spare batteries handy in case battery goes dead. • Store batteries in a cool dry place. • Remove batteries from the aid at night to prolong battery life. • Keep battery contacts bright and clean. Poor contacts can contribute to loss of power and may result in a “frying” sound in the hearing aid. • Discard dead batteries properly