Engineering Graphics
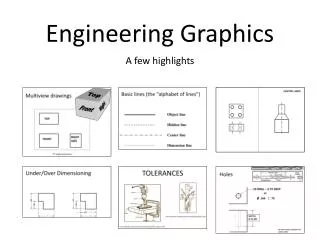
Engineering Graphics. INDEX. Introduction Scales Engineering Curves Orthographic Projection Isometric Projection Projection of Points & Lines Projection of Planes Projection of Solids Section of Solids. IN CLASS. INTRODUCTION. Types of Lines Numbering Dimensioning Types of Polygon.

Engineering Graphics
E N D
Presentation Transcript
Engineering Graphics Anurag R Pal, PIT
INDEX • Introduction • Scales • Engineering Curves • Orthographic Projection • Isometric Projection • Projection of Points & Lines • Projection of Planes • Projection of Solids • Section of Solids IN CLASS Anurag R Pal, PIT
INTRODUCTION Types of Lines Numbering Dimensioning Types of Polygon Anurag R Pal, PIT
TYPES OF LINES Anurag R Pal, PIT
NUMBERING Anurag R Pal, PIT
STRAIGHT LETTERS & NUMERALS • Step-1 First draw two horizontal lines of any length at the distance 10 mm apart from each other. • Step-2 Then draw vertical lines between the two horizontal lines at distance 10 mm apart form each other. • Step-3 Then write down the Capital Alphabet letters within each box in such a way that each letter of the alphabet should touch the boundary of the respective box only. Like in the same way write down full ABCD…. • Step-4 As per the procedure described above write down numerals from 1 to 0 in a new line. Anurag R Pal, PIT
INCLINED LETTERS & NUMERALS • Step-1 First draw two horizontal lines of any length at the distance 10 mm apart from each other. • Step-2 Then draw vertical lines between the two horizontal lines such that each vertical line should be inclined at an angle of 75° with the horizontal line & each line should be at the distance of 10 mm apart from each other. • Step-3 Then write down the Capital Alphabet letters within each box in such a way that each letter of the alphabet should touch the boundary of the respective box only. Like in the same way write down full ABCD…. • Step-4 As per the procedure described above write down numerals from 1 to 0 in a new line. Anurag R Pal, PIT
DIMENSIONING There are two types of dimensioning system: • Uni-Directional System • Aligned System Anurag R Pal, PIT
In Unidirectional Method of Dimensioning the dimension line should be cut at center and dimensions should be placed in the middle of dimension lines as shown into the figure. Anurag R Pal, PIT
In Aligned Method of Dimensioning the dimension line should be continuous and dimensions should be placed in the middle of dimension lines as shown into the figure Anurag R Pal, PIT
Polygon BASIC DRAWING How to draw a Polygon? • TRIANGLE • SQUARE • PENTAGON • HEXAGON • SEPTAGON • OCTAGON C 6 4 A B 30 Anurag R Pal, PIT
TRIANGLE C 6 4 A B 30 Anurag R Pal, PIT
SQUARE C 6 RADIUS O 4 A B 30 Anurag R Pal, PIT
PENTAGON BISECTOR C 6 5 RADIUS 4 A B 30 Anurag R Pal, PIT
HEXAGON C 6 RADIUS 4 A B 30 Anurag R Pal, PIT
OCTAGON 8 RADIUS C 6 4 A B 30 Anurag R Pal, PIT

