INTRODUCTION TO ADOBE ILLUSTRATOR
INTRODUCTION TO ADOBE ILLUSTRATOR. VECTOR MONSTERS. Created by CHRIS SPOONER. Adobe illustrator software…. is a vector graphics editor developed and marketed by Adobe Systems. VECTOR GRAPHICS….

INTRODUCTION TO ADOBE ILLUSTRATOR
E N D
Presentation Transcript
INTRODUCTION TO ADOBE ILLUSTRATOR VECTOR MONSTERS Created by CHRIS SPOONER
Adobe illustrator software… • is a vector graphics editor developed and marketed by Adobe Systems
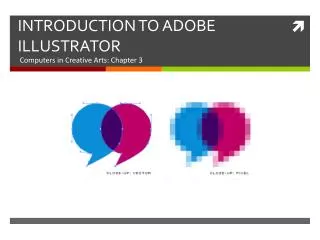
VECTOR GRAPHICS…. • Vector graphics is the use of geometrical primitives such as points, lines, curves, and shapes or polygon(s), which are all based on mathematical equations, to represent images in computer graphics.Vector graphics formats are complementary to raster graphics, which is the representation of images as an array of pixels, as is typically used for the representation of photographic images.
The main parts of Adobe illustrator are the…. • TOOLBAR • DOCUMENT • WINDOWS • This what you see when you open up ILLUSTRATOR!
NOW THAT YOU HAVE SOME BACKGROUND INFORMATION.LETS GET STARTED
Part one of the series will cover the creation of this flying bat ghost, so to begin launch Adobe Illustrator…Go to FILE/ NEW and open document
Draw a circle onto the artboard, (hold shift). Then with the Pen Tool add two additional anchor points to the path as shown. (Hover over the path and you will see a little plus sign appear on the pen-cursor icon, simply click to add a point)
With the Direct Selection Tool (white arrow) select and delete the lower most point of the circle, this will leave an unclosed path as shown above.
Back with the pen tool, click on the open end point on the bottom left of the circle to continue this path. Create a zig-zag line across to the opposite end point and complete the path. When hovering over the final end point you will notice an O appear on the cursor to indicate you are about to close the path by joining with this end point.
Use the Direct Selection Tool again to select all of the points on the lower half of the circle. Once selected nudge these downwards with the cursor key to extend the body of the character.
Select the circle tool again and draw two eyes with a black fill, creating these at different sizes gives the monster quirky characteristics.
A little skill with the Pen Tool is required next to draw a wing shape off the edge of the character's body. Take some time to learn how the Bezier Curves affect the shape of the path. Once complete, fill the shape with black.
Instead of drawing another wing, copy and paste the one that has just been created and head to Object > Transform > Reflect. Choose the Vertical axis to mirror the wing, then position on the opposite side.
Select the main body, and thicken the stroke to give a definite outline. Click the little icon underneath to align the stroke to the outside of the shape.
Select the eyes, and add light grey strokes to the outside of these shapes.
A slight highlight on the wings can be made with the pen tool, zoom right in and follow the shape of the wing and fill this shape with a deep blue.
Back onto the body copy and paste in front (CTRL + F) the shape and change the black stroke to a thinner light grey outline, align this stroke to the inside.
Your scary Flying Bat Ghost is complete. Now move on to the next monster #2 of 4
Part one of the mini-series covered the creation of the flying Bat, now we'll take a look at the Dumb Blue Sucker Monster! Again, using mostly the basic tools and shapes making the tutorial suitable for beginners to Illustrator.
select the Rounded Rectangle Tool and draw a shape as shown. Use the cursor keys to adjust the roundness of the corners to give almost circular ends.
We don't need the bottom half, so create a rectangle to cover the area to chop off. Select both the shapes and use the Substract From Shape Area option from the Pathfinder Window and click Expand.
Use the Circle Tool to create an ellipse for use as the sucker part of the monster. Align these two shapes centrally. Use the Pathfinder Tool to Add To Shape Area, and Expand. This merges the objects together into a complete shape.
Continuing with the Circle Tool draw a large circle as an eye, copy and paste in front (CTRL + F) then scale down whilst holding shift and alt. Repeat this again and fill the final circle with black. Use the same process to create the second eye. Remember this character is quite dumb so creating different sized eyes both wide open will express a brainless, vacant stare.
To further enhance his characteristics create a curved line for use as the mouth using either the Pen or Pencil tool; a wobbly shaped mouth expresses confusion which is perfect for this character. Add a thick red stroke to this line to simulate the lips, and add rounded edges by checking the Round Cap icon.
Copy and Paste this line but give a much thinner, black stroke to make the mouth opening.
Create small tabs with the rounded rectangle for use as the teeth. Make duplicates of these and position them equally across the mouth, rotating each one slightly to follow the curvature of the line.� Use CTRL/CMD + [ and CTRL/CMD + ] to alter the order of the objects to make the black stroke the front most object, hiding the top half of the teeth underneath it.
Bring in some colour by adding a blue fill to the body shape. Copy and Paste this shape, but exchange the fill and stroke to a dark blue stroke aligned to the inside of the object.
Thickening the strokes on the eyes gives more definition, enabling them to stand out.
Copy and Paste Behind (CTRL + B) the eyes and add a dark blue stroke to the outside of the circles.
Give more definition to the sucker part of the monster by adding a subtle shadow. Draw a blue ellipse with the Circle Tool.
Create a slightly larger ellipse as a tool to remove an area of the underlying circle. Use the Substract From Shape Area tool and Expand to leave a thin crescent shape.
Finally add some small circular highlights in the monsters eyes to give a glazed appearance.
NOW on your own try to make the last two monsters on your own, using the same tools and techniques as the first two monsters...

