Download
1 / 21
490 likes | 1.23k Vues
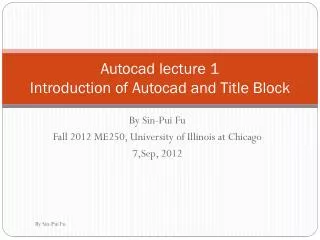
Autocad lecture 1 Introduction of Autocad and Title Block. By Sin- Pui Fu Fall 2012 ME250, University of Illinois at Chicago 7,Sep, 2012. Install Autocad on your computer . Create a student account on http://usa.autodesk.com/autocad/ Free (student edition). Objective . Title block

E N D
Autocad lecture 1Introduction of Autocad and Title Block By Sin-Pui Fu Fall 2012 ME250, University of Illinois at Chicago 7,Sep, 2012 By Sin-Pui Fu
Install Autocad on your computer • Create a student account on http://usa.autodesk.com/autocad/ • Free (student edition) By Sin-Pui Fu
Objective • Title block • Draw toolbar • Attach a title block file in a current drawing By Sin-Pui Fu
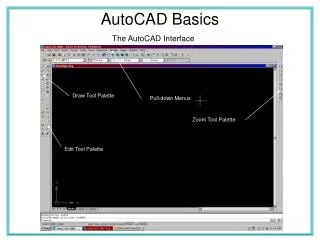
Introduction to Drawing Screen Drawing toolbar Modify toolbar Layer toolbar Annotation toolbar Command window Ortho Mode Model/Paper space Scale By Sin-Pui Fu
Drawing & Modify Toolbar By Sin-Pui Fu
Modes You should turn on all modes By Sin-Pui Fu
Set “Drawing Unit” Before Drawing • 1. type “un” in command window • 2. select a correct unit in “Drawing unit” window By Sin-Pui Fu
Dimensions of Title Block 7.25inches 2.5 inches 1.2inches 9.75 inches By Sin-Pui Fu
Basic Command 1: Line (L) • Method 1: • Step1: Type command “L” • Step2: Enter the starting point • Step3: Enter the second point • Step4: Press ESC • Method 2: • Step1: Type command “L” • Step2: Pick a starting point by using mouse • Step3: Move your mouse to desire direction • Step4: Enter any number for distance • Step5: Left click on the mouse • Step6: ESC By Sin-Pui Fu
Polyline (pline) • Step1: Type command “pline” • Step2: Select a starting point by using mouse • Step3: Select a second point • Step4: Select several more points • Step5: Press the right mouse button, then select Enter By Sin-Pui Fu
Basic Command: Circle (C) • Step1: Type command “C” • Step2: Enter a center point • Step3: Enter the radius or (type “d” for diameter) By Sin-Pui Fu
Multiline Text Editor Click “Multiline Text” bottom Change the text size Type the text here! By Sin-Pui Fu
Import/Attach a File Step 1 : Click “Layout 1” that’s located on the bottom left corner of the screen.
Modify Layout Right Click the mouse By Sin-Pui Fu
Changing the paper size By Sin-Pui Fu
Step 2 : Click “Insert” Step 3 : Under “Insert” click “Attach” Step 4 : Locate your file and click “open”
Step 6: File attached • You may need to re-scale or move the title block to the middle with proper size by using command “scale” and “move”
Print Layout You may need to change the setting to fit your paper size By Sin-Pui Fu
Practices Exercise By Sin-Pui Fu
Online Learning Login By Sin-Pui Fu