Download
1 / 30
300 likes | 506 Vues
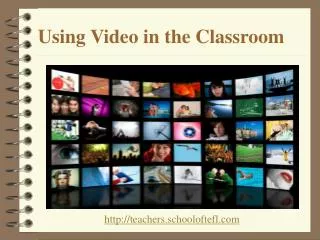
Using Video in the Classroom. Jill Morris January 9, 2010. Why use video?. Video is something different which therefore increases student interest and engagement with course material

E N D
Using Video in the Classroom Jill MorrisJanuary 9, 2010
Why use video? • Video is something different which therefore increases student interest and engagement with course material • Students have to really understand something in order to create a video about it. They might just slop together a paper, hoping no one will notice, but it is difficult to do this with a video. • It’s fun! • It encourages group participation. • You’ll be surprised at how well student projects come together!
You don’t have to be tech-savvy • Today we will: • Look at sample student projects • Look at equipment • Learn how to use Movie Maker • Edit a sample video • Brainstorm project ideas in multiple disciplines • Consider what time in the term these projects could fit into
Sample videos from Baker: • The assignment comes from WRI115 (Workplace Communication). • Students were asked to create a short infomercial or commercial based upon fake companies created for the course. • Students worked in teams to create the videos you are about to see. • This was the last assignment, and videos were due on the last day of class.
Projects from elsewhere: • The first video is taken from a Technical Communication course. The assignment is creating an instructional video. • The others are from a Composition II course. That assignment is to recreate a movie using only things you already have, plus $25 per group. It is adapted from the movie Be Kind Rewind. I will be teaching this project here during Winter Term.
Cameras, tripods, etc. • Many Baker students own their own cameras because they already have children. They will most likely want to use their own. • Point and shoot cameras usually have a video feature. • I have my own tripod and camera, which are loaned out to students, but the above are good options if you don’t have one or are uncomfortable about it. • I also have a laptop to pull video off my camera in the classroom, as well as a stabilizer, but I had these outside class and they aren’t necessary to do this kind of work.
Software and Computers • Windows requires a Firewire (IEEE 1394) connection to transfer video to Windows Movie Maker from a camera with Mini DV tape. • Windows Movie Maker is available free with Windows or as a download for all people with a legal license. • Macs come equipped with both Firewire and iMovie. • If you have a Mac, you will need to get Flip4Mac and Quicktime 7 in order to export to WMV.
Getting Started • This is the main Movie Maker screen. • Click “Capture from Video Device” or “Import Video” to begin importing video for use into Movie Maker. “Import Video” should be used for clips that are already on the hard drive of the computer. • Start Movie Maker and import the videos, sounds, and pictures that I have left for you in the ASSIGN director under “Video PD”
Once video is imported… • “Clips” (or small videos that you build your entire project from) are stored in the center of the screen). • Each can be previewed separately • Each can be cut and edited before being put in the timeline.
Next…. • To put a clip into your movie, you drag it from the clips pane (left click, hold, and drag) into your timeline which is located at the bottom of the screen • You are currently in timeline view, which allows you to view clips in order and add transitions and effects. • Add a clip or two now.
Splitting Clips • Once you have learned how to add clips, you should add all of your clips in the order you wish them to appear in your video. • Sometimes you will need to split a clip in two. To do this, be sure to preview it in the preview window, play it to the point you want to split it, then click the split clip button. This will create two clips at wherever the playhead is currently located.
Adding Transitions • Once your clips are laid out in order, you should add transitions between them. • Transitions change the way one clip fades (or doesn’t) into another immediately following it. They are easy to overuse, and if in doubt, use a cross-fade for clips that you want to have a gentle transition into or nothing at all for quick changes. • To create a transition click on “Edit Movie” on the left side of Movie Maker, then click “View Video Transitions.” • Transitions appear in the center. They should be dragged and dropped to the rectangle with the arrow on it between clips. This will apply the transition between the clips.
Video Effects • Similar to transitions, video effects change the way a clip looks and are applied in a similar way. To view available effects, click “View Video Effects” on the main screen • Some of these effects are very useful. Brightness increase can correct a dark video (to a certain extent). However, overusing them can look cheesy and unprofessional.
Adding Sound • It is often necessary to add sound to a movie (foleying, background music, or voiceover). • Music can be added by importing a music clip from the main Movie Maker window (it should already be saved on your hard drive). Once a song is imported, it is available in your collections. • To add music, we are going to have to change from “storyboard” view to “Timeline” view. Click on the button that says “Show Timeline.”
Sound Continued… • In this view you can drag and drop music files to play at certain points in your existing movie. • Movie Maker also has a handy tool to allow you to add voice-overs or narration without using other software.
Narration Tools • The button to open the narration tool looks like a microphone. You should use an external microphone to do your narration. • Clicking on the button will start the narration tool. You should watch your video, and when you want to speak click “Start Narration” on your screen. • You can, of course, always record narration using other software and then import it in—which is what I usually do. • Be sure to speak directly into the microphone. When you are done click “Stop Narration.”
Titles • Adding titles to your clips also has a special tool. Click on “Make Titles or Credits” in the main Movie Maker screen. • Titles in Movie Maker are simple because each is added through a Wizard. I recommend that you change default settings for all titles, however, because the default ones label a project as “made in Movie Maker” to any viewers familiar with the software.
Finishing! • The project file that Movie Maker creates needs to be exported into one of the video types that can be opened by most computers. • When a video is done, you should click on the File Menu and then on “Save Movie File.” Movie Maker will give you a list of options available to your computer (and that’s important, some computers and versions of the software will have more than others). Choose the options you want, and save the file. Later you can burn the file to a DVD, share it online, etc.
Project Ideas • Here are some samples: • Composition: • Videos informing other students about service learning opportunities • argumentative video based upon final paper topics • Studying the difference between oral/visual communication and written communication • Math: • Videos wherein students teach other people how to solve certain types of problems • Psychology/Social Work: • Scripted and mock counseling sessions
When should this happen? • There are two schools of thought about major new media projects: • 1. Do them as the very last project • 2. Do them earlier in the term. • I am a proponent of doing them as soon as possible, providing they fit into the class curriculum, because the team building and engagement I experience after them shouldn’t have to wait till the end of the term. • What about the projects we just brainstormed? Where would they fit?
Backdrops: - These are full sized backdrops, just scale them up! - Can be Copy-Pasted out of Templates for use anywhere! www.animationfactory.com