Download
1 / 33
330 likes | 522 Vues
VIDEO IN THE CLASSROOM. Instructional Applications Presented by: Carla Nutt and Mary Kralicke. The Filmmaking Process. FIVE PHASES Development Pre-Production Production Post-Production Distribution. Development. Defining the Project Determining Groups/Roles

E N D
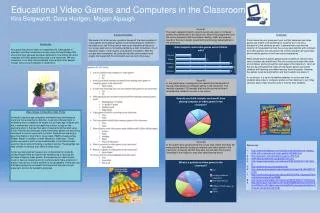
VIDEO IN THE CLASSROOM Instructional Applications Presented by: Carla Nutt and Mary Kralicke
The Filmmaking Process FIVE PHASES • Development • Pre-Production • Production • Post-Production • Distribution
Development • Defining the Project • Determining Groups/Roles • Developing Ideas • Making the Pitch • Getting Approval • Writing the Script
Defining the Project What makes a great project? • Relevance • Awareness of community, family, or self • Higher order thinking skills • Real world learning • Enjoyable
Defining the Project Define the Purpose • Entertain • Inform • Convince • Argue • Defend • Explore
Delivery Date Audience Venue Delivery Format Special Instructions Assessment Defining the ProjectImportant Project Considerations • Purpose • Vision/Goal • Subject • Questions • Production Team • Format • Project Length
Defining Roles • Individual • Large group/whole class • Teams of 5 or 6 students
Defining Roles • Teams of 5 or 6 students • Writer • Director • Camera • Editor • Producer
Defining Roles • Large Groups/Whole Class • Leadership roles • Departments
Defining Roles Leadership Roles: • Executive Producer • Producer • Production Manager • Director • Assistant Director
Defining Roles Filmmaking Departments: • Writing • Locations • Art • Camera • Sound • Editing • Publicity
Developing Ideas • Brainstorming • Mind Mapping (graphic organizers) • Parameters/scope • Dedicated time to developing ideas • Research • Flexibility
Making the Pitch • Oral Communications of Ideas • Pitching to the Teacher • Pitching to Other Students
Writing the Script • The script or screenplay is the blueprint for the construction of the film. • Developing Writing Skills • Creative writing • Organization • Spelling, grammar, punctuation • Consistent formatting • Shot Lists and Sequencing
Storyboarding Why use a storyboard? • Helps develop and refine ideas • Allows for better communication • Aides in evaluating specific productions choices • Assists with planning for backgrounds, props, and other needs • Reveals needs for transitions • Helps develop students' creativity, logic, and visual presentation skills
Beginning Video Projects Video Alphabet • Illustrate the alphabet with individual shots or whole scenes. • Literal, poetical, or metaphorical illustrations. • Students work in groups of two or four. Video Metaphor • Provide a mysterious or thought-provoking phrase that students must translate into video. • Use a line of poetry, crossword puzzle clue, a song phrase, a phrase from a famous speech (the Pledge of Allegiance) or a line from a newspaper article.
Advanced Video Projects A New Ending • Students write a new ending or scene to follow the last scene of a story, novel or event. Adapt a Scene of Story • Similar to writing a new ending. Students write their own version of a scene from an existing book, story or movie.
Advanced Video Projects Portrait • A video portrait of a person (student or teacher choice) • A member of the family, community, a peer. • Encourage students to show the subject's everyday activity, as well as interviews. • What other elements in that subject's life might tell us more about that person?
Other Applications • Demonstration of procedures • Promoting school activities • Audience-targeted advertisements • Reviewing, reflecting shared events • Student-created presentations • Documentaries • Public Service Announcements (ISAFE) • Morning announcements
Resources • American Film Institute • Adobe digital School Collection • POV’s Borders • http://delicious.com/froese/videointheclassroom • http://gallery.mac.com/flickschool#100102&view=grid&bcolor=black&sel=22 • http://www.soundzabound.com
References • Adobe Digital School Collection: Teacher Resources. Retrieved from http://www.adobe.com/education/instruction/adsc • Garrison, Andrew. Video Basics and Production Projects for the Classroom. Center for Media Literacy. Retrieved from: • http://www.medialiet/.org/reading room/article3.html • Guttler, Frank. AFI Screen Education Blog: Lights, Camera, Education! Retrieved from: http://blog.afi.com/screened/?cat=3 • Regnart, Pat. Digital Video Production Kent School District Retrieved from: http://www.kent.k12ws.us/KSD/IT/TSC/managing/hardware/vidprod/#DVclassroom
Windows Movie Maker • Capture • First, launch Movie Maker (Start > All Programs> Windows Movie Maker). • Use the Movie Task List to select the capture option to capture video from your camera of choice (Flip Camera, Digital Camera, Camcorder, eeePC). • You can also use the Import Video option to import video clips already on your hard drive or to import pictures. • It’s very important that all the files used to create your movie project are all stored in one project folder you’ve created. (For example, save all music, pictures, and video you’ll be using in the same place rather than scattered about in My Music, My Pictures, My Videos, etc.)
EDITING • Edit • Now, take one the clips you want to use and drag it to one of the boxes on the Storyboard. • Keep doing this until you have all the clips on the Storyboard that you’d like to use. • You can move the clips around in the Storyboard until you have a good sequence. • Now, to adjust the timing of the clips, switch to Timeline Mode by clicking on the "Show Timeline" button just above the Storyboard. • You can use the Clip menu at the top of the screen to set start and end points for the clip or you can just click and drag the front or end of the clip to set the start or end point.
TRANSITIONS and EFFECTS • Add Transitions and Effects • Switch back to Storyboard mode by clicking the "Show Storyboard" button above the Timeline. • To display a set of transitions to select from, choose “View video transitions” from the Movie Tasks pane. See the smaller boxes that look a bit like semaphore flags between the boxes with the video clips? That’s where you’ll drop your transitions. • Select the transition you want to use and drag and drop it onto the semaphore flag between two clips. • To display the Video Effects palette, choose “View video effects” from the Movie Tasks pane. See the little box on each of your clips that has a star? That’s where you’ll drop your chosen effect.
TITLE AND CREDIT SLIDES • Add Title Slide and Credit Slide • To create your titles and credits, choose “Make titles or credits” from the Movie Tasks pane. • Choose from a menu of possibilities the type of title or text you are creating. Then get to work and type it, just like you would in a word processor. • To select a different way for the title to behave choose “Change the title animation” and select something else. • To change the font, the font size, the font color, etc., select, “Change the text font and color.” • Click "Done, add title to movie" when you're ready.
MUSIC • Add Music – New to IISD – http://www.soundzabound.com • Username: sound(campus number) • Password: music • To add music or a narration track, choose “Import audio or music” from the Movie Tasks pane. • To add a narration track, you’ll need to find or create a blank space in the audio track in Timeline mode (click “Show Timeline”) and then select Tools > Narrate Timeline. • Right-click on any audio clip—including the audio tracks of any of your video clips—and adjust volume, create a fade in/fade out effect, or even entirely mute the audio.
PUBLISHING • Publish • Select "Save to my computer" from the Movie Tasks area and then select a folder. From the drop down list of possibilities, select: • "Video for broadband" • "Video for ISDN" • "Video for dial-up access" • Of course, you can also "burn" your movie to a CD or DVD
FLIP CAMERAS to MOVIEMAKER • Capture video on clips • Plug Flip USB into computer • Run ‘Flip Share’ application • In top menu click “Share online’- ‘Other’ • Follow step-by-step instructions (name folder if desired) • Wait for computer to create the .wmv files (you will be notified but will not ‘see’ anything happening) • Folder will appear on Desktop with .wmv file(s) • Open Moviemaker- import video- Choose newly created.wmv’s in the folder you saved. • Ready to edit