DNA Sequencing Scramble
In this engaging lesson, students will explore the powerful method of DNA sequencing, focusing on the importance of complementary base pairing and the role of chain terminators. They will learn how DNA polymerase functions in the 5’ to 3’ direction and understand how electrophoresis separates DNA fragments by size. Through hands-on activities, students will synthesize DNA strands, align resulting products, and read sequences. Additionally, the lesson contrasts traditional Sanger sequencing with modern automated methods, highlighting safety considerations and labeling technologies.

DNA Sequencing Scramble
E N D
Presentation Transcript
DNA Sequencing Scramble Class instructions
In this lesson • DNA sequencing is a powerful method for analyzing DNA • Ratio of chain terminators (ddNTPs) is important • Importance of complementary base pairing • DNA polymerase only works in the 5’- 3’ direction • Electrophoresis separates DNA fragments by size • Chain terminators stop the reaction & visualize the result • Why fluorescent labels are used more than radioisotopes • Software (bioinformatics) is used to line up sequences
The devil is in the detail! • The 5’ prime and 3’ prime ends of the bases must be round the right way! IMPORTANT: Do not take bases apart!!!
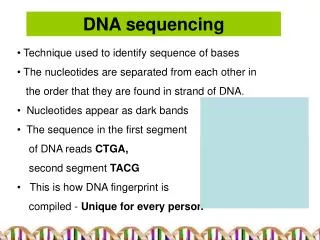
Correct base pairing is critical! • Green (Guanine) pairs with yellow (Cytosine) • Blue (Adenine) pairs with orange (Thymine)
Bases with white sugars are CHAIN TERMINATORS or dideoxynucleotides (ddNTP)
Automated sequencing • A whole class activity • There are four pots, one for each nucleotide, each with 15 normal and 5 ddNTPs • Produce a copy of our template using the labeled nucleotides • Align resulting products in one column to read sequence
The activity Each student takes it in turns to synthesise a new strand Randomly select a nucleotide from each pot Add them in the 5’ to 3’ direction If you pull out a ddNTP, your chain is finished, it is the next student’s turn
The result - electrophoresis • Line up all the fragments from longest to smallest in one column • Read the sequence from the smallest fragment upwards
Read sequence in this direction Automated Sequencing Results G C A C T
Electrophoresis gel is read by a laser - printout produced Read sequence in this direction
Sanger Sequencing • Original method of sequencing • Chain terminating nucleotides are radioactively labeled • Sequencing takes place in four separate tubes, each with one ddNTP • All four results are then run in four separate lanes on a gel, separated by size
The activity • As before put the template at front of the class • Denature the two strands and anneal the primer: • Then line up the automated sequencing products in size order using one lane per base.
Sanger Sequencing Result - Electrophoresis • Line up products in 4 columns – one for each base: Read sequence in this direction
G A T C How an electrophoresis gel would look Read sequence in this direction
The difference between two methods • Original Sanger method requires four lanes because all fragments are the same colour. • Radioactive labels = hazardous • Automated sequencing can be run in one lane because each fragment is coloured differently. • Coloured labels = safe