Download
1 / 24
240 likes | 399 Vues
This guide is yours to keep for the duration of the course. Please regularly refer to it for exemplar work and treat it with care as it’s replacement will cost you £2.50. GCSE Product Design Guide Book Unit 2. NAME. GCSE PRODUCT DESIGN My Design Portfolio 2011 - 2013. Introduction

E N D
This guide is yours to keep for the duration of the course. Please regularly refer to it for exemplar work and treat it with care as it’s replacement will cost you £2.50 GCSE Product Design Guide Book Unit 2 NAME
GCSE PRODUCT DESIGN My Design Portfolio 2011 - 2013 Introduction The work of a specific artist/designer or art/design movement will be the source of ideas for a new range of products aimed at a design conscious market. It is important that the designs you develop into prototypes are not copies of existing work but reflect the general influence and style of the chosen source which should therefore be viewed as “in the style of…” Design Brief A mail order company wishes to offer a range of lighting products based upon 20th century design (designers/movements/artists). You are required to choose one such designer/movement/artist and make a lighting product which reflects the essential features of the movement/designer/artist. It is anticipated that the target market will be middle age adults who wish to create themed rooms in their homes. NAME…………………………………….… Student Number……………
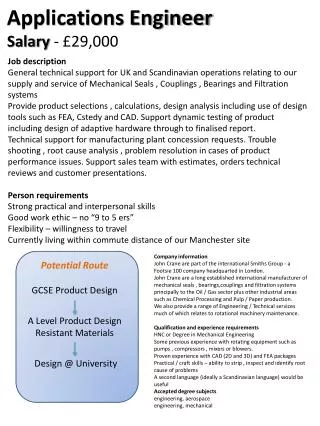
Spider Design Written Brief Analysis Diagram EXAMPLE Using the information on your spider diagrams write a written analysis - Take each of your sub headings and information and rather than writing in bullet points write a written paragraph. Use the sub heading as a sub title and write a sentence about each of the points written on the diagram explaining them in more detail. e.g. This is the problem you are going to solve. What is it exactly you are going to do. Why does this problem need solving? ‘I am going to design and make a ………………’ Conduct a spider diagram of things that you will need to find out in order to answer the brief. A high grade task analysis will be absolutely busting with information – explore anything and everything that is relevant. Function Environmental Aesthetics Shape Materials Possible materials I could use for my product could be wood, metal or plastic. Plastic would be good cause it comes in a range of materials such as acrylic and ABS. I could get it in bright colours and it has a very good finish with a high shine. Metal could be good because it is modern and stylish. Chrome is a quite in finish at the moment, but it could look quite cold. Wood is very traditional so could give my product a more natural finish but it can be weak and soft and it will rot if left outside. Where Style Project Title Sizes Ergonomics Theme User Finish Materials What Why EXAMPLE EXAMPLE EXAMPLE
Spider Design Brief Diagram
Written Analysis
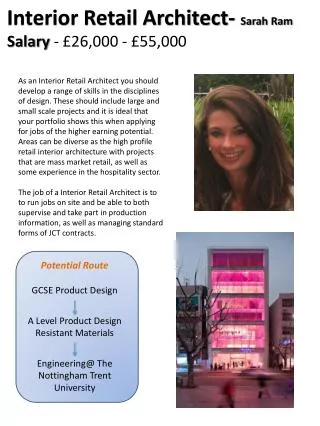
Mood board Inspiration Client/User Board Evaluation Profile EXAMPLE • In this section you will identify the person/people you are designing the product for. • You should include: • A description of the person/people • An image or images to represent the demographic • The age or ages of the client/user and who is will affect your project • The needs of the client/user and how this will effect your project • How much money would your client/user be prepared to spend on your product Collect as many images as you can that relates to your project. (Enough to fill this space completely with no gaps.) Mount the pictures onto the sheet overlapping them so that no white is showing through. You should also include relevant or useful annotation. Evaluate the inspiration (this is a very brief evaluation) - How has it helped you in your project? What are your favourite images? I have created this inspiration board because…
Research Product Plan Analysis You must analyse 6 products – try and find 4 you like and 2 you hate! The pictures must be at least the size of the palm of your hand – NO SMALLER Once the image has been mounted neatly onto the page you must evaluate it in detail. You must be descriptive with bullet points and then summarise your thoughts in a written paragraph. You must create a research plan so that you are mapping out the research methods you are going to do. You must use the end column to state if you decided to use this method Function Materials Used Finish Bad Points are; Style Product Your teacher will provide examples of research methods. Good Points are; Colour • Descriptive Bullet Points; • Materials used – Why • Function • Good Points • Bad Points • Colour/Style and Finish • Personal Written Paragraph; • What do you think? Why? • What do you really like? Why • What don’t you like? Why • Do you think it is successful? Why • How could it be improved? Why
Product Product Analysis Analysis Product Analysis Evaluation Display your images and evaluation of 2 products you like in this space Display your images and evaluation of 2 products you hate in this space EXAMPLES EXAMPLES Use the information on the previous page to help you with this section. Use the information on the previous page to help you with this section. Evaluate the information from above (this is a very brief evaluation) - How has it helped you in your project? What have you discovered?
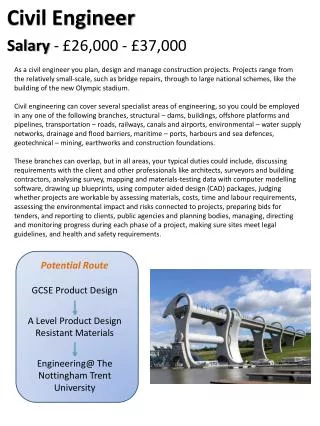
Questionnaire & Analysis & Analysis Questionnaire Results EXAMPLE This pie chart shows that a majority of young parents, as well as parents in their mid-30s, are more likely to have young children (aged between 0-5), therefore, providing me with enough information to conclude that I should aim my product towards parents of this age boundary. Your Questionnaire Must be specific to your demographic !! NO POINTLESS QUESTIONS!!! This bar chart shows me that parents have female children, on the majority. This could possibly affect the respondents’ opinions as they may want their child to have a ‘natural’ likeability to a particular thing (i.e. colours). This pie chart shows that the majority of young children who have an educational toy are less than a year old, or aged. Therefore, these children should be more borne into mind during my product’s fabrication. Also, during the analysis of my questionnaire results, these children should be examined more meticulously, and their parents – as they are the majority within my target audience. This bar chart clearly shows me that my product should definitely be made out of plastic, presumably because the vast majority of learning-through-play-toys in the market are made from plastic. Plastic is a very versatile material with a lot of variation: some tough and hard, and some which are soft and can be easily manipulated due to their high malleability. Also, utilising plastic will provide a water-resistant layer which adds to the durability of my product. • You need to write a detailed questionnaire. • All the questions must be written so that the answer will benefit your design. • You need approximately Twelve question – They must all fit onto one A4 page • The questions must be relevant – If the response would not help you design your final product then do not include it. Evaluate each question:- Why have you asked the question? How is the information going to help you? You need to get between 10 and 20 of your questionnaires filled in. Choose your 6 most relevant and important results in your questionnaire - Collect all your results and put into bar graphs, pie charts, etc. Evaluate each result: What was the result? How is the result going to help you? Results Evaluate the information from above (this is a very brief evaluation) - How has the questions you have asked and the information that you have gathered helped you? Evaluation
Research Design Summary Criteria Using your task analysis produce a list of requirements that your product must meet. What does it need to include to be successful? This should be approximately ten bullet points covering a range of aspects for each project. To ensure you have a variety of spec points, take one from each task analysis or written analysis sub heading. Split your page into sections and evaluate each of the research methods that you completed. You must explain what you did and what you found out – Be Specific with the facts Inspiration Board Product Analysis Questionnaire and Results Overall Summary
Initial Ideas & Annotation You need to produce at least 6 design ideas for each of your products. Your ideas must be as different as you can. If you produce a number of ideas that are all based around one theme then it does not matter how many ideas there are you will not get a high grade as they will be marked as developments rather than initial ideas. Your 6 ideas must form a wide range of ideas that are all very different to each other to get the high grades. Try and be as original and as imaginative as you can – even if an idea seems a little silly don’t worry. • Remember to annotate each sketch – • Descriptive Annotation– label your ideas explaining the material to be used, colour, size, product locations, key features, etc • Personal Annotation - Annotate your ideas with your thoughts, what do you think, will it work, what could be changed. Remember don’t just make statements you must back them all up and explain why you have said what you have. • Spec Check Table – • Pick the 5 most key • points from your • specification and • list in a table. Mark • each idea against it • ticking if it meets it • and giving it a cross if it doesn’t. You can then give • your idea a score out of 5 and • summarise how it could be improved • further. EXAMPLES Don’t forget about presentation and layout. You don’t want more then two ideas to a page, they must be large clear drawings (about the size of your hand) with plenty of detailed annotation.
Design Development Choose your two most successful ideas. You now need to develop these further. Develop each idea individually to begin with – You must develop the design 4 times, you can do this logically one after another or the 4 developments can all be from the original idea. You must then develop the two ideas together 4 times. Take the good points from both and try and combine them into several ideas while eliminating any bad points that you discovered. Develop your ideas as much as possible looking at every aspect of them to ensure good marks are gained. You must also include detailed annotation similar to your initial ideas but the personal annotation and spec summary is slightly different. DEVELOPMENT 4 ORIGINAL IDEA DEVELOPMENT 3 DEVELOPMENT 2 DEVELOPMENT 1 Descriptive Annotation – label your developments explaining the material to be used, colour, size, product locations, key features, etc Personal Annotation - Annotate your developments with your thoughts, what do you think, will it work, what have you changed and why, could it be changed any further and how? Remember don’t just make statements you must back them all up and explain why you have said what you have. Spec Check Table – Using the same 5 key points from your specification and list in a table. Mark each development against it ticking if it meets it and giving it a cross if it doesn’t. You can then give your idea a score out of 5 and summarise how it has been improved from the original design. Is it more or less suitable and why? This section is very important, you must try and improve your designs against your specification and thoughts. It does not matter if you go back to your original design idea as long as you have demonstrated development skills and tried to improve on your idea.
Design Development Offend… 1. To cause displeasure, anger, resentment, or wounded feelings in. 2. To be displeasing or disagreeable to: Onions offend my sense of smell. “Everyone is offended by something” Offensive product = Lower sales Sustainability Development ORIGINAL IDEA Environmental Development Moral Development Social Development On this page you must ensure your design is (or will not be) offensive to any potential customers. Test your favourite idea against the 4 areas listed above-right, use the example to help you layout your page. • Explore how your product could offend any social groups. • Does it include any curse words and/or offensive phrases? • Does it have reference any violence? • Does it relate to any sex or anything people may consider ‘rude’? • Can it be used by people with disabilities? • Does it reference any aspect of pop culture? • This section focuses on how impact your product will have on the environment. • How will you product be disposed of? • Can any part of it be recycled? • Can any part of it be reused? • Will it biodegrade? • Can parts be replaced in to increase it’s life in service? • Can any parts be repaired? • This section focuses on how manufacturing your product will affect the environment. • Will manufacturing your product generate any harmful waste? • Could it be made sustainable materials? • Could it be made from recycled materials? • How can environmental damage be reduced? • Explore how your product could offend any person’s moral and/or religious views and/or beliefs. • Does it include any religious imagery? • Will your product offend any person’s beliefs? • Does your product patronise / parody and religious texts? Environmental Development Sustainability Development Social Development Moral Development
Modelling 3 Dimensional 3 You must now produce a proportionate scale model of your design idea. This can be done using Styrofoam, card, MDF or any appropriate material. You must take a photograph of the model and evaluate it Now you see it in 3D: what do you think? And why How could it be improved? You must then produce a second model improving on the first one and take another picture and evaluate again commenting on the improvements You must then make a third model improving on the previous two and take another picture and evaluate again commenting on the further improvements. d Model 1 Model 3 Model 2 Evaluation 1 Evaluation 2 Evaluation 3
Modelling Computer Aided Design You must now produce a computer generated model of your chosen design. This can be done using any computer aided design package you are comfortable with. You can personalise your work by creating your own page layout, but remember to record all the C.A.D. models you create. Follow the steps below to ensure you fully explore your idea: 2 1 Once you have settled on the shape and size from step 1 try your idea with 3 different textures or colour schemes. Print a record of each of the 3 rendered models you produce. Using your chosen program model your chosen idea. Then, make 3 changes to the shape and/or size. Print a record of each of the 4 models you produce. 4 3 If you ideas/development or product might require additional graphics (e.g. logo or text) produce examples using a 2D C.A.D. of your choosing. Print a record of these ideas. Mount all the images from steps 1-3 onto one page of A3. Analyse each image to say what you like AND dislike about it. Test each idea against the design brief and client profile to ensure you choose the most appropriate idea.
Materials Manufacturing Testing Techniques Use this page to help organise your page – Try and personalise your work though Possible Construction Method #3 Possible Construction Method #2 Different Material #1 • Draw your final design in the centre of the page and all around explain and explore different possible solutions for construction and materials that could be used. • You must have a minimum of six explorations on the page. • You can get information about manufacturing your designs from: • Product Design Revision Guide • Your subject teacher • www.technologystudent.com Possible Construction Method #1 Different Material#3 Different Material #2 Use this page to help organise your page – Try and personalise your work though On this section of the page you will test the properties a selection of materials of your choosing. 1 2 3 Preparation Testing Documenting In the workshop conduct a series of practical tests to help you find out which of the materials will be best for the job. Your teacher show you the appropriate tests. Remember to take lots of photos! Mount up your photos describing the processes. Record your results. Write a conclusion stating which material(s) will be best for manufacturing your project. Selection 3 appropriate materials and ask your teacher/technician to provide you with samples of them. Note which materials you are testing and remember to say why!
Materials Materials Testing Testing Joining Use these pages to help organise your page – Try and personalise your work though There are many ways you can join the materials your project will require… …some of these methods will be too time consuming… some of these methods will be too weak …but some will be just right. On this section of the page the must practically explore and document a selection of the joining methods you could use. 2 3 1 Testing Documenting Preparation Mount up your photos describing the processes. Write a conclusion stating which joints will be best for manufacturing your project. Create a full scale ‘mock-up’ for each joining method. Test each joint with appropriate scenarios. Selection a small range of jointing methods, check with your teacher. Ask the department technician to prepare the materials required. Packaging testing If your product was going to be manufactured and sold to clients it would be distributed through the post (mail order) You must experiment will different packaging processes and materials to find out the pros and cons for each technique On this page you must… …record the images and results from your packaging testing Use the three steps above the help you complete this page
Specification Using your research summary you must generate a list of requirements for your product. Important For each requirement you must justify your reasoning… “my product must be xxxxx because…” • Packaging • How will you product be packaged and why? • What forces will the packaging need to protect the product from? • Scope of Specification • This is the function of your product : Clearly define the need or purpose of the product. What is it to be used for? Why is it necessary? What will be achieved by manufacturing this product? • Performance • What must this product have to do to fulfil its function? You must include everything even the most obvious features and explain why. • Ergonomics • The product must be compatible with its user. What must you take into account for a human being to successfully interact with your product and why. • Aesthetics, appearance and finish • Does the product have to be a certain colour or texture? Will it need to blend in with certain surroundings. Use your theory research as well as research results and personal preferences to explain how you would like your product to look. You must give a justification for all your decisions. • Materials • It may be too early at this stage to name the actual material but the properties could be outlined for example. It may need to be strong, light, soft, flexible, it could require a certain finish to be applied. State as much information as you can at this point but remember explain why. • Manufacture • The product might have to withstand certain forces and therefore the method of construction will be important. The methods of joining need not be mentioned until the final choice of material has been made. Is it flat pack? Is it going to be a prototype model or a concept model? • Maintenance • What need to be done to maintain the product? Will any parts need replacing? Are any extras allowed to be fixed on? • Dimensions The size of the product must be relevant to its purpose. What are your size restrictions and why. Will your product be a similar size to another product? All your measurements must be in mm. • Life in Service • How long do you expect your product to last in its working circumstances? What is its life span, how long before it will need replacing or be updated. • Health and Safety • Are there any health and safety factors that need to be considered. For example, toxicity, danger to small children to small children from small parts or sharp edges etc.
Images of Final Product Use this page to document your final product. Mount five good pictures each picture should show a different angle and/or feature. Photo #2 Photo #3 Photo #1 Photo #4 Photo #5
Diary of Making and Modifications Use this pages to help organise your page – Try and personalise your work though Before and after each practical session your must document what you plan to do and what happened. You must document all aspects of your manufacture as well as talking about any design alterations made as manufacture takes place. Be as detailed as you can and make sure you document everything leaving no gaps, where you can also use diagrams or photographs to help you. This is a very important document as it represents to the examiner your planning and manufacturing skills so make sure it reflects them. Important Important The yellow arrows denote ‘important’ information – ensure you fill these columns with as much specific information as possible
Evaluation Design Process / Manufacturing • Design Cycle Evaluation • You must now evaluate the design route that brought you to this point. Go though each section of your design folder and answer the following questions: • Why do you think this section was needed? • What did you find out? • How did it help you? • What information did you take forward to the next section? And why? • Ensure you reference the following sections: • Analysis of task • Research • Specification • Initial Ideas • Development • Modelling • Planning • Making Evaluation • In this second section you must evaluate the process of making your product. • Remember to use your ‘Diary of Making’ to help you. • Use the following questions as prompts but you must elaborate in detail. • Did you enjoy the making process? • Do you think it went well? • What skills did you learn? • What new skills did you find hard/easy/useless? • How much support did you need from the teacher/technician? • How well did you manage your time? • How did you feel when you finished? • You may wish to use small (thumbnail images) to support some of your points.
Evaluation Specification / Client Use this pages to help organise your page – Try and personalise your work though Interview • Generate an interview of 10 questions to ask a possible user • e.g. • Would you buy it? • Do you think it serves its purpose? • Can you suggest any modifications or improvements? Use this space to record the questions and results
Modification Plan Industrial Production Options Use this pages to help organise your page – Try and personalise your work though Production Methods One Off I have used a one off production method to make my product. It is a unique product and specifically meets the needs of my target audience and to my specification. Batch I think that batch production would be required if my chair / shop if it is to be made and launched into the real world. This is because I would want to save costs and manufacture approximately 400 copies to distribute to the public. Mass As my chair / shop becomes more established and desirable I will need to start manufacturing my product in greater numbers to increase its popularity further. Mass production would allow a larger number to be produced while lowering the costs. Just in Time I would use just in time production to ensure that I did not waste money on storage of raw materials and have them delivered as and when they were needed.. • Modifications • If you were to design & make your product again what would you do differently? And why? • Talk about the designing aspects of the project • Talk about the manufacturing aspects of the project. • (100 words min) Design and Safety Standards My designs would need to meet relevant BS standards covering all aspects of technical product documentation The Kitemark My light would meet British standards institute tests and I would display the Kitemark to tell customers that the products being advertised had been tested against nationally recognised standards The CE Mark As the brand grows I will look for European Standards of approval for safety.
Modification Plan Industrial Production Options THIS SLIDE IS FOR INFORMATION ONLY Design and Safety Standards What Design and Safety Standards must your flyer / supporting product meet to ensure that it is approved? Industrial Practice You need to write about how your product would be made in the real world. Look at the example worksheet to give you an idea of how to lay your work out. What type of Production? Imagine you were going to manufacture your chair/ shop within each production method and explain why? You need to write a section about what type of production would be suitable for your product explaining why in detail. Think about what your product actually is? How many would you need? Who would use it? One Off Production It usually refers to one object being made. The object is usually hand made and takes a skilled person a number of days to make. Consequently, the price of a one off prototype is expensive because all the costs for design and manufacture require to be recovered. Batch Production This is the type of production considered when a small quantity of each unit is required, up to 500. Batch production can allow for the objects design to change if required easily. Time saving devices are used such as templates being used to support design and manufacture and teams of workers to increase speed. Mass Production This is the production method used for a larger quantity of products, A number of workers working all day for weeks on end to meet demand and need. The object is split into component parts and each part is worked on separately. Just in Time Production This is where the raw materials arrive exactly as they are needed to save money on storage costs. It also allows production to change depending on demand