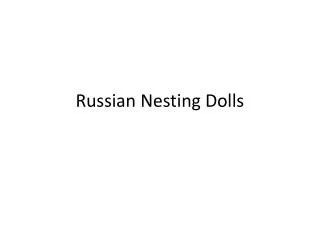
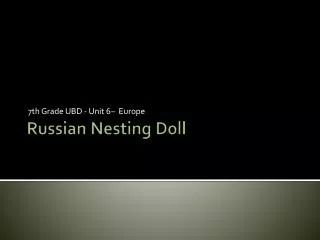
Russian Nesting Doll
7th Grade UBD - Unit 6– Europe. Russian Nesting Doll . Background Information.

Russian Nesting Doll
E N D
Presentation Transcript
7th Grade UBD - Unit 6– Europe Russian Nesting Doll
Background Information • It is difficult to believe that the nesting doll, what some might consider the embodiment of Russian culture, was just born some 100 years ago. Nesting doll history began in the 1890s. Artists turned to Russia’s peasantry for the thread that would unite the country with its past.
Background Information • The art form caught on quickly. In 1900 one of the Russian wooden dolls was taken to a show in Paris, where it received an award. • The nesting doll’s shape and concept became a canvas for renderings of political figures, illustrating Russian fairy tales, creating religious icons, and much more. Virtually any image one could imagine can be adapted to its versatile shape.
Background Information • The world has seen many changes in the past century, but the nesting doll has remained very much the same, taking us back to a simpler time. • Many are committed to ensuring that this is one tradition that won’t fade into obscurity, including one company, Golden Cockerel Crafts. Jointly located in Boone, North Carolina and St. Petersburg, Russia, Golden Cockerel is striving to ensure the survival of the nesting doll, Russia’s past and the cottage industry.
Step One Start with a square shaped paper. Fold the paper in half as shown to create a crease line in the center. Flatten the paper out again. (Do not draw dotted line. It is there as a reference.)
Step Two Fold the two corners at the sides inward toward the crease line. Your project should look like the picture shown.
Step Three Turn the paper over and fold back the tip as shown.
Step Four Your project should look like this.
Step Six Turn the paper back over to the front.
Step Seven Cut half way into the 2 corners at the sides. The dotted lines indicate where you should cut. (Do not draw the dotted lines. Do not cut center line.)
Step Eight Cut as shown.
Step Nine This is what you should have now.
Step Ten Fold in the cut flaps to form the “hair”.
Step Eleven Cut away the excess. Cut where the dotted lines show. (Do not draw dotted lines.)
Step Twelve Your project should look like this.
Step Thirteen Flip the project over to the back.
Step Fourteen Fold the top tip back and glue both flaps down.
Step Fifteen Flip project back over to the front. It should look as shown.
Step Sixteen Now, fold the flaps over to create “hands”. They should look like this.
Step Seventeen Now your Russian doll is complete.
Step Eighteen Decorate as you like. (Remember craftsmanship!)