Download
1 / 23
230 likes | 355 Vues
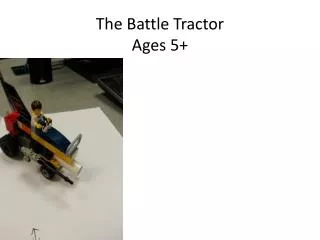
Discover how to build an exciting battle tractor with our detailed step-by-step guide designed for ages 5 and up. Follow the instructions to connect various LEGO pieces, including rods, tires, and mini-figures, to create your very own construction. Each step is accompanied by clear direction, helping young builders develop their assembly skills while having fun. Whether you're a beginner or have some experience, enjoy creating this unique vehicle and unleash your imagination.

E N D
Step 2Connect the tires to the black rod. The black rod should not go completely through either tire.
Step 3Connect the yellow lego to the front of the gray lego. You will take up two sets of dots on the yellow lego when they are connected.
Step 4Connect the small gray lego to the front of the yellow lego this will take up the first two sets of dots furthest away from the medium sized gray lego.
Step 5Connect the medium sized black lego to the top of the yellow lego mentioned in the last step.
Step 6Connect the long yellow lego to the top of the black lego.
Step 7Connect the blue lego with the controls on top to the top of the long yellow lego mentioned in last step. Make sure that the 2 sets of dots remain uncovered one towards the front and one set towards the back.
Step 8In this step you will have to connect the very small gray lego to the set of yellow dots closest to the controls. Once that is completed you will take the human lego and place it on top of the small gray lego.
Step 9If the previous step was done correctly the picture on the left shows where the small gray lego goes. The picture on the right shows where the human lego should be placed.
Step 10For this step you will need the gray lego piece that looks like a TV screen. Then place it on the set of yellow dots furthest away from the driver.
Step 11In this step you will place the 2x3 black lego piece right behind and down from where the driver is.
Step 12In this step you will take the small orange lego and place it on the first two sets of dots on the black 2x3 lego that are closest to the driver leaving the last pair of dots exposed.
Step 13In this step you will need the very small lego piece. You will place that piece on the remaining dots of the 2x3 black lego mentioned earlier.
Step 14After that you will need the medium sized red lego with the gray t coming out the back. You will place it on the medium sized gray legowith the t facing toward the back.
Step 15For this step you will need the black lego with the wing on it. You will place it on top of the small white and orange legos that are right behind the driver.
Step 16For this step you will need the 2x1 black lego. You will place it on the second row of dots on the 2x4 black lego. It should be placed going vertically and horizontally.
Step 17For this step you will need the gray lego that looks like a gun. You will place it on the side of the 2x1 so the two dots on the gray lego are facing upwards.
Step 18For this step you will need the long black lego piece that looks like the barrel of a gun. You will place it on the front of the gray lego mentioned in the last step. Make sure that the smaller end of the barrel is facing outwards.
Step 19For this step you will need the gray lego that looks like a ladder. You will place it on the opposite of the gun. You will place it on the first set of dots closest to the driver.
Step 20For the last step you will need to find the white lego piece that looks like a blimp. You will place it on the under of the long yellow lego and you should place on the first and second dots.
Enjoy your new battle tractor • If you have any questions or concerns feel free to talk to anyone in the Lucky Ones group and they should be able to assist you or answer any other questions you may have.